wotw, gut punch
means something knocks the wind out of you literally a punch to the gut. means to be suddenly be emotionally wound up, because of something you see or hear.
like I am about to do to you …
wotw, gut punch
means something knocks the wind out of you literally a punch to the gut. means to be suddenly be emotionally wound up, because of something you see or hear.
like I am about to do to you …
Here we will get to know about the If-else, control flow.
As the name says (if) it simply applies the condition applied to it. If the value of the expression is true, the command works according to it.
#!usr/bin/env/ python 3
 number= int(input("Enter a number:"))
            if number<100
            print("the number is less than 100")
(if)statement is not fulfilled.
  #!usr/bin/env python3
   number= int(input("Enter a number:")
           if number<100
             print("The number is less than 100");
           else
             print("The number is greater than 100");
cse@cse-Vostro-3470:~$ cat employee
eid ename desg dependent age salary
001 Arun Engineer Master 30 35000
010 Mrinal Engineering Admin 21 45000
101 Ajay Civil Assist superMembeer 22 54010
101 rabeen developer R&d 25 9000
001 Arun Engineer Master 30 35000
010 Mrinal Engineering Admin 21 45000
01 Ajay Civil Assist superMembeer 22 54010
101 rabeen developer R&d 25 9000
001 Arun Engineer Master 30 35000
cse@cse-Vostro-3470:~$ sort -n employee eid ename desg dependent age salary 001 Arun Engineer Master 30 35000 001 Arun Engineer Master 30 35000 001 Arun Engineer Master 30 35000 01 Ajay Civil Assist superMembeer 22 54010 010 Mrinal Engineering Admin 21 45000 010 Mrinal Engineering Admin 21 45000 101 Ajay Civil Assist superMembeer 22 54010 101 rabeen developer R&d 25 9000 101 rabeen developer R&d 25 9000
cse@cse-Vostro-3470:~$ sort -nr employee
101 rabeen developer R&d 25 9000
101 rabeen developer R&d 25 9000
101 Ajay Civil Assist superMembeer 22 54010
010 Mrinal Engineering Admin 21 45000
010 Mrinal Engineering Admin 21 45000
01 Ajay Civil Assist superMembeer 22 54010
001 Arun Engineer Master 30 35000
001 Arun Engineer Master 30 35000
001 Arun Engineer Master 30 35000
eid ename desg dependent age salary
cse@cse-Vostro-3470:~$ sort -u employee
001 Arun Engineer Master 30 35000
010 Mrinal Engineering Admin 21 45000
01 Ajay Civil Assist superMembeer 22 54010
101 Ajay Civil Assist superMembeer 22 54010
101 rabeen developer R&d 25 9000
101 rabeen developer R&d 25 9000
eid ename desg dependent age salary
cse@cse-Vostro-3470:~$ sort -ur employee
eid ename desg dependent age salary
101 rabeen developer R&d 25 9000
101 rabeen developer R&d 25 9000
101 Ajay Civil Assist superMembeer 22 54010
01 Ajay Civil Assist superMembeer 22 54010
010 Mrinal Engineering Admin 21 45000
001 Arun Engineer Master 30 35000
-t in sort can be used as specifying delimiter sort -t” “ +4 -5n employee : to sort according to particular column
cse@cse-Vostro-3470:~$ sort -t” “ +4 -5n employee
01 Ajay Civil Assist superMembeer 22 54010
101 Ajay Civil Assist superMembeer 22 54010
eid ename desg dependent age salary
010 Mrinal Engineering Admin 21 45000
010 Mrinal Engineering Admin 21 45000
101 rabeen developer R&d 25 9000
101 rabeen developer R&d 25 9000
001 Arun Engineer Master 30 35000
001 Arun Engineer Master 30 35000
001 Arun Engineer Master 30 35000
cse@cse-Vostro-3470:~$ sort -k3 employee
01 Ajay Civil Assist superMembeer 22 54010
101 Ajay Civil Assist superMembeer 22 54010
eid ename desg dependent age salary
101 rabeen developer R&d 25 9000
101 rabeen developer R&d 25 9000
010 Mrinal Engineering Admin 21 45000
010 Mrinal Engineering Admin 21 45000
001 Arun Engineer Master 30 35000
001 Arun Engineer Master 30 35000
001 Arun Engineer Master 30 35000
cse@cse-Vostro-3470:~$ sort -t” “ +4 -5n +1 -2r employee : Sorts 5th field first leaving till 4th field then again perform sort on the 2nd field on the sorted list.
eid ename desg dependent age salary
01 Ajay Civil Assist superMembeer 22 54010
101 Ajay Civil Assist superMembeer 22 54010
010 Mrinal Engineering Admin 21 45000
010 Mrinal Engineering Admin 21 45000
101 rabeen developer R&d 25 9000
101 rabeen developer R&d 25 9000
001 Arun Engineer Master 30 35000
001 Arun Engineer Master 30 35000
001 Arun Engineer Master 30 35000
cse@cse-Vostro-3470:~$ sort -k2,4r student 1si17cs097 Sarthak 5 S+ 1si17cs071 Nitish 5 B USN NAME SEM GRADE 1si17cs062 Mrinal 5 S+ 1si17cs061 Mrigank 4 S 1si17cs058 Mihir 3 S+ 1si17cs052 Kshtiz 1 C
grep "unix" filename.txt : prints only line containing unix also higlights the “unix ” wherever it is present.
unix is great os. unix is opensource. unix is free os.
unix linux which one you choose.
unix is easy to learn.unix is a multiuser os.Learn unix .unix is a powerful.
grep -n "unix" filename.txt : prints only line containing unix and also gives the no. line.
1:unix is great os. unix is opensource. unix is free os.
3:unix linux which one you choose.
4:unix is easy to learn.unix is a multiuser os.Learn unix .unix is a powerful.
$grep "[2-3][0-9]" emp : Check for the string from 20 to 39
TCS101 Anu Engineer Manufacturing 30 35000
INFY02 Sona Developer Development 25 29000
TCS102 Raki Accountant Admin 31 32000
INFY03 Arun Engineer Manufacturing 28 34000
INFY04 Amit Accountant Admin 24 27000
TCS103 Nanda Engineer Manufacturing 29 37000
TCS104 Swathi Developer Development 28 29000
$ grep -v "[2-3][0-9]" emp :Invert the sense of matching, to select non-matching lines.
$ grep -n "[2-3][0-9]" emp : Displays in ordered list.(i.e. with line number) with string matching from 20 to 39.
1:TCS101 Anu Engineer Manufacturing 30 35000
2:INFY02 Sona Developer Development 25 29000
3:TCS102 Raki Accountant Admin 31 32000
4:INFY03 Arun Engineer Manufacturing 28 34000
5:INFY04 Amit Accountant Admin 24 27000
6:TCS103 Nanda Engineer Manufacturing 29 37000
7:TCS104 Swathi Developer Development 28 29000
$ grep -n "TCS[0-3][0-9][0-9]" emp : Displays only TCS employee details with line number present in the original file ranging from TCS000 to TCS399.
1:TCS101 Anu Engineer Manufacturing 30 35000
3:TCS102 Raki Accountant Admin 31 32000
6:TCS103 Nanda Engineer Manufacturing 29 37000
7:TCS104 Swathi Developer Development 28 29000
*NOTE : emp and student are the file names.*
unix is great os. unix is opensource. unix is free os. learn operating system. unix linux which one you choose. unix is easy to learn.unix is a multiuser os.Learn unix .unix is a powerful.
sed -e 's/unix/UnIx/g' filename.txt : Searches for unix and replaces it with UnIx everywhere. Here g stands for making changes globally.
UnIx is great os. UnIx is opensource. UnIx is free os.
learn operating system.
UnIx linux which one you choose.
UnIx is easy to learn.UnIx is a multiuser os.Learn UnIx .UnIx is a powerful.
linux is easy to learn.linux is a multiuser os.Learn linux .linux is a powerful.
sed 's/unix/UnIx/1g' filename.txt : Replaces with Unix globally from the first occurrence in a line.
UnIx is great os. UnIx is opensource. UnIx is free os.
learn operating system.
UnIx linux which one you choose.
UnIx is easy to learn.UnIx is a multiuser os.Learn UnIx .UnIx is a powerful.
linux is easy to learn.linux is a multiuser os.Learn linux .linux is a powerful.
sed '3,5s/unix/UnIx/' filename.txt : It will replace the unix with UnIx from 3rd line till 5th line if present.
unix is great os. unix is opensource. unix is free os.
learn operating system.
UnIx linux which one you choose.
UnIx is easy to learn.unix is a multiuser os.Learn unix .unix is a powerful.
linux is easy to learn.linux is a multiuser os.Learn linux .linux is a powerful.
sed '1,2s/unix/UnIx/' filename.txt: It will replace the unix with UnIx from 1st line and 2nd line.
UnIx is great os. unix is opensource. unix is free os.
learn operating system.
unix linux which one you choose.
unix is easy to learn.unix is a multiuser os.Learn unix .unix is a powerful.
linux is easy to learn.linux is a multiuser os.Learn linux .linux is a powerful.
sed '1,$s/unix/UnIx/' filename.txt : It will replace the unix with UnIx from 1st line till the last line. Here “$” indicates end line.
UnIx is great os. unix is opensource. unix is free os.
learn operating system.
UnIx linux which one you choose.
UnIx is easy to learn.unix is a multiuser os.Learn unix .unix is a powerful.
linux is easy to learn.linux is a multiuser os.Learn linux .linux is a powerful.
sed '/unix/ a "Add a new line"' filename.txt : It adds “Add a new line” at the end of the line in which unix occurred.
unix is great os. unix is opensource. unix is free os.
“Add a new line”
learn operating system.
unix linux which one you choose.
“Add a new line”
unix is easy to learn.unix is a multiuser os.Learn unix .unix is a powerful.
“Add a new line”
linux is easy to learn.linux is a multiuser os.Learn linux .linux is a powerful.
sed '/unix/ i "Add a new line"' filename.txt : i means insert the “Add new line” before the occurence of unix
“Add a new line”
unix is great os. unix is opensource. unix is free os.
learn operating system.
“Add a new line”
unix linux which one you choose.
“Add a new line”
unix is easy to learn.unix is a multiuser os.Learn unix .unix is a powerful.
linux is easy to learn.linux is a multiuser os.Learn linux .linux is a powerful.
sed '/unix/ c "Add a new line"' filename.txt : replace the line containing unix with the content “Add new line”
“Add a new line”
learn operating system.
“Add a new line”
“Add a new line”
In Python there is no need to import any external libraries for file handling as it comes with an inbuilt library There are 3 main operations associated with the file. 1. Creating/Opening a file. 2. Writing into the file/ Reading from the file. 3. Closing a file.
Syntax :
filePtr = open("your_file_name.txt", "mode")
Following are the modes supported in python:
1. “w”, “r”, “a”: To open files in write mode, read mode and append mode respectively.
ex:
filePtr = open("my_file.txt", "w")
It will create a new file if the given file name doesn't exist else it will overwrite the contents of the given file.
filePtr = open("my_file.txt", "r")
It will open a file only if it exists in the reading mode. i.e. we cannot edit the contents of the file.
filePtr = open("my_file.txt" , "a")
It will append the contents of the file if already exists else it will create a new one.
filePtr = open("my_file.txt", "w+")
It will create a new file if the given file name doesn't exist else it will overwrite the contents of the given file. In this mode, we can also read the content of the file at the same time.
filePtr = open("my_file.txt", "r+")
It will open a file only if it exists in the reading mode also we can edit the contents of the file unlike in “r” mode.
** Note: +r differs from +w mode as in +r mode it doesn't delete the content also it doesn't create a new file if doesn't exist.**
filePtr = open("my_file.txt" , "a+")
It will allow simultaneous read and append operation on the file.
filePtr = open("my_file.txt", "wb")
It will create a new file if the given file name doesn't exist else it will overwrite the contents of the given file.filePtr = open("my_file.txt", "rb")
It will open a file only if it exists in the reading mode. i.e. we cannot edit the contents of the file.
filePtr = open("my_file.txt" , "ab")
It will append the contents of the file if already exists else it will create a new one.
filePtr = open("my_file.txt", "wb+")
It will create a new file if the given file name doesn't exist else it will overwrite the contents of the given file. In this mode, we can also read the content of the file at the same time.
filePtr = open("my_file.txt", "rb+")
It will open a file only if it exists in the reading mode also we can edit the contents of the file unlike in “r” mode.
filePtr = open("my_file.txt" , "ab+")
It will allow simultaneous read and append operation on the file.
We can write in a file using write() function
Syntax :
filePtr.write("THIS is a file CONTENT")
We can read from the file using read() and readline() function
ex:
content = filePtr.read(): This return the entire content of the file.
content = filePtr.readline(): This returns only the content of one line in a file.
Closing a file is very important as if it exceeds the top limit it can lead to the crashing of the program. So it is advisable to close a file.
Syntax :
filePtr.close()
This is the second part of the series, in the first part we talked about the general idea of concurrency, how it's different from parallelism and saw how Python handles concurrency.
Part 1: Talking Concurrency -1
In the second part of the blog, we will look into the modern solution towards the problem using the new Asyncio module.
In the last post, we looked into a basic code snippet on how can we write concurrently. We also discussed some of the basic terminology used while using the Asyncio module. If you don't remember you should quickly take a recap as we would look at those concepts in a bit detailed manner.
Before looking at some code, let's understand some basic terminologies that would help in understanding the code better.
Eventloop: it's an infinite loop that keeps track of all the running tasks. It manages all the suspended functions and executes them when the time is right. These functions are stored in the queue called as the Task Queue, the event loop constantly polls the task queue and passes them to the event loop. When a task is passed on to the event loop it returns back a future object.
Future: a future is an indirect reference to a forthcoming result. It can loosely be translated as promise you make to do something when a condition is met, so when the condition is met a future can “callback” when ready to be executed. Since everything is an object in python, future is also an object that has the __await__() method implemented and its job is to hold a certain state and result. The state can be one of three things:
Pending: it does not have a result or exception yet. Cancelled: it was canceled Finished: it was finished either with a result or exception.
Futures also have a method called the add_done_callback() this is method allows the function to be called as soon as the task is completed with its process and is returned with a result. Which is the python object that would be returned with the expected result or raise an exception when the task is finished.
asyncio.create_task(coroutine) wraps the coroutine into a task and schedules its execution. asyncio.create_task(coroutine) returns a task object. Every time a coroutine is awaited for a future, the future is sent back to the task and binds itself to the future by calling the add_done_callback() on the future. From now on if the state of the future changes from either canceled or finished, while raising an exception or by passing the result as a python object. The task will be called and it will rise back up to its existence.Since a typical program will have multiple tasks to be executed concurrently, we create normally with asyncio.create_task(coroutine) but we run them with asyncio.gather().
@asyncio.coroutine which used a yield from keyword. Later in Python 3.5 async and await keywords were introduced which made working/reading concurrent code much easier. I won't go into much detailed on how coroutines evolved to the new async def keyword, because I planning to write a separate blog on that.As we looked into the basic definition of coroutines in the last blog, we can loosely describe them as restartable functions.
You make a coroutine with the help of the async def keyword and you can suspend the coroutine with the await keyword. Every time when you await the function gets suspended while whatever you asked to wait on happens, and then when it's finished, the event loop will wake the function up again and resume it from the await call, passing any result out. Since coroutines evolved from generators and generators are iterators with __iter__() method, coroutines also have __await__() which allows them to continue every time await is called.
At each step a coroutine does three things:
Before moving forward, I want to talk about await. In Python, anything that can be awaited i.e used with the await keyword is called an awaitable object. The most common awaitable that you would use would be coroutines, futures and tasks. Thus anything is blocking get's put to the event loop using the await and added to the list of paused coroutines.
Now let's look at a very basic async program to understand how everything fits in together.
import asyncio

import asyncio

async def compute(x, y):
    print("Compute %s + %s ..." % (x, y))
    await asyncio.sleep(1.0)
    return x + y

async def print_sum(x, y):
    result = await compute(x, y)
    print("%s + %s = %s" % (x, y, result))

asyncio.run(print_sum())
The sequence diagram below describes the flow of the above program.

Now that we know all the basic terminology used in an async program let's look at a slightly complex code below for getting a better understanding all the jargons we learned above.
import asyncio


async def compute(x, y):
    """
    A coroutine that takes in two values and returns the sum.
    """
    print(f"Computing the value of {x} and {y}")
    await asyncio.sleep(1)
    return x + y


async def print_sum():
    """
    A coroutine that creates tasks.
    """
    value1 = asyncio.create_task(compute(1, 0))
    value2 = asyncio.create_task(compute(1, 0))
    value3 = asyncio.create_task(compute(1, 0))
    print(sum(await asyncio.gather(value1, value2, value3)))

asyncio.run(print_sum())
async def print_sum() and async def compute() are the two coroutines in the above program, the async def print_sum() as the main function used in the sync programming. The main function executes the entire program and all the functions related to it. The same approach is followed here, one coroutine awaits all the other coroutine.
Though this can be easily miss-understood, in that case, the program would just fine but would run in more like a sequential manner.
    value1 = await asyncio.create_task(compute(1, 0))
    value2 = await asyncio.create_task(compute(1, 0))
    value3 = await asyncio.create_task(compute(1, 0))
    print(sum(value1, value2, value3))
The above code can be a good example of how not to write async code, here using await on every task we are making all the calls sync thus making the program sequential. To avoid this asyncio.gather() is used in the program. To gather all the tasks in the program, value1, value2 and value3.
Finally, when all the tasks are gathered together, they are run concurrently.
A lot of time you might be in a situation where you might have to call a sync function def from coroutine async def or have to call coroutine async def from sync function def. Ideally, you “shouldn't” use sync functions for calls that can be async like a database call because that is something that could provide further optimization. But there is nothing wrong with using a synchronous library for database, an async library for HTTP and gradually move things to async.
Calling a sync function def from a coroutine async def. In that case, you run the sync function in a different thread using the threadpool executor. The runinexecutor() method of the event loop takes an executor instance, a regular callable to invoke, and any arguments to be passed to the callable. It returns a Future that can be used to wait for the function to finish its work and return something.
import asyncio
import concurrent.futures

def blocking_io():
    # File operations (such as logging) can block the
    # event loop: run them in a thread pool.
    with open('/dev/urandom', 'rb') as f:
        return f.read(100)

def cpu_bound():
    # CPU-bound operations will block the event loop:
    # in general it is preferable to run them in a
    # process pool.
    return sum(i * i for i in range(10 ** 7))

async def main():
    loop = asyncio.get_running_loop()

    ## Options:

    # 1. Run in the default loop's executor:
    result = await loop.run_in_executor(
        None, blocking_io)
    print('default thread pool', result)

    # 2. Run in a custom thread pool:
    with concurrent.futures.ThreadPoolExecutor() as pool:
        result = await loop.run_in_executor(
            pool, blocking_io)
        print('custom thread pool', result)

    # 3. Run in a custom process pool:
    with concurrent.futures.ProcessPoolExecutor() as pool:
        result = await loop.run_in_executor(
            pool, cpu_bound)
        print('custom process pool', result)

asyncio.run(main())
When you have to call coroutines from the normal sync function. You just have to manually get_event_loo() , create tasks() and call the asyncio.gather() function. Since you can await, one thing you can do is create a queue with asyncio.queue() and use that queue to pass around the data between different coroutines.
import asyncio


async def compute(x, y, data):
    print(f"Computing the value of {x} and {y}")
    result = x + y
    await data.put(result)


async def process(n, data):
    processed, sumx = 0, 0
    while processed < n:
        item = await data.get()
        print(item)
        processed += 1
        value = item
        sumx += value
    print(f"The sum is:{sumx}")
    await asyncio.sleep(.5)


def main():
    loop = asyncio.get_event_loop()
    data = asyncio.Queue()
    sum1 = loop.create_task(compute(1, 4, data))
    sum2 = loop.create_task(compute(0, 0, data))
    sum3 = loop.create_task(process(2, data))
    final_task = asyncio.gather(sum1, sum2, sum3)
    loop.run_until_complete(final_task)


if __name__ == '__main__':
    main()
Write a program that reads log files and refires those URLs that have a 5xx status code. Once the refiring is done just add the &retry=True in the prefix of the URL and store them in a separate log file.
The log file will be a text file, you can check out a sample file here.
Just before ending the blog I would like to thank maxking and Jason Braganza for helping me out in the blog.
In the next part of the series, I will be talking about threads and finally will conclude the series with asyncio based frameworks such as quart and aiohttp.
Happy Coding!
wotw, antifragile
to be someone, who is more than resilient. to be someone, who thrives when the world breaks you!
to learn how, spend an hour and watch the videos below.
The above quote clearly replicates confidence and self-love. We somehow get affected by the negative comments and judgments passing by and try to change ourself so that people would accept us the way we are. Finally, when we arrange ourselves for the people to accept us there is again a judgment passing by and yet again we try to change ourselves. In the end, we forget the real us and be a toy for people's satisfaction. as we grow old we realize that we have left the true selves way back and been another person. Fat-shaming or Body shaming, being a dark-skinned girl or being extra bold even wearing a dark lipstick at daytime, or wearing clothes of your own choice attracts people's attention more than taking care of social and devastating issues happening day-to-day. Have you ever heard someone saying that look at the person who threw the packets on the side of a road or look at the person who is pissing at a public place, why aren't they ashamed? Yes, I am healthy and have a unique body shape that maybe most girls don't have or most guys make fun of it. So what? yes I am like this and I am proud of it but you will ignore it once or twice or maybe thrice. Ignorance is not a solution the mentality should be changed, and it can only change if people start teaching their children the value of respect and acceptance, acceptance of people as they are. That obviously doesn't include the acceptance of wrongdoings and violent nature of some people, but accepting the things to make this a society and a better place to live. Only then we can stand together and build a healthy community.
wotw, myth
the stories we tell ourselves as a culture, to explain what we could not really explain.
to help use make sense of the world, so that we’d not fuss over the unexplained and let us get on with our lives and make progress with the things we do understand.
After so many days I am continuing with Python again. Yes, I was not able to maintain the series properly, but let's get back to work and know what I read next in Python from the book of PYM. In Python most of the lines will have expressions and these expressions are made of operators and operands.
These are the symbols which tells the python interpretor to do the mathematical operation.
2+3
5
22.0/12
1.83333
To get floating results we need to use the division using any of operand as the floating number. To do modular operation use % operator.
#!/usr/bin/envv python3
days= int(input("Enter days:"))

month= days/30
days= days%30
print("Months= %d days= %d %(month, days))
< is less than > is greater than <= is less than or equal to >= is greater than or equal == is equal to != is not equal to
Note: // operator gives floor division result.
4.0//3
1.0

4.0/3
1.33333
To do a logical AND, OR we use these keywords.
One month ago I attended DevConf India 2019. It was held from August 2-3 at Christ University, Bangalore. It was quite a while since I attended a conference, the last one being PyCon India 2018 . Due to my laziness in writing I have altogether missed writing my Conference experiences till now. This will be in fact my first Conference blog post. Now on I will make sure to write about each of the conferences I go.
I came to know about DevConf India last year when it was first held, from people in my developer circle. DevConf India is organised by Red Hat and has similar events in US and Czech Republic. Since I was in Bangalore this year I made sure I attend it after I saw the dates in Twitter. I registered as soon as I came to know about it.
I mostly planned on meeting up with people and attend a few talks. I started at 8.30 am from my place and unfortunately missed the Keynote owing to a bad experience with a Bike Taxi service. I reached the Venue around 10 am and collected my Attendee badge and T-shirt. Then I headed towards the Keynote Session Hall where I met Naren from Chennaipy. I earlier met him at PyCon India 2018. It was nice catching up with him.
After having breakfast at the venue I headed to the Booth area where I met Chandan . I started visiting the booths asking questions about various projects like Fedora, Debian, CentOS. Shortly after I met up with some more familiar faces from Dgplug – Sayan, Rayan , all of them I met during PyCon India last year. I expected a Dgplug staircase meeting at DevConf but unlike last year there were less attendees this time. After that we went for lunch at the Cafeteria where I met Ramki , Praveen and pjp . Few days earlier I was reading pjp’s tutorial regarding gcc and gdb from dpglug irc logs . It was nice to catch up with him in person. I was discussing with Sayan and Praveen about the initial days of dgplug at my college at NIT Durgapur, attending their first talk in 2013 when I had just joined my college.
After Lunch I decided to attend few talks. I attended a talk regarding Evolution of Containers – there I came across terms like Chroot, Cgroups, Namespaces , how the whole container ecosystem was born. I have been always been inquisitive about containers and though I haven’t really worked on containers before this talk really fascinated me to dive into the world of containers.
Then I attended a talk on What hurts people in Open Source Community . The talk helped to set my expectations right regarding contribution to a Open source project and Community.
After that I went to the Closing Keynote of the day shortly after which we went for evening snacks where we had more discussions over Coffee and Dosa – we noticed a item mentioning ‘Open Dosa’ over which we laughed a lot  . And it was finally close of the day.
I reached a little late to the venue and went straight to the talk that I didn’t want to miss. It was a Documentation BoF where speakers were discussing how to create effective documentation and tools for creating collaborative documentation. I came across User Story based documentation and tools of the trade like asciidoc and asciidoctor . I met Ladar Levison there during that session and talked with him regarding better project organisation. He gave me his business Card which mentioned Lavabit . Little did I know about him until I read this article which explained more about Lavabit and his role in Snowden’s secure email communication. But that was after this conference and I wished I could talk more about Privacy and Lavabit projects.
After that I went for lunch with Sayan, Chandan and Rayan where we chatted on lot of different stuff on open source, food and conferences. After Lunch I went to attend Sinny‘s talk on Fedora CoreOS whom Sayan introduced last day.
Finally it was nearing the end of the day. I went to attend the closing keynote by Jered Floyd and sat beside Christian Heimes from Red Hat who was sharing anecdotes from his travel experiences.
I made few notes that I would like to share from my experience at the Conference and also as a note to me for future Conferences
And yes don’t forget to take pictures  It really bring memories. It may sound weird but this is something I really forget every time I meet up with people and later wait for Conference photos.
Two and a half months earlier I shifted to Bangalore after a 2 years stint at my first Company at Hyderabad. I was looking for new opportunities and started appearing in interviews when I hit the hard realisation that what I learned till now was not enough. I need to self-learn more and interact more with people and learn from stories that people experienced. I landed up a job at a EDA based firm at Bangalore and decided to move in there.
Time really flies and it had been already 2 years working in the Software Industry. I met with a lot of people, made friends and shared some good experiences. I became aware of the meetup culture, realised writing code is not the only way that makes you a good developer, realised that communication is a key factor in conveying your ideas.
I became part of the HydPy Community and organised 2 conferences – PyConf Hyderabad 2017 and PyCon India 2018 . I met some like minded people passionate about technology and flourishing the Python Community at Hyderabad. I still am a part of the Community and hope to continue doing so.
I also attended the dgplug Summer Training in 2018, made many friends there as well whom I keep meeting during conferences. They are a really amazing community and there is always something to learn from each of the IRC conversations.
I interacted with a lot of people from Python and open source Community. Going to Conferences and meetup is really a good way to interact with some awesome people and sharing their knowledge. But it’s also true that you really need to work on something tangible and develop your skills. Then only you can move forward and also put the experiences to use.
I have been living in the heart of the fast growing city at Hyderabad. It’s been a nice experience here as a whole (except from traffic on rainy days!). I explored to places around in the initial days. Some significant events happened during my stay – the GES 2018 was held, Hyderabad metro rail was inaugurated, the first IKEA store in India opened up . I Spent my first Durga puja away from home. Realised that Kolkata Biryani is still better than Hyderabadi Biryani. Saw more buildings, Tech parks and flyovers being constructed in Rapid phase. Got to experience the hot summer and pleasant winters. All together it had been a good time in the city of Nizams. Hope to come again here someday !
It’s been 2.5 months while I came here at Bangalore. It’s called the Garden City of India because of the amount of greenery it has. But I would rather call it a City of Traffic ! Dealing with traffic can be terrifying here. Nevertheless there is a lot of greenery left and I see palm trees here and there quite often. The area I live is booming with an array of multinational companies, I also observed more number of semiconductor based companies. Rightly calling it “Silicon Valley of India”. It’s pretty early to state my experience in this city so maybe I will write about it in the next phase
So what next ? I want to make my time here more productive and also develop some good habits that I have been lingering about. Get into the habit of writing, take time out for more self-learning, contribute to open source more often, interact with more people, put the experiences to use as much as I can, get more exercise and cut laziness. In fact I got me a cycle and have been doing my daily commute with it! I know now it’s more talk than work now. But I want this blog post as a reminder so that whenever I wander off I can come to this page and find what I need to do! And keep myself prepared for the next phase.
Chromium Embedded Framework (CEF) is a framework for embedding Chromium-based browsers in other applications. Chromium itself isn’t a extensible library. It helps you to embed a chromium browser in a native desktop application. The project was started by Marshall Greenblatt in 2009 as an open source project and since then it has been used by a number of popular applications like Spotify, Amazon Music, Unreal Engine, Adobe Acrobat, Steam and many more (full list can be found in this wiki). CEF is supported for Windows, Linux and macOS platforms.
There are 2 versions of CEF – CEF1 and CEF3. CEF1 is a single process implementation based in Chrome Webkit API. It’s no longer supported or maintained. CEF3 is a multiprocess implementation based on Chromium Content API and has performance similar to Google Chrome.
The purpose of writing this article is to document the work that I did while working on the CEF project. The major focus is on the Print Preview addition to CEF upstream project where I worked on.
For the past 1 year I have been working on CEF as a part of my day job. Initially the work was to maintain updates of CEF with every Chromium version released. We had a fork of the CEF open source project in which we applied some extra patches as per the requirements of the custom desktop application that used it. Building CEF was quite similar to building Chromium. It had a build script which was mostly used from downloading the code, building and packaging the binaries. Everything is documented here in this link . Upgrading the CEF was quite some task since building CEF took a lot of time and resources (a lot of CPU cores and a lot of Memory) and since CEF was based out of chromium I had to skim through parts of chromium code. Chromium has a nice developer documentation and a good code search engine that eased a lot of things. But owing to the fact that chromium has a huge codebase the documentation was outdated in few areas.
The interesting part of the CEF project came when I was handed over a work of a missing piece in CEF. Chromium supports in browser print preview where you can preview pages before printing, similar to one shown in the picture below.

CEF didn’t support this feature and had the legacy print menu where you cannot preview the pages to be printed.

This meant applications that used CEF couldn’t support print preview within them. The task was to make print preview available in CEF.
The work started with CEF version 3112 (supported chromium v60) and was in a working state in CEF 3239 (supported chromium v63) in our CEF fork. Then the change was supported only in Windows since our desktop application that used it was a Windows only application. I was handed over the work in CEF 3325 (supported chromium v65) where the following specs already existed in the Print Preview patch. The relevant blocks of code is available in the CEF source code now.
enable_service_discovery is disabled nowCefPrintViewManager::PrintPreviewNow() will handle print-previewCefPrintViewManager will not handle the print now. It handles the PrintToPdf function exposed through browserHost. Also, it listens to two print preview message PrintHostMsg_RequestPrintPreview, PrintHostMsg_ShowScriptedPrintPreview and generate the browserInfo for print preview dialogweb_modal::WebContentsModalDialogManagerDelegate and web_modal::WebContentsModalDialogHost required by the constrained window of print preview dialogGetDialogPosition() and GetMaximumDialogSize() used by browser platform_delegateProfile preferences required for printingConstrainerWindowsViewsClient class which is called in browser_main.ccCefPrintViewManager::InitializePrintPreview() initializes the print preview dialog which further calls PrintPreviewHelper::Initialize() which generates the browser_info required by print previewCefPrintViewManagerBase and its associated methods from CefPrintViewManager. Those methods are redundant after the print preview changesswitches::kDisablePrintPreview in CefPrintRenderFrameHelperDelegate::IsPrintPreviewEnabled() to determine whether print preview is enabledAfter I took over the CEF print preview work I did a number of changes to print preview, specs of which is documented below
print_preview_resources.pak in BUILD.gn to fix blank screen error which came from chromium v72 onwards because of updated print preview UIPrintPreviewEnabled() to extensions_utilswitches::kDisablePrintPreview to kSwitchNames in CefContentBrowserClient::AppendExtraCommandLineSwitches() to disable print preview on using --disable-print-preview command line switchprint_header_footer_1478_1565 chromium patch since it’s no longer required to disable print preview by defaultWebContentsDialogHelper() to wrap web_modal::WebContentsModalDialogManagerDelegate and web_modal::WebContentsModalDialogHost interface methods. Move it in a separate header and cc fileCefBrowserHostImpl::IsWindowless() methodis_windowless parameter in CefPrintRenderFrameHelperDelegate object from CefContentRendererClient::MaybeCreateBrowser() method in content_renderer_client.cc DownloadPrefs::FromBrowserContext for CEF use case. Add GetDownloadPrefs() to CefBrowserContext and use that to get the download_prefs in chromiumextra_info param to CreatePopupBrowserInfo()GetNativeView() method for MacOS platform delegate and update GetMaximumDialogSize() methodextensions::PrintPreviewEnabled()) since the print dialog crashes on printShowCefSaveAsDialog() and SaveAsDialogDismissed() to PdfPrinterHandler.Integrating print preview was a big and non-trivial change in CEF since not only it needed good understanding of the printing code in chromium but also the print preview feature was getting constant updates from Chromium. The code was constantly changing with every chromium version released and the print preview chromium documentation was outdated.
CEF3 has a multiprocess architecture similar to chromium’s documented here . There is a main browser process and multiple renderer processes. Debugging multiprocess applications can be trickier. I used Visual Studio which made things a bit easier as it has the Child process Debugging power tool which is a extension that would automatically attach Child processes and helped to debug into the child processes whenever they spawned up.
The chromium v72 version introduced a new print preview UI which broke the renderer, we got a blank screen in print previw. It took weeks to figure out what was wrong. Finally it came out that a pak file was missing which needed to be included in BUILD.gn. I had to spend multiple debugging session with my team to figure that out.
Also it had to be supported for all platforms (Windows, Linux, macOS) to qualify to be merged to the CEF upstream repo. Each platform had a different way of rendering dialogs. Though the windows support was working the Linux and MacOS weren’t supported in the changes yet. I added the support for Linux platform after building CEF in a linux VM. The MacOS support finally didn’t work out and we had to keep using legacy print for Mac platform. Though I needed to ensure the change built fine in Mac, so I had to build it for Mac as well (I was given a separate Mac machine just because of this since Mac doesn’t ship VM images) and in fact the change broke the MacOS build so the issues had to be fixed.
Even after all these changes the functionality broke after a architectural change was made in CEF in version 3770 (supported chromium v75) in this commit which rendered blank screen during print preview. Marshall took over the work from there and made a number of changes in the patch which can be seen in this PR chromiumembedded/cef#126 . The change was added manually in master revision 1669c0a on 20th July. It will be supported from the next CEF version (supported chromium v77). The current implementation supports print preview in Windows and Linux platforms via a --enable-print-preview flag.
Overall it has been a good experience working in the project and I got to know a lot about chromium itself. This was my first major contribution in a C++ based project. It helped me to understand how a browser works under the hood, how a browser renders web pages and processes javascript. I hope to carry forward this knowledge in some similar browser based project in future.

I didn't know what baroque writing meant until I read this book. If not anything else, I'll be reading this book for it's dreamy lines and a kind of story telling style that I wish I could have.
Read more… (5 min remaining to read)
About 3 months back I installed the newly released Fedora 30 OS – dual boot with Windows 10 in my PC. This blog post comes from the notes I made during that time and as I troubleshooting note for future.
I had Fedora 29 and Windows 10 dual boot in my PC before that. The Fedora install partition was running out of space due to low disk space selected during my last install so I decided to do a clean reinstall this time. I made a live usb using the Fedora media writer for windows and the Fedora 30 iso available at getfedora download page. I followed the usual steps that I followed for installing earlier Linux installations in my PC, similar to what mentioned in this video.
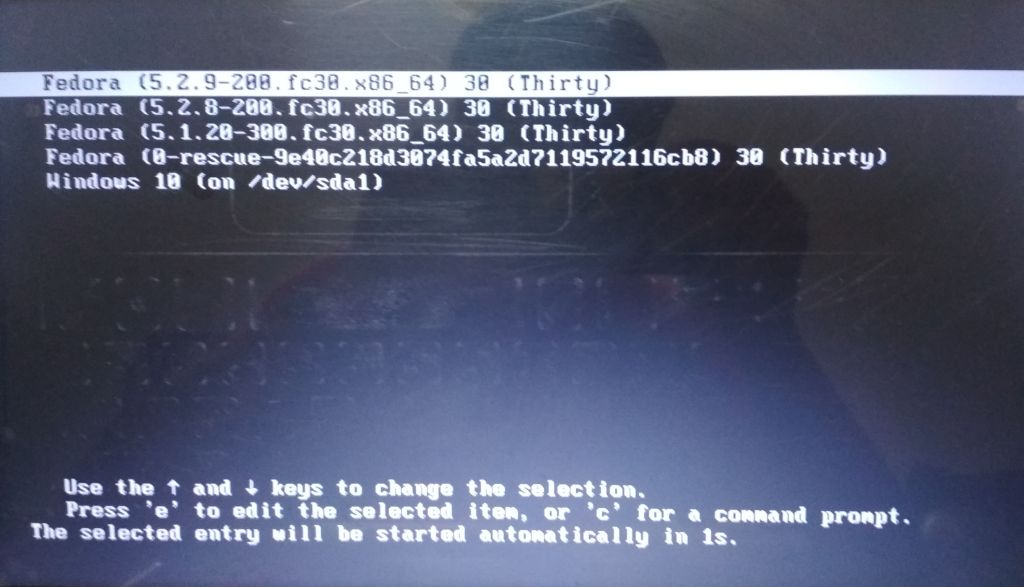
The installation went fine and finally I was ready to boot from my hard drive. Then I saw what is called the Dreaded GRUB2 boot prompt.
error: unknown filesystem.
Entering rescue mode...
grub rescue>
I quickly started finding way to fix the grub. The first thing I found was the steps listed in this video. I had to choose the right partition from which the bootloader would load.
grub rescue> ls
(hd0) (hd0,msdos4) (hd0,msdos3) (hd0,msdos2) (hd0,msdos1)
This shows the various partitions in my hard drive. One of this is the linux partition where my Fedora 30 OS is installed. I need to list all the partitions and one of them will have the linux filesystem.
grub rescue> ls (hd0, msdos4)/
bin/  boot/  dev/  etc/  home/  lib/  lib64/  lost+found/  media/  mnt/  opt/  proc/  root/  run/  sbin/  srv/  sys/  tmp/  usr/  var/
Now I ran the following commands and waited for the system to boot up
grub rescue> set prefix=(hd0, msdos4)/boot/grub2
grub rescue> insmod normal
grub rescue> normal
I got the same grub rescue boot prompt but this time with a different error
error: file '/boot/grub2/i386-pc/normal.mod' not found.
Entering rescue mode…
grub rescue>
The issue was that, the i386-pc folder was missing in the /boot/grub2 folder. The fix that I found for the issue was related to grub2 not being properly installed at the boot location. Luckily I was able to boot Fedora from UEFI Boot option from the Boot Menu. I logged into Fedora and reinstalled grub2.
$ sudo grub2-install /dev/sda
$ dnf install grub2-efi
I hoped that this would fix the issue, but it again came down to the same starting point loading the grub2 rescue prompt.
I further searched and landed up in the fedora grub2 manual . After reading it I realized there is something wrong in my grub2 configuration. I booted into my OS using UEFI boot and opened /boot/grub2/grub.cfg file. The entry for Windows was missing. I followed the steps given in this section. I went to the grub rescue prompt and fired the following commands
grub rescue> set root=(hd0, msdos4)
grub rescue> linux /boot/vmlinuz-5.1.20-300.fc30.x86_64 root=/dev/sda4
grub rescue> initrd /boot/initramfs-5.1.20-300.fc30.x86_64.img
grub rescue> boot
Then I recreated the grub.cfg file using these commands
$ grub2-mkconfig -o /boot/grub2/grub.cfg
$ grub2-install --boot-directory=/boot /dev/sda
Voila ! I was able to see the grub menu with all the boot entries.
So why did the issue actually occur ? It didn’t happend in the past whenever I did a fresh installation nor it’s a issue specific to Fedora 30. I tried to dig the actual cause of the issue and after a little finding and introspection I came to this conclusion.
Using the Fedora media writer was in fact the place where I unknowingly did a mistake. I usually used UNetbootin for creating my linux live usb in past which made the images to boot in BIOS only mode. The Fedora media writer enables to boot in both UEFI and BIOS mode. My Windows installation boots via Legacy boot and it has always been like that and since I have been using UNetbootin earlier, it always picked up Boot via BIOS for the live images. This time while creating the Fedora 30 image using Fedora Media writer the default boot mode picked up was UEFI and that created a EFI GRUB2 configuration. Now when I booted the live usb I just booted from the “Boot from USB” option without noticing whether it was UEFI or BIOS and I went ahead and did Fedora 30 installation. Now my default boot option was Legacy Boot (since it supports the Windows boot) while the installed Fedora OS grub loader was created to boot in EFI mode. That in turn caused this problem due to a corrupted grub2 configuration.
Always be careful while created OS images. Check how it is supposed to boot. In case of dual boots all the OS must boot via the same mode – either both UEFI or both BIOS. So make sure when you are doing a clean install of the second OS it must boot via same mode as the already installed OS.
wotw, kind
i can afford to get preachy this week, because i turned a year older.
so, be kind!
to your parents,
your significant other,
your family,
your friends,
the folks around you,
to your dog and stray dogs and all the animals,
to whoever you can.
and most importantly
Be kind to yourself!
And while I think Bezos is a kook, his grandpa certainly was not.
My grandfather was a highly intelligent, quiet man. He had never said a harsh word to me, and maybe this was to be the first time? Or maybe he would ask that I get back in the car and apologize to my grandmother. I had no experience in this realm with my grandparents and no way to gauge what the consequences might be. We stopped beside the trailer. My grandfather looked at me, and after a bit of silence, he gently and calmly said, “Jeff, one day you’ll understand that it’s harder to be kind than clever.”
It’s harder to be kind than clever. So it’s no small thing I ask of you. Do a kind deed every day. Your life will be the better for it.
Today I tried to install UBUNTU 18.04 LTS into my friend's laptop. I will say it was quite a mixed experience. Below are the following steps I did for installing:
Click on windows icon type “Create and format Disc”. There you will see the following :

Meanwhile, download the ISO file for UBUNTU 18.04 (LTS bionic). Also, download Etcher for creating flash USB.
Give the path for downloaded iso file.

Go to the BIOS setup. For my dell Vostro laptop. I will press F12 just as the dell image logo is visible.
 * Go to your USB drive
* Select “Open UBUNTU without installing”
* Go to your USB drive
* Select “Open UBUNTU without installing”
Select Normal Installation. Uncheck download updates while installing Ubuntu.
 Now there are two steps 1. Easy Step 2. Creating our configuration
Select “Install Ubuntu alongside Windows Boot Manager” and goto Step 8

Select “Something Else“
 Find where there is free space you have created.

Select and click on the “+” icon and we will allocate the space for “swap” and “home” and “root” directory.
Select logical memory and / signifies root, allocate 20 GB for it.
Select swap memory for 4GB (half the RAM size is preferred, for my Laptop of 8GB, it's 4096 MB).
Now give the rest of the space for the home.
Now select install now.

 Click on continue. And wait for the installation to finish.
Yay! we are all done.
Click on continue. And wait for the installation to finish.
Yay! we are all done.
wotw, feminism
does not mean equality in the literal sense.
more for women to have the freedom, to be themselves.
the freedom, to work and play and live in peace.
means, a movement to get from under the thumb of millennia of social mores and things have always been this way, so suck it up.
means to actually live to the basic ideal of live and let live.
I am reading the book Linux for you and me, and some of the commands I got to know and it's work!! Gnome Terminal Here in this terminal, we write the commands.
For example: [darshna@localhost~]
Here Darshna is the username, localhost is the hostname and this symbol `#~ is the directory name.
Following some commands are: * date command= tells us about current time and date in IST(Indian standard time) * cal command= displays the default present calendar. * whoami command= tells which user account you are using in this system. * id command=displays real user id. * pwd comma= helps to find the absolute path of the current directory. * cd command= this command helps you to change your current directory.
Whenever we think of programs or algorithms we think of steps that are supposed to be done one after the other to achieve a particular goal. Let's take a very simple example of a function that is supposed to greet a person:
def greeter(name):
    """Greeting function"""
    print(f"Hello {name}")

greeter(Guido) #1
greeter(Luciano) #2
greeter(Kushal) #3
"""
Output:
Hello Guido
Hello Luciano
Hello Kushal
"""
Here the function greeter() greets the person who's name is passed through it. But it does it sequentially i.e when greeter(Guido) will run the whole program will block it's state unless the function executes successfully or not. If it runs successfully then only the second and third function calls will be made.
This familiar style of programming is called sequential programming.
Sequential programming is comparatively easy to understand and most of the time fit the use case. But sometimes you need to get most out of your system for any X reason, the most common substituent of X, I could find is scaling your application.
Though greeter() is just a toy example but a real-world application with real user need to work the same even on huge amount of traffic it receives. Every time you get that spike in your traffic/daily active user you can't just add more hardware so one of the best solutions at times is to utilize your current system to the fullest. Thus Concurrency comes into the picture.
Concurrency is about dealing with lots of things at once. – Rob Pike
Before I move forward, I know what most of the people will say. If it's that important why at work/college/park/metro station/.. people are not talking about it? Why most of the people still use sequential programming patterns while coding?
Because of a very simple reason, it's not easy to wrap your head around and it's very easy to write sequential code pretending to be concurrent code.

I got to know about this programming style very late and later when I talked to people they said the same thing. It's not easy to code, you can easily skip the best practices and very hard to debug so most of the people try to stick to the normal style of programming.
The two most popular ways(techniques) of dealing with concurrency in Python is through:
Threading: Python has a threading module that helps in writing multi-threaded code. You can spawn independent threads share common states (just like a common variable that is accessed by two independent threads).
Let's re-write that greeter() function again now with threads.
import threading
import time
def main():
    thread1 = threading.Thread(target=greeter, args=('Guido',))
    thread2 = threading.Thread(target=greeter, args=('Luciano',))
    thread3 = threading.Thread(target=greeter, args=('Kushal',))
    thread1.start()
    thread2.start()
    thread3.start()

def greeter(name):
    print("Hello {}".format(name))
    time.sleep(1)

if __name__ == '__main__':
    main()

"""
Output:
Hello Guido
Hello Luciano
Hello Kushal
"""
Here thread1, thread2, thread3 are three independent threads that run alongside main thread of the interpreter. This may look it is running in parallel but it's not. Whenever the thread waits(here it's a simple function so you might see that), this wait can be anything reading from a socket, writing to a socket, reading from a Database. Its control is passed on to the other thread in the queue. In threading, this switching is done by the operating system(preemptive multitasking).
Though threads seem to be a good way to write multithreaded code it does have some problems too.
Asyncio: Python introduced asyncio package in 3.4, which followed a different approach of doing concurrency. It brought up the concept of coroutines. A coroutine is a restartable function that can be awaited(paused) and restarted at any given point. Unlike threads, the user decides which coroutine should be executed next. Thus this became cooperative multitasking.
Asyncio brought new keywords like async and await. A coroutine is defined with the async keyword and is awaited so that the waiting time can be utilized by the other coroutine.
Let's rewrite the greeter() again but now using the Asyncio.
import asyncio


async def greeter(name):
	await asyncio.sleep(1)
	print(f'Hello {name}')


def main():
    loop = asyncio.get_event_loop()

    task1 = loop.create_task(greeter('Guido'))
    task2 = loop.create_task(greeter('Luciano'))
    task3 = loop.create_task(greeter('Kushal'))

    final_task = asyncio.gather(task1, task2, task3)
    loop.run_until_complete(final_task)


if __name__ == '__main__':
    main()

"""
Output:
Hello Guido
Hello Luciano
Hello Kushal
"""
Looking at the above code we see some of the not so common jargons thrown around, event loop, tasks, and a new sleep function. Let's understand them before we dissect the code and understand it's working.
greeter() is a coroutine which prints the greeting, though this is a simple example but in an I/0 bound process a coroutine needs to wait so await helps the program to wait and get off the event loop. The async.sleep() function is different from the time.sleep() because async.sleep() is a non blocking call i.e it does not hold the program until the execution is completed. The argument given to the async.sleep() is the at the most value of the wait.Now let's move on to the code. Here task1,task2 and task3 work concurrently calling the coroutine. Once all the tasked are gathered the event loop runs until all the tasks are completed.
I hope this gives you a brief overview of Concurrency, we would be diving deep into both threading and asyncio and how can we use async for web applications using aiohttp and quart.
Stay tuned this will be a multi-part series.
While reading about concurrency you might a lot of other topics that you might confuse concurrency with so let's look at them now just so we know how is concurrency different.
Concurrency is about dealing with lots of things at once. Parallelism is about doing lots of things at once. Not the same, but related. One is about structure, one is about execution. Concurrency provides a way to structure a solution to solve a problem that may (but not necessarily) be parallelizable. -Rob Pike
Parallesim: doing tasks simultaneously, this is different from concurrency as in parallelism all the tasks run side by side without waiting(sleep) for other tasks, unlike a concurrent task. The method to achieve is called multiprocessing. Multiprocessing is well suited for CPU bound tasks as it distributes tasks over different cores of the CPU. Sadly Python's GIL doesn't do go well with CPU bound tasks.
Single-Threaded/Multi-Threaded: Python is a single-threaded language because of the Python's GIL but you can use multiple threads. These threads run along with the main thread. So threading, in general, is the method to achieve concurrency.
Asynchronous:, asynchrony is used to present the idea of either concurrent or parallel task and when we talk about asynchronous execution the tasks can correspond to different threads, processes or even servers.
Part 2: Talking Concurrency: Asyncio
#Did you know? We can assign multiple assignments in a single line.
For example:a,b = 10,20
a=10
b=20
You can use this method for swapping two numbers.
a,b=b,a
a=20
b=10
To understand how it works, we need to understand a datatype called tuple. We use a comma, to create the tuple; in the right-hand side we create the tuple(called tuple packing) and in the left-hand side we do tuple unpacking into a new tuple.
Let us take an example tp understnd more clearly.
data=("Darshna Das, West Bengal, Python")
name, state, language=data
name=Darshna Das
state=West Bengal
language=Python
Formatting a string Let us now see different methods to format string. .format method
name="Darshna"
language="Python"
msg="{0} loves {1}". .format(name,language)
print(msg)
Darshna loves Python.
Interesting fact In Python 3.6 a new way to do string formatting introduces a new concept called f-string.
name=Darshna
lanuguage=Python
msg=f"{name} loves {language}
print(msg)
Darshna loves Python.
f-strings provide a simple and readable way to embed Python expressions in a string.
I recently started reading the pym book suggested by folks at #dgplug. Since I have been programming in Python since an year and a half, I could go through the basics fairly quick. Here are the topics I covered:
However, file handling is something I have rarely used till now. This blog talks about the it and some of the great takeaways.
A file can be opened in three modes: ### Read: Opens the file in read-only mode. The file cannot be edited or added content to. The syntax for the same is :
>>> f = open('requirements.txt' , 'r')
### Write: Opens the file in write, you can make desired changes to the file. The syntax for the same is:
>>> f = open('requirements.txt' , 'r')
### Append: Opens file in append mode. You can append further content, but cannot change or modify past content. The syntax for the same is:
>>> f = open('requirements.txt' , 'a')
When a file is openened in read mode, the file pointer is at the beginning of the file. There are different functions for reading the file:
It reads the entire file at once. The file pointer traverses the entire file on calling this function. Therefore, calling this function again will have no effect, since the file pointer is already at EOF. Syntax for the same is:
>>> f.read()
'selenium >= 3.141.0\npython-telegram-bot >= 11.1.0\ndatetime >= 4.3\nargparse >= 1.4.0\nwebdriver-manager >= 1.7\nplaysound >= 1.2.2'
This function moves the file pointer to the beginning of the next line hence outputting one line at a time. Syntax for readline() function is :
>>> f.readline()
'selenium >= 3.141.0\n'
>>> f.readline()
'python-telegram-bot >= 11.1.0\n'
Reads all the lines in a file and returens a list.
>>> f.readlines()
['selenium >= 3.141.0\n', 'python-telegram-bot >= 11.1.0\n', 'datetime >= 4.3\n', 'argparse >= 1.4.0\n', 'webdriver-manager >= 1.7\n', 'playsound >= 1.2.2']
Now, we should always close a file we opened when not in use. Not closing it increases memory usage and degrades the quality of code. Python offers nice functionality to take care of file closing by itself:
`with keyword can be used as follows:
>>> with open('requirements.txt' , 'r') as f:
...     f.read()
...
'selenium >= 3.141.0\npython-telegram-bot >= 11.1.0\ndatetime >= 4.3\nargparse >= 1.4.0\nwebdriver-manager >= 1.7\nplaysound >= 1.2.2'
The .write() function can be easily used to write into a file. This will place the file pointer to the beginning and over-write the file completely. Here's how that works:
>>> f = open('requirements.txt' , 'w')
>>> f.write('tgbot\n')
6
The return value '6' denotes the number of characters written into the file
Hope you enjoyed reading the blog, :)
In continuation with the last blog, we now proceed with the following topic.
Variables and Datatype Following identifiers are used as reserved words, or keywords of the language, and cannot be used as ordinary identifiers. They must be typed exactly as written here:
false                   class              finally

is                         return

none                    continue        for

lambda                  try

true                       def                  from

non-local              while

and                        del                   global

not                        with

as                           elif                  if

or                           yield

assert                     else                 import

pass

break                     except               in

raise
In Python, we don't specify what kind of data we are going to put in a variable. So, we can directly write abc=1 and abc will become integer datatype.
If we write abc= 1.0 abc will become of floating type.
Eg:-
a= 13
b=23
a+b
36
From the given example we understand that to declare a variable in Python we just need to type the name and the value. Python can also manipulate strings, they can be enclosed in single quotes or double-quotes.
Reading input from keyboard Generally, the real-life Python codes do not need to read input from the keyboard. In Python, we use an input function to do input(“string to show”); this will return a string as output.
Let us write a program to read a number from the keyboard and check if it is less than 100 or not.
testhundred.py
#!/usr/bin/env python3
number=int(input("Enter an integer:"))
if number<100:
print("Your no. is smaller than 100")
else:
print("Your number is greater than 100")
output:
$ ./testhundered.py
Enter an integer: 13
Your number is smaller than 100.
$ ./testhunderd.py
Enter an integer: 123
Your number is greater than 100.
Contributing to open source is one of the best ways to hone up programming skills. Along with writing quality code, using a version control tool plays a crucial role while contributing. There are a lot of source control management platforms such as github , gitlab , phabricator etc. This blog discusses about making code contributions via github.
Pull request, as the name suggests is a patch of code that is sent to original code base to be merged into the source code after review. Usually, maintainers of the project will review the PR(pull request) and merge it into original code base if everything looks okay.
First off, there should be a fork of the upstream repository. Fork is nothing but a copy of the upstream repository onto your own github. This is where you will be pushing your changes. (Since you own it :D)
Then, clone of repository so as to do the changes locally and testing them before sending a patch. This should be fairly simple using
git clone <repository URL>
Now, if we want to make a change to the source code, we should always ensure that the master/development branch to be always in sync with upstream. You would definitely not like messing the master branch , and if in case the issue's priority is not high, the PR will be pending with the changes in master branch.
Other than that, the master branch is 'supposed' to have the updated code(or the production code), the rest of the features are supposed to be done on separate branches before being pushed into production.
Thus, it it is always a good practice to make new branches for each pull request to be opened. To do this use
git checkout -b <branch_name> -t upstream/master
This will make the branch in sync with the upstream. If upstream is not added, you can manually add it to remote using
git remote add upstream <upstream_URL>
Or alternatively, you can just create a branch and fetch from upstream using:
   git checkout -b <branch_name>
   git fetch upstream
make the required changes and commit them via git add and git commit commands
After the changes are done, push to your code via
git push origin <branch_name>
Usually, just after pushing to github, you would button when you open your repository(on github) clicking on which a PR will be made. It should look something as follows:

If that doesn't show automatically, navigate to the branch(on github) and make a PR.
That is it! Now keeps doing the requested changes(if asked) locally and keep pushing code on the created branch till the point it is fit for merging.
Recently I was browsing through git add’s manual to find out how to split hunks and stage them.
I found that there is an option called --intent-to-add which is pretty useful.
Like it says, one can use it to add an untracked file to git’s index but not stage the file.
An untracked file doesn’t show up in diffs and cannot be staged by hunks since nothing is in the index yet. So by adding it to the index, we just track it and can stage when ready.
This blog is in a git repo, so lets track the current post. When the file is not yet tracked, we see
$ git status
On branch master
Your branch is up to date with 'origin/master'.

Untracked files:
  (use "git add <file>..." to include in what will be committed)

        content/post/shorts/TIL Use git to add untracked file to index.md
Now when you add it to the index,
$ git add --intent-to-add content/post/shorts/TIL\ Use\ git\ to\ add\ untracked\ file\ to\ index.md
$ git status
On branch master
Your branch is up to date with 'origin/master'.

Changes not staged for commit:
  (use "git add <file>..." to update what will be committed)
  (use "git checkout -- <file>..." to discard changes in working directory)

        new file:   content/post/shorts/TIL Use git to add untracked file to index.md

no changes added to commit (use "git add" and/or "git commit -a")
With this you can look at a proper output of git diff,
diff --git a/content/post/shorts/TIL Use git to add untracked file to index.md b/content/post/shorts/TIL Use git to add untracked file to index.md
new file mode 100644
index 0000000..ff5d586
--- /dev/null
+++ b/content/post/shorts/TIL Use git to add untracked file to index.md
@@ -0,0 +1,45 @@
+---
+title: "TIL Git: Add Untracked File to Index"
+date: 2019-08-14T16:10:24+02:00
+tags:
+  - git
+categories:
+  - dgplug
+---
+Recently I was browsing through `git add`'s manual to find out how to split hunks and stage them.
+I found that there is an option called `--intent-to-add` which is pretty useful.
+Like it says, one can use it to add an untracked file to git's index but not stage the file.
+
+# Why is it useful?
+An untracked file doesn't show up in diffs and cannot be staged by hunks since nothing is in the index yet.
+So by adding it to the index, we just track it and can stage when ready.
+
+# Example
+This blog is in a git repo, so lets track the current post.
+When the file is not yet tracked, we see
+```git
+$ git status
+On branch master
+Your branch is up to date with 'origin/master'.
+
+Untracked files:
+  (use "git add <file>..." to include in what will be committed)
+
+        content/post/shorts/TIL Use git to add untracked file to index.md
+```
+
+Now to when you add it to the index,
+```git
+$ git add --intent-to-add content/post/shorts/TIL\ Use\ git\ to\ add\ untracked\ file\ to\ index.md
+$ git status
+On branch master
+Your branch is up to date with 'origin/master'.
+
+Changes not staged for commit:
+  (use "git add <file>..." to update what will be committed)
+  (use "git checkout -- <file>..." to discard changes in working directory)
+
+        new file:   content/post/shorts/TIL Use git to add untracked file to index.md
+
+no changes added to commit (use "git add" and/or "git commit -a")
+```
I guess this has gone enough meta so lets wrap it up. Enjoy and explore git, you will always find something new :)
by Jagannathan Tiruvallur Eachambadi (jagannathante@gmail.com) at August 14, 2019 02:10 PM
wotw, xenophobia
means the fear of things changing. the ability to not see the other side in an open hearted manner. causing one to become close minded and intolerant
and if you want to know if Nujeen made it?
After resuming my study I've learned about File handling (I can recall file handling in C).
File handling Python gives us an easy way to manipulate files. We can divide files in two parts, one is test file which contain simple text, and another one is binary file which contain binary data which is only readable by computer.
File opening The key function for working with files in Python is the open() function. The open() function takes two parameters; filename, and mode. There are four different methods (modes) for opening a file:
"r" - Read - Default value. Opens a file for reading, error if the file does  not exist
"w" - Write - Opens a file for writing, creates the file if it does not exist
"a" - Append - Opens a file for appending, creates the file if it does not exist
"x" - Create - Creates the specified file, returns an error if the file exists
Creating a file To create a new empty file:
>>> f = open("file.txt", "x")
To Create a new file if it does not exist:
>>> f = open("file.txt", "w")
Opening a file To open a file we use open() function. It requires two arguments, first the file path or file name, second which mode it should open. If we don't mention any mode then it will open the file as read only.
>>> f = open ("file.txt")
>>> f
<_io.TextIOWrapper name='file.txt' mode='r' encoding='UTF-8'>
Closing a file After opening a file one should always close the opened file. We use method close() for this.
>>> f = open ("file.txt")
>>> f
<_io.TextIOWrapper name='file.txt' mode='r' encoding='UTF-8'>
>>> f.close()
Reading a file To read the whole file at once use the read() method.
>>> f = open("sample.txt")
>>> f.read()
'I am Rayan\nI live in Bangalore\nI am from West Bengal\n'
If we call read() again it will return empty string as it already read the whole file. readline() can help you to read one line each time from the file.
>>> f = open("sample.txt")
>>> f.readline()
'I am Rayan\n'
>>> f.readline()
'I live in Bangalore\n'
To read all the lines in a list we use readlines() method.
>>> f = open("sample.txt")
>>> f.readlines()
['I am Rayan\n', 'I live in Bangalore\n', 'I am from West Bengal\n']
We can loop through the lines in a file object.
>>> f = open("sample.txt")
>>> for x in f:
...     print(x, end=' ')
...
I am Rayan
I live in Bangalore
I am from West Bengal
Example:
>>> f = open("sample.txt", "w")
>>> f.write("I am Rayan\nI live in Bangalore\nI am from West Bengal")
>>> f.close()
>>> f = open("sample.txt", "r")
>>> print(f.read())
I am Rayan
I live in Bangalore
I am from West Bengal
Using the with statement (which I found so cool) In real life scenarios we should try to use with statement. It will take care of closing the file for us.
This is the continuation of the Python learning series from the book Python for you and me.
Modules – These are Python files that contain different function definitions or variables that can be reused. These files are always ended with the .py extension.
For writing any language you need an editor, similarly here we use mu editor which was developed by Nicholas Tollervey. For installation, the total download size is around 150MB. We can open the editor from the command line type mu in the terminal. Give the following command line, type mu in the terminal
python3 -m mu
Executing Code – Write your code you want to execute and save it. – Use a proper file name. ( end it with .py) – Click on the run button to execute the code. – If you want to a REPL, then click REPL button.
NOTE: Do not give any unnecessary space in the file name, use _ if required, for an example download_photos.py
Today I read about few things those are listed below:
Data Structures in Python Data structures is a way to store and organize data. Obviously, some data structures are good in one set of problems, but terrible in other ones. The right choice of data structure can make your code faster, more efficient with memory and even more readable for other human beings. Python has few in-built data structures.
Lists List is a sequence of elements. It can store anything: numbers, strings, other lists, functions and etc. The fact that it can store anything is great but it has a disadvantage. This kind of list will require more memory. Let’s take a look at a basic example of list:
# create list
>>> list= ['Noname', 'Rayan', 'xyz', 100, 42, 55]
>>> list
['Noname', 'Rayan', 'xyz', 100, 42, 55]
# check if element is in list
>>> 42 in list
True
Tuples Another way to store a sequence of elements is to use tuples. Tuple is basically the same thing as list but with one difference. You can’t add or remove elements from tuples after initialization. It’s immutable data structure.
>>> a = ('Noname', 'Rayan', 'xyz', 100, 42, 55)
a
>>> ('Noname', 'Rayan', 'xyz', 100, 42, 55)
Dictionary nother important data structure is dictionary. The difference between dictionary and list is that you access elements in dictionary by key, not by index.
>>> dict = {'Rayan': 'Das','Kushal': 'Das','Sayan': 'Chowdhury'}
>>> dict
{'Rayan': 'Das', 'Kushal': 'Das', 'Sayan': 'Chowdhury'}
Sets Set stores only unique elements.
>>> letters = {'a', 'b', 'c'}
>>> 'c' in letters
True
>>> letters.add('d')
>>> letters
{'c', 'b', 'd', 'a'}
Strings In Python we declare strings in between “” or ‘’ or ‘’’ ‘’’ or “”” “”“ There are different methods available for strings.
Functions A function is a block of code which only runs when it is called. You can pass data, known as parameters, into a function. A function can return data as a result.
Defining a function This way we can define a function.
>>> def func(params):
...     statement1
...     statement2
Calling a function
>>> def func():
...     print("hello from func")
...
>>> func()
hello from func
Local and Global variables
Keyward only arguments We can also mark the arguments of function as keyword only. That way while calling the function, the user will be forced to use correct keyword for each parameter.
Docstrings We use docstrings in Python to explain how to use the code, it will be useful in interactive mode and to create auto-documentation.
Got to know about Higher-order function. It does at least one of the following step inside: -Takes one or more functions as argument. -Returns another function as output.
Map function map is a very useful higher order function in Python. It takes one function and an iterator as input and then applies the function on each value of the iterator and returns a list of results.
I've started Python again from Pym book by Kushal
Read about following topic and solved few basic problems.
I've paused here. Cleared all my basics again till now. Basics are the key ingredients in long run I believe.
I have just started with Python, from the book Python For you and me!
Some basic guidelines I have jotted down. The first program to print the “Hello World !”
print ("Hello World!") = Hello World !
While writing this above code, we write it into a source file. We can use any text editor. For example:
#!/usr/bin/env python
print ("Hello World!")
On the first line, we use (#!), which is called she-bang. In python, this indicates that it should be running the code. The lines of text in python is called “strings”.
Whitespace at the beginning of a line is known as indentation, but if we use the wrong indentation it shows an error.
Basic Rules For Indentation!
Always give a space after # and then start writing commands.
As I said learning is never easy. At least for me. When I first started learning Python from youtube back in my college, Every time tutorials starts with Variables, Operators and Expressions. I thought it's more like C/C++ and then I used to pause the tutorial and procrastinate. I procrastinate so much that I procrastinate the actual procrastination.
Well later I realized that I've wasted the time. But then I've started again and this time through docs. Yes from PYM book and blogs. I think docs gave me a better picture. I'm still learning. It's not that thing that you can complete within a week. Better things take time. Here are few things for beginners who is getting started with Python.
Whitespace and indentation in Python is important. Whitespace in the beginning of the line called indentation. For wrong indentation Python throws an error. Example:
>>> a=10
>>>    b=20
  File "<stdin>", line 1
    b=20
    ^
IndentationError: unexpected indent
There are more places where we should be following the same type of whitespace rules:
Comments are simple English to explain what this code does. It's easier to understand your code if you follow proper commenting for every code snippets. Comment line starts with # and everything after is considered as a comment. Example:
#This is a comment
a = 10
b=20
#This line will add two numbers
a+b
Multi Line Comments:
#This is a comment
#written in
#more than just one line
print("Hey there")
or we can add a multiline string (triple quotes) in our code, and place our comment inside it.
'''
This is a comment
written in
more than just one line
'''
print("Hey there")
Consider a module to be the same as a code library. A file containing a set of functions you want to include in your application. To create a module just save the code you want in a file with the file extension .py To use a module you have to import it first. Example:
>>> import math
>>> math.sqrt(16)
4.0
Following identifiers are used as a keywords and these can not be used as an ordinary identifiers. False class finally is return None continue for lambda try True def from nonlocal while and del global not with as elif if or yield assert else import pass break except in raise
In Python we don’t specify what kind of data we are going to put in a variable. So you can directly write abc = 1 and abc will become an integer datatype. If you write abc = 1.0 abc will become of floating type. Example:
>>> a=10
>>> b=20.0
>>> type(a)
<type 'int'>
>>> type(b)
<type 'float'>
From the above example you can understand that to declare a variable in Python , what you need is just to type the name and the value. Python can also manipulate strings They can be enclosed in single quotes or double quotes like:
>>> 'Python is not a snake'
'Python is not a snake'
>>> "Python is a programming language"
'Python is a programming language'
Generally the real life Python codes do not need to read input from the keyboard. In Python we use input function to do input.
$ vim hello.py

number = int(input("Enter an integer: "))
if number < 100:
    print("Your number is smaller than 100")
else:
    print("Your number is greater than 100")
Output:
$ ./hello.py
Enter an integer: 229
Your number is greater than 100
$ ./hello.py
Enter an integer: 1
Your number is smaller than 100
We can assign values to multiple variables in a single line:
>>> i, j = 100, 200
>>> a
100
>>> b
200
Operators are used to perform operations on variables and values. Python provides few operators which are below listed:
Arithmetic operators are used with numeric values to perform common mathematical operations:
>>> x=10
>>> y=10
>>> x+y #Addition
20
>>> x-y #Subtraction
0
>>> x*y #Multiplication
100
>>> x/y #Division
1.0
>>> x%y #Modulus
0
>>> x**y #Exponentiation
10000000000
>>> x//y #Floor division
1
Assignment operators are used to assign values to variables:
>>> x = 5
>>> x += 5
>>> x -= 5
>>> x *= 5
>>> x /= 5
Comparison operators are used to compare two values:
>>> x == y
>>> x != y
>>> x > y
>>> x < y
>>> x >= y
>>> x<= y
and #Returns True if both statements are true
or #Returns True if one of the statements is true
not #Reverse the result, returns False if the result is true
is #Returns true if both variables are the same object
is not #Returns true if both variables are not the same object
in #Returns True if a sequence with the specified value is present in the object
not in #Returns True if a sequence with the specified value is not present in the object
& #AND- Sets each bit to 1 if both bits are 1
| #OR- Sets each bit to 1 if one of two bits is 1
^ #XOR- Sets each bit to 1 if only one of two bits is 1
~ #NOR- Inverts all the bits
<< #Zero fill lest shift (Shift left by pushing zeros in from the right and let the leftmost bits fall off)
>> #Signed fill right shift (Shift right by pushing copies of the leftmost bit in from the left, and let the rightmost bits fall off)
This will guide you through making a pull request to a Git repository through the terminal so that you can make your life easier while working on a project.
1. A developer creates the feature in a dedicated branch in their local repo. 2. The developer pushes the branch to a public GitHub repository. 3. The developer files a pull request 4. The rest of the team reviews the code, discusses it, and alters it. 5. The project maintainer merges the feature into the official repository and closes the pull request.
To create a pull request you need to have made your code changes on a separate branch or forked repository. To fork a repository you need to open the repository and click on the fork button. You'll get a copy of the repository after fork. You can work with forked repository made your code changes then create a PR.
To make your own local copy of the repository you would like to contribute to, let's fire up the terminal.
We'll use git clone command with the URL that points to your fork of the repository.
$ git clone https://github.com/username/repository.git
To avoid trouble later, let's create a new branch in our repo so that the work you'll do is sorted separately.
$ git checkout -b [branch-name]
This command will create a new branch in your repo and switch to it.
This is where you'll add your features. If you create a new file remember to add it with git add command and commit them by git commit -m
$ git add [file-name]
$ git commit -m [commit-message]
At this point you can use git push command to push the changes to the current branch of your forked repo.
$ git push origin [new-branch]
This is the most simple step if till now you've done correctly. Now click on the New pull request button in your forked repo. Write down a nice report explaining why these changes should be included in the official source of your project and then confirm. Project author will get a notification that you submitted a PR. They will review your code and you'll get notification for their further actions. They may reject your PR or they may suggest something for changes. Go back, edit it and push again. PR will be automatically updated. If the maintainer is want to integrate your contributions to the project, the maintainer have to click Merge and your code will become a part of the original repo.
wotw, lgbtqia+
from the LGBTQIA Info website
If you're just learning about sexuality, gender, and all these other things, they can be a little hard to remember. This acronym not only serves as a symbol of our movement for rights, but even as a memory tool for those who need a little help.
L – Lesbian. Lesbian is a term used to refer to homosexual females.
G – Gay. Gay is a term used to refer to homosexuality, a homosexual person, or a homosexual male.
B – Bisexual. Bisexual is when a person is attracted to two sexes/genders.
T – Trans. Trans is an umbrella term for transgender and transsexual people.
Q – Queer/Questioning. Queer is an umbrella term for all of those who are not heterosexual and/or cisgender. Questioning is when a person isn't 100% sure of their sexual orientation and/or gender, and are trying to find their true identity.
I – Intersex. Intersex is when a person has an indeterminate mix of primary and secondary sex characteristics.
A – Asexuality. Asexuality is when a person experiences no (or little, if referring to demisexuality or grey-asexuality) sexual attraction to people.
+ – The “+” symbol simply stands for all of the other sexualities, sexes, and genders that aren't included in these few letters.
In the last blog I talked about Iterators and Iterables and I am assuming you're familiar with both of the concepts. So moving forward from let's talk about generators.
Simply put generators are iterators with a yield keyword and they do not return they yield. Similarly, a generator function is one that has a yield keyword in its body.
Let's look at some code and find out a bit more about them so we can define them more formally.
def range_123():
    print("Start")
    yield 1
    yield 2
    yield 3
    print('End')


for number in range_123():
    print(number)
"""
OUTPUT:
Start
1
2
3
End
"""

numbers = range_123() # Assigning generator object to numbers

next(numbers) #Output -> 1
next(numbers) #Output -> 2
next(numbers) #Output -> 3
next(numbers) #Output -> StopIteration Error
When we look closely into the above code range_123() is a generator function. Since generators are iterator we can directly iterate over the whole iterator function or we could assign it to a generator object and then use the next keyword to iterate over it until it's exhausted and raises the StopIteration error in a manner of confirming with the IteratorPrortocal.
Now you must be wondering what is the difference between the yield and return?
When a return statement is invoked inside a function, it permanently passes control back to the caller of the function and disposes of a function's local state.
When a yield is invoked, it also passes the control back to the caller of the function but it only does so temporarily. It suspends the function and retains its local state.
def greeter(name):
    while True:
        yield f'Hello {name}'

gen_object = greeter('Pradhvan')
next(gen_object) # Output -> Hello Pradhvan
next(gen_object) # Output -> Hello Pradhvan
next(gen_object) # Output -> Hello Pradhvan
next(gen_object) # Output -> Hello Pradhvan
If we look at the above code we could clearly see that local variable are stashed away temporaily, suspending the function and giving control back to the caller while retaining it's local state.
Since it's doing a lazy evaluation it can be continued anytime with the next() on the generator, which can evaluate somewhat infinitely long series of greeting messages.
Let's look at one more example of a code snippet where multiple yield statements decide the flow of the function.
def repeater():
    while True:
        print("Start")
        yield 1
        yield 2
        print("end")
gen_obj = repeater()
next(iterator) # 1
next(iterator) # 2
next(iterator) # 3

"""
OUTPUT # 1
start
1
OUTPUT # 2
2
OUTPUT # 3
end
start
1
"""
The above example makes it clear that in a generator function the flow of control of where the function suspends is decided by the yield statement. As the #2 suspends the value at 2 and when we do next() on 3 we get the whole block of statements.
A generator function can be replaced with a generator expression. These are similar to list comprehensions which that eagerly builds a list, generator expressions return a generator that can lazily produce the items.
def range_123():
    print("Start")
    yield 1
    print("Middle")
    yield 3
    print("End")

res1 = [x*3 for x in range_123()]

"""
Output res1:
Start
Middle
End
"""

for i in res1:
    print("-->",i)
"""output:
--> 3
--> 9
"""
Start Middle and End.def range_123():
print("Start")
yield 1
print("Middle")
yield 3
print("End")
res2 = (x*3 for x in range_123())
print(res2) # <generator object <genexpr> at 0x7f8be1d09150>
for i in res2:
print("-->",i)
"""
Output
Start
-->i
Middle
-->i
End
"""
res2, the body of the generator function range_123() actually executes.next() while the iteration advances till a StopIteration is raised.Since comprehension is a great way to increase the readability of your code and if you're using generator expression, you're making the comprehension more memory efficient.
But sometimes we tend to overuse the whole comprehension feature which backfires, I found a great article Overusing list comprehensions and generator expressions in Python which you should definitely look into.
Learning Unix commands are very essential as it helps you to navigate easily in your directories and files. Today we will learn some basics Unix commands which is easy for any beginners to begin with. Also you will get to know some bonus tips in the end.
Let's begin with creating new file.
cat > filename : creates a new file, if files already exists then overwrites it.
cat >> filename: appends the content in the already existing filename, else if not found then creates a new one.
Now to see if file is created or not.
ls -li : long list the files present in that directory with the inode no.
Now if you want to list files which is in some other directory or same working directory then there comes the concept of Relative addressing and Absolute addressing.
Relative addressing: here we can move to the directory which is under that directory.
username@hostname directoryname$ cd directory_name
Absolute Addressing: here we specify address from the root
username@hostname directoryname$ cd /home/username/directory_name
Lets play with calendar commands.
cal: prints the calendar of current month
cal mm yyyy : will print calendar of that year of that month.
cal year : will print the calendar of that year
In Unix, you can do calculations as well.
bc: It will open binary calculator. Here you can perform calculations.
ln filename linkname : it creates a new link pointing to the existing file “file_name”
where cp filename newfilename : creates a new file with “newfilename” and then copies the content of the filename into it.
Note ls -li will confirm that in the copy command there will be different inode number while link command creates a new link to file as they have the same inode no.
mkdir is used to make a directory and rmdir is to remove a directory
rm file_name: is used to remove a file_name
Till now we learned some basic tips. Time for some Bonus Tips.
passwd : this command is used to change the current password
sudo passwd -l username : to lock that username from the system
sudo passwd -u username: to unlock that username from the system
sudo passwd -e username: to expire the username password next time he logins he has to give new passwd
sudo passwd -d username: deletes the password of that account and sets that account passwordless.
I was thinking to note down my thoughts so that I can share my experience. So here it is, about how I joined 'dgplug' and get to know about Open-Source.
During my B.Tech 3rd semester somehow I got to know about the word 'Open-Source'. After a year when I was a fifth semester student, I met 'Ratnadeep(rtnpro)' in a tech-talk at my college,talk was over Open-Source , Its opportunities and freedom.Open Source culture was a myth in my college, very few people knew about Open-Source and its freedom of learning. In my batch, hardly fifty percent people know about Open-Source and Communities. During the talk 'Ratnadeep debnath(rtnpro)' mentioned about 'dgplug' summer training program and also told about 'Kushal das(kushal)' and other 'dgplug' operators, in those days I was learning python so after the talk a name was coming again and again in my mind that was 'Kushal das(kushal)', there were many questions and doubts were in my mind e.g. how to start, where to start then I decided to ping 'Ratnadeep debnath(rtnpro)' and he helped me a lot. I was a hindi background student till my 12th standard so I was a little bit shy to talk ans also I was a window user in those days then 'Ratnadeep debnath(rtnpro)' suggested me to shift over fedora, and also suggest to join IRC to get enrolled in 'dgplug' where masterminds like Kushal, Ratnadeep(rtnpro), Sayan, Chandan , Jasonbraganza were there. Summer training program had been started 15 days before i joined. 'Kushal das' suggested me to go through the logs, I did that. Kushal das(kushal) provided his book for python named 'Python you and me', book helped me a lot to understand python with a decent practice. https://pymbook.readthedocs.io/en/latest/ I started digging more about Open-Source and i got my interests in it. At the beginning, after trying on my own, I lost hope because I was struggling to learn to contribute and thought that it's impossible ,I started staying on 'dgplug' after sessions and listened to people what they are taking and used to ask questions frequently whenever doubt appeared in my mind as time passed thing became easier, it's just start for me many thing to go. Jasonbraganza's sessions over reading and writing importance was amazing and encouraged me and many more to write, I am very much thankful to him for his kind help. That's how it all started for me.

I own a Xiomi smartphone which runs on android 9 (or Android Pie). One of the best features of Android 9 is inbuilt private DNS support. Means, now you can encrypt your DNS queries!
Read more… (1 min remaining to read)
In recent years, we have been in so much love for the free commodity without realizing we ourselves have become the commodity. We install only free apps from stores. This is to make you aware of the possible threat to our Right to Privacy which is very important:
We have used Facebook like various free social networking sites which claims connecting people. Have you ever wondered how these proprietary companies are offering users its product for free? Yes, Facebook gets lots of revenue from adds. But how these adds are unknowingly so accurate? There has to be something tracking our data. These trackers know very effectively which sites have I visited and which product I looked in the cart. There has been many cases of phone tapping and call records that itself has put the citizens privacy a question.
You might have gone through various surveys that asks you varieties of question and it will predict your personality. You fill it and submit ignoring the Terms and Condition. These can give them permissions to our personal data likes messages our locations etc. Now these contents are connected to my profile. Giving the direct access to any buyer about my pulse. These companies can now target the user by bombarding with the polarised content which is designed for me and seen only by me.
We spent most of our time on these social sites liking and disliking the contents, called as data points . These data points can describe our personality. Through these personality they target those user whose decision can be influenced. These data are so much important to the buyer's that they can pay any amount. Most of the buyers are the political parities who want to influence the election by targeting its citizens. This is cheating democratic process of election. There is a instance during the Trump's Election campaign where a candidate named Ted Cruz won the election on the basis of the user's Facebook like. See how big that difference can cause. Data mining companies like Cambridge analytica had major role in his winning. According to the report Cambridge Analytica has stated that it has around 5000 data points of around millions of American's citizens.
We have to skeptic about our data sharing. You don't know how can some companies mines your data and influence you in their reasoning. Our society has to be updated with the current threat and unethical business model. As the world is getting more advanced keeping our data secure and private is very challenging. There have been many cases of data phishing and fraud calls where we unknowing share our personal and crucial details. The reason behind this is lack of awareness among the people. It is our duty to find the solution so that the technologies we build for human life enhancement should not break it.
wotw, intersex
basically means that we finally admit to ourselves that we humans come in all shapes and sizes and that we cannot really slot or categorise people into our narrow worldview and then judge them for not meeting our crazy expectations.
Iteration is the fundamental technique which is supported by every programming language in the form of loops. The most common one at least from is the For loop and if specifically talk about Python's case, we have For each loop. For each loop are powered by iterators. An iterator is an object that does the actual iterating and fetches data one at a time and on-demand.
Let's take a step back and look back at some of the common terms which would help us in understanding iterators even better.
iterables: anything that can be iterated over is called an iterable.
for item in some_iterable:
    print(item)
sequences: Sequences are iterables which can be indexed.
numbers = [1,2,3,4]
tuples = (1,2,3)
word = 'Hello world'
Iter is built-in function and whenever the interpreter needs to iterator over an object, it automatically calls the iter().
The iter() function returns an iterator.
When the iter function is called it does three things:
__iter__ method. (To see this just do dir() on the object.)__iter__ method is not present but the __getitem__is implemented, python creates an iterator that fetches the items in order, starting from the index zero.numbers = [1,2,3,4]
num = iter(numbers) # Builds an iterator 'num'
Looking at the code snippet above we can make a better definition of an iterable.
*Any object which the __iter__ built-in function can be called an iterable.*
Before moving forward let's look at nifty little way the iter() works with functions to make them work as an iterator.
Let's build a die roller that rolls a die from 1-6 and stops when the die hits 1.
In this usage we need to make sure of two things:
def die_roll():
    return randint(1,6)

roller = iter(die_roll, 1)

print(type(roller)) # <class 'callable_iterator'>

for roll in roller:
    print(roll)

"""
Output:
5
6
3
2
"""
Python obtains an iterator from an iterable. Let's look at the for-each loop again to see how everything fits in the picture.
numbers = [1,2,3,4]
for number in numbers:
    print(number)
Looking at the code above we can only see the iterable i.e numbers. But what about the iterator? What about the iter() ? Isn't it suppose to use both to work.
Here we can't see the iterator or the iter() in action but it's working behind the scene. Let's re-write the whole statement in a while loop so we can see how it all fits together.
numbers = [1,2,3,4]
num = iter(numbers) # builds an iterator
while True:
    try:
        print(next(num))
    except StopIteration:
        del num
        break
The flow of the above code is simple:
You must be wondering everything is fine but why did we delete the iterator.
Iterators have this property that they are one-directional and once all the item is iterated over they can't be reset to the original state.
Thus the StopIteration signals that the iterator is exhausted. Thus it's best to delete it.
Python iterator objects are required to support two methods __iter__ and the __next__ method.
iter method returns self. This allows iterators to be used where an iterable is expected i.e “for” and “in” keywords.
next method returns the next available item, raising the StopIteration when there are no more items to be looped through.
Let's bundle this knowledge and build our very own Range built-in function.
class _Range:
    def __init__(self, start, end, step = 1):
        self.start = start
        self.end = end - 1
        self.step = step

    def __iter__(self):
        return self

    def __next__(self):
        if self.start > self.end:
            raise StopIteration
        else:
            self.start += self.step
            return self.start - 1

numbers = _Range(1, 3)
print(next(numbers)) # Result -> 1
print(next(numbers)) # Result -> 2
print(next(numbers)) # Raise a StopIteration Exception
Now that we know how an iterator works let's look back at the definition of an iterator again:
*Any object that implements the __next__ no-argument method that returns the next item in a series or raises StopIteration when there are no more items is called an Iterator.*
Just a quick tip before moving forward, the optimal way of creating your own iterator is to make a generator function, not by creating a iterator class like we did here.
The iterator objects are required to support the following two methods, which together form the iterator protocol. The __iter__ and the __next__ method.
iterator.__iter__()
iterator.__next__()
# Tuple unpacking
x,y,z = coordinates
numbers = [1,2,3,4,5]
a,b,*rest = numbers
print(numbers)
Iteratorables are not necessarily iterators but an iterator is necessarily iterable.
Example: Generators are iterators that can be looped over but lists are iterables but not an iterator.
letters = ['a','b','c','d']
next(enumerate(letters)) # Result -> (0, 'a')
next(zip(letters,letters)) #  Result -> ('a','a')
next(reversed(letters)) #  Result -> 'd'
next(open('iterator.txt')) #  Result -> 'iterator\n'
I have been using git from quite some time, but there are certain amazing things about git that I learnt just recently.
git blame gives the commit hash, author and time for every line in a file. This can be used to know who are the people who have contributed to that particular code and the commit hash too! It can also help figure out who added a particular line in a project which broke it, and then go blame them :P
Ever been in a hurry and made a spelling mistake? That's exactly what is command is for! This can change the commit message for the last commit.
Just type git commit --amend that would open the file in the default terminal text editor. Change the message, save and quit, and done!
Squash is not a command, but definitely a concept in itself. Imagine having changes in a file multiple times, which would make a lot of unnecessary commits. Now if any point of time, one needs to go back in history, doing that would be just plain painful with several commits cluttered. Squashing here comes to rescue!
Squashing means convert related commits to one commit. It's nothing but a kind of interactive rebase. for last n commits you can do git rebase -i HEAD~n. Here's how it goes:

This will open the commits in the default text editor. Instead of pick in front of commit, type squash for those commits you wish to squash.

Save and exit, you will get another file which asks the user to choose final commit messages. Type the appropriate message and delete other messages. Save an quit, it's squashed! \o/
While working on projects, things are in a messy state and you want to switch branches for a bit to work on something else. Now, you do not want to commit things half done(you need to commit everything before switching). git stash comes to rescue!
Stashing takes the current state of your working directory and pushes it onto a stack of unfinished changes. Now you can switch branches! You can also apply the unfinished changes any time with git stash apply
Tagging is a feature in git. For every software there are releases, now imagine if a software is released and development team is working for the next release. Meanwhile, there is a bug report with severe priority. Now, hat needs to be fixed in the previous version! Remembering the last commit for each release is not a good idea. Git here offers the functionality!
It has the ability to tag specific points in a repository’s history as being important(releases). There are five basic commands:
git tag – will list all the tags in the project.git checkout <tag_version> – jumps to the repository's state with the particular tag version.git tag -a <version> -m '<commit message> – creates a tag with the version number and commit message.git tag -d <tag_name> – deletes the tag from the listA lot of open source work is done via mailing list. The kernel mailing list comes at the top of my head. A lot of commits are mailed as patches. These patches contain the diffs(git diff). They can be easily applied via git apply <filename>. Now the code can be tested with the patch applied.
Git has a short status flag so you can see your changes in a more compact way. If you run git status -s or git status –short you get a more simplified output from the command.
 The
The ?? indicates the file hasn't been staged. D indicates deleted file and there are a few other tags too.
You don't need to have a weird name that the upstream would have to your repository. You can always rename the directory while cloning. The syntax is:
git clone <upstream URL> <directory name>
Git is indeed a wonderful tool in itself. There's so much to learn. Hope you enjoyed reading the blog, :)

Got a dream contributing to FOSS projects but lacking confidence in git commands. Don't worry this blog is for you: Let's begin learning git with the following FAQ:
git init: Using this command we first initialize a local git repository. The files we will add here will now be tracked by the git. Running git init command is safe it reinitialize if there is an existing one.
git clone https://github.com/your_username/repo_name: Will clone the remote repository into a newly-created directory.
git status: This command gives the list of files that have not been committed. This includes modified files and newly created files.
Staging is like a checkpoint where only those files are there which is to be committed. Here we do modify any changes before final commit.
git add [file-name.txt]: This command adds the file-name.txt to the staging area.
git add -A or git add .: Using this command we can add all new and changed files to the staging area.* Note: There are times when unwanted files like file_name.swp also get added and committed to avoid this it's better to add files one by one.*
git commit -m "[commit message]"
-m is used to allow adding a commit message
Using this command we can move all the staging area files to commit area in the local repository.
git rm file-name or git rm -r folder-name
The above command are useful when you are deleting a file or deleting multiple files. git rm -r file-name removes the duplicate file-name recursively.
git branch: This command lists all the branches created in your local repository.
The asterisk denotes the current branch.
git branch -a: This will list all the branches in the local as well as a remote repository.
git branch [branch name]: This command will create a new branch.Note this does not checkout the new branch.
git branch -d [branch name]: This command will delete the branch. This is the safest way to delete a branch as it prevents deletion if there are any unmerged changes.
git branch -D [branch name]: This command will forcefully delete the branch and also deletes the commits associated with the branch.
*Note all the above will bring changes in the local repository.
git push origin --delete [branch name]: This command will delete a remote branch.
Yes, you can use git checkout -b [branch name] command to create a branch and switch to that branch automatically.
Well, It depends on the Git version you are using.
For modern version of git: git checkout [remotebranch]
For older version of git : git checkout [remotebranch] origin/[remotebranch]
git log: Using this we will see all the changes committed in the repositories.
git log --summary: Using this we get the detailed view of the changes made in the repositories.
git log --oneline: This command gives the history of the commits in brief.
git checkout -- [file-name.txt]: This command will permanently discard all the changes made in the branch local repository.
git stash: This command will remove the changes made in the current branch but saves it for later use. So using git stash pop we can get back the saved changes made in the file of that branch.
Ever wondered to get a GUI application from another machine get rendered onto yours? If not, Linux offers that to you :P Let's see how: First of all we shall discus some basic terminologies before moving ahead:
The display server is very similar to a web-server. So Imagine that you have an apache server. Now when a client requests a service, the server would send a few instructions accordingly to the client over http/https protocol. The client(which here is the web browser) will render those instructions and display the content requested. The display server in Linux works almost the same way. The server here interacts with the hardware (CPU) and sends instructions over a protocol known as the 'X' protocol. The latest version of the same is 11, and hence it's called X11.
Think what would happen if the display-server is on one machine and client on the other machine? Yes! that would render the graphical applications onto the client machine. That's is exactly what X-forwarding is – render the application on one machine while it runs on a different machine.
Okay, enough of terminologies, let's get to implementing it now.
On the server, configure /etc/ssh/sshd_config to contain the following:
X11Forwarding yes
X11DisplayOffset 10
These two are usually commented out, ensure that the sshd_config contains these.
You may need to restart ssh for the changes to be picked up.
You can run this if the ssh server doesn't pick that up and then restart the server:
cat /var/run/sshd.pid | xargs kill -1
Next, start ssh on both the machines. On Debian or Debian derivatives you can do so by doing:
sudo service ssh start
Now we will connect the client to the server. On the client machine type:
ssh -X <server name>@<server ip>
If you are facing trouble finding out ip, you can do so via:
nmcli -p device show
And it's done! You have SSH'd into the server machine. Now you can render GUI apps on the client machine, while it runs on the server.
Here's me rendering firefox on the client :D
First of all kudos for successfully creating `.onion' address. If not, see my previous blog.

Just having a domain is useless if you don't know how to make use of it. So let's begin with the newly created domain. Note the following guidelines are verified on Ubuntu 18.04
sudo mkdir /var/www/your_directory_name
cd /var/www/your_directory_name/
touch index.html
sudo vi index.html : sudo gives the power to override the readonly files
Press 'i' to go in INSERT mode
Write your good name
Press ESC and give :wq as command to save index.html and exit vi Editor.
cd /etc/nginx/sites-available/ : If says permission denied sudo it :)
sudo vi default : It will open long content. Edit the root line from '/var/www/html' to '/var/www/yourdirectoryname'. Save and exit.
systemctl reload nginx
Kudos our work is done
Incase you forgot your domain name.
Type sudo cat /var/lib/tor/hidden_service/hostname
Happy Coding :)
Context Managers in Python help the users to manage the resources efficiently in a program i.e opening or closing a resource or locking or unlocking a resource. Context Managers come handy when we have to manage resource before and after an event.
The most common context manager that every python programmer uses very frequently for managing files, is a with as statement.
with open('MyContextManager.txt') as f:
    f.write('Using Context Manager is FUN !')
The above code snippet has mainly two advantages:
file = open('MyContextManager.txt','W')
try:
    file.write('Not using a Context Manager.')
finally:
    file.close()
Here we manage the opening and closing of a file manually with a try-finally statement.
Python's standard library comes with a module, contextlib. This contains utilities for working with context managers and the with statement.
So why would someone want to write their own Context Managers?
Because, Context Managers are best at managing resources before and after an event; thus one doesn't have to worry about the allocation/de-allocation or Locking/Unlocking or Opening/Closing of events.
Also, they make the code simple and more readable.
Writing your own context manager can be done in two ways; either create your own class or use the Contextlib module to create a Context Manager decorator.
Let's first look at how we can create a simple Context Manager class. A Context Manager class consists of two main methods enter and exit. If you're familiar with testing, you can compare these two methods with the setup and teardown.
Just like every class in Python, the init method is optional. But in the case of Context Managers, we use init only if we're using a with as statement. init has to be passed the name which you want to associate with as in the with as statement.
Now let's take a look at a simple Game of Thrones inspired ContextManager which creates a dict of the house symbols.
class ThronesContextManager:
    def __init__(self, HouseSymbol):
        self.HouseSymbol = HouseSymbol

    def __enter__(self):
        print("Enter: {}".format(self.HouseSymbol)")
        return self.HouseSymbol

    def __exit__(self, *exc):
        print("Exit: {}".format(self.HouseSymbol))


with ThronesContextManager({"House Stark": "Wolf"}) as HouseSymbol:
    HouseSymbol["Targaryen"] = "Three Headed Dragon"

"""
---Output---
Enter: {'House Stark': 'Wolf'}
Exit: {'House Stark': 'Wolf', 'Targaryen': 'Three Headed Dragon'}
"""
Now taking a look at the above code example we can say that any Context Manager has two methods an enter method and an exit method.
Before moving forward to contextmanager decorator let's break down the code snippet we saw in the starting of the post and see how it works behind the hood.
Since we know how context managers work it won't be difficult to the observe what's happening when we call with as statement while opening a file.
with open('MyContextManager.txt') as f:
    f.write('Using Context Manager is FUN !')
The easier way to write a context manager is by using the Contextlib module and creating a context manager decorator.
The good thing about using the @contextmanager is that it builds the enter and exit method for you automatically, thus we can transform a generator function into a contextmanager decorator.
Let's re-write the ThronesContextManager again but with a @ThronesContextManager.
from contextlib import contextmanager

@contextmanager
def ThronesContextManager(data):
    print("Enter: {}".format(data))
    yield data
    print("Exit: {}".format(data))

with ThronesContextManager({"House Stark": "Wolf"}) as HouseSymbol:
    HouseSymbol["House Targaryen"] = "Three Headed Dragon"

"""
---Output---
Enter: {'House Stark': 'Wolf'}
Exit: {'House Stark': 'Wolf', 'House Targaryen': 'Three Headed Dragon'}
"""
Here are some interesting things I found about Contextmanagers. I came across these while researching for this blog post and hence the that's the reason I am adding this to the section PyRandom. I would keep updating this section as I learn more about Context Managers.
with open('MyContextManager.txt') as f:
    # Variable defined inside the Context Manager
    VariableName = f.read()
print(VariableName)
import contextlib

@contextlib.contextmanager
def make_context(name):
    print ('entering:', name)
    yield name
    print ('exiting :', name)

with make_context('A') as A, make_context('B') as B, make_context('C') as C:
    print ('inside with statement:', A, B, C)

"""
---OUTPUT---
entering: A
entering: B
entering: C
inside with statement: A B C
exiting : C
exiting : B
exiting : A
"""
Since we covered all the basic stuff on Context Managers, we can start digging deeper and learn to use Context Managers in a more realistic scenarios. So here are a few things that I would like you to read more about:
The reason behind the blog is that I recently picked a Python problem which goes something like this
Write a Context Manager named Suppress which suppresses the exception of a given type/types i.e if the given exception type is raised, that exception should be caught and muted in a sense.
Code Example:
>>> x = 0
>>> with suppress(ValueError):
...     x = int('hello')
...
>>> x
0
>>> with suppress(ValueError, TypeError):
...     x = int(None)
...
>>> x
0
Since you read this far I am assuming you are also just starting to learn about this topic. Let's put it all that we have learned so far to a test and get some hands-on experience of writing your Context Manager. Try to solve this problem.
I am still solving the problem and once it's done I would link my solution here.
Happy Coding !
Nowdays these two types of encryption methods are widely used. * Symmetric encryption * Asymmetric encryption
In symmetric encryption single key is used by both sender and receiver for encryption and decryption. Therefore both the parties have to exchange the key and thus trust issues arise here a lot. Some of symmetric key algorithms are DES(Data Encryption Standard), Triple DES, AES(Advanced Encryption Standard).
Suppose there are two-person A and B, A wants to send his/her data from an insecure network to B. A will encrypt the data with key and B will have to decrypt it with the same key.
In asymmetric encryption pair of the key are used, one is called public key and the other is private key. The private key is kept secret by the owner and the public key is shared. Data encrypted with the recipient's public key can only be decrypted by the corresponding private key.
Suppose A wants to send data to B, so A must have B's public key to encrypt the data then B decrypt the same with his/her corresponding private key.
Hey everyone if you want to view information about CPU in Linux you can use the command cat /proc/cpuinfo in terminal it will display what type of processor your system is running and the number of CPUs present and much more.
Here is an example.
Firstly, DNS is how web addresses are looked up to find their location in terms of IP addresses. So it is actually surprising that this lookup has always been unencrypted. The issue has become mainstream of sorts when UK’s Internet Service Provider’s Association nominated Firefox as an internet villain for enabling DNSOverHTTPS (DoH). This allowed people to bypass DNS based blocking performed by ISPs which further cemented the idea that one needs encrypted DNS to avoid being censored or worse MITMed by an authoritarian government by using domain level blocking. I prefer DoT over the DoH protocol simply because of latency issues caused by dependency on TCP for the latter. DoT works similar to regular DNS over UDP but under a different port. One reason for vendors to prefer DoH, is due to over eager firewalls blocking all ports except 80 and 443, used by HTTP and HTTPS by default. In this post, I want to show you how easy it is to get a secure and private DNS at the OS level, so you can do what Firefox does, but for all applications. Okay, lets get to the crux of the article!
Unbound is usually available in the repositories of operating systems, Linux and BSD. Install it using your favourite package manager and we can begin!
The next step is to configure unbound to use root servers to resolve DNS recursively. This is useful to first get acquainted with unbound and also to rule out issues if DoT fails to work.
# /etc/unbound/unbound.conf
server:
  verbosity: 1
  use-syslog: yes # outputs to systemd journal in our case
  do-daemonize: no # handled by systemd
  username: "unbound" # use separate user for security
  directory: "/etc/unbound"
  auto-trust-anchor-file: trusted-key.key # Auto-update the trust anchors, used for DNSSEC
 root-hints: root.hints # download root.hints from https://www.internic.net/domain/named.cache
It is important we take care of directory permissions so unbound can read and write to it.
You may have to manually change ownership of /etc/unbound using chown.
Before starting the service, make sure to change /etc/resolv.conf to use the local nameserver run by unbound.
# /etc/resolv.conf
nameserver 127.0.0.1
This step also requires some care if your distribution is handling DNS using NetworkManager, systemd-resolved or openresolvconf.
For NetworkManager, refer to configuration related to DNS in the “main section”.
In the case of systemd-resolved, I would suggest you to just disable and import any local network related settings into unbound.
In openresolvconf, we can use it with unbound as a subscriber.
After this is done, start the unbound service and check the logs for errors if any.
You can use drill or dig to do DNS testing from the terminal. For example,
> drill lobste.rs
;; ->>HEADER<<- opcode: QUERY, rcode: NOERROR, id: 42947
;; flags: qr rd ra ; QUERY: 1, ANSWER: 1, AUTHORITY: 0, ADDITIONAL: 0
;; QUESTION SECTION:
;; lobste.rs.   IN      A

;; ANSWER SECTION:
lobste.rs.      3600    IN      A       71.19.148.33

;; AUTHORITY SECTION:

;; ADDITIONAL SECTION:

;; Query time: 400 msec
;; SERVER: 127.0.0.1
;; WHEN: Wed Jul 10 11:52:06 2019
;; MSG SIZE  rcvd: 43
Check rcode and SERVER in the output to confirm your configuration.
In the previous section unbound recursively resolved the DNS by querying the root servers. But in most cases we would like to resolve them from a caching server close to us. In this case we access the server using TLS like so,
# DNSOverTLS addition to unbound.conf
server:
  tls-cert-bundle: /etc/ssl/certs/ca-certificates.crt # needed for verification of TLS

forward-zone:
  name: "."
  forward-tls-upstream: yes

  #nic.cz
  forward-addr: 193.17.47.1@853#odvr.nic.cz
  forward-addr: 185.43.135.1@853#odvr.nic.cz
  forward-addr: 2001:148f:ffff::1@853#odvr.nic.cz
  forward-addr: 2001:148f:fffe::1@853#odvr.nic.cz
As can be seen the format for forward-addr in the case of DoT involves specifying the IP, port and name.
The name is checked against the host mentioned in the TLS certificate securing our connection.
In this example I am using the host from (cz.nic)[https://www.nic.cz/odvr/], but other alternative exists from Cloudflare, Google and Quad9 to name a few.
As before, check the configuration using drill after restarting the service.
You can also check the syntax of the configuration file, before restarting, by using unbound-checkconf to prevent unnecessary round trips.
Hopefully by the end of this post, you have a secure and private DNS setup!
by Jagannathan Tiruvallur Eachambadi (jagannathante@gmail.com) at July 10, 2019 09:18 AM
Hello folks, my self Ritik Raushan. This is my first blog ever written by me. I`ll be going to publish much more technical kinds of stuff in upcoming posts. Here we will learn and grow together. See you again.
Ansible Pune Meetup
It’s always fun to meet new people to learn new things and get something new, So I join Ansible Pune Meetup ( 29 june 2019 ).
We talked about a wide variety of industries use-cases and solution for problems.
It’s Saturday and rain is coming and i was getting ready for the meetup, It’s 9:00 AM iirc, I meet Ompragash Viswanathan
and then we join Amit Upadaye, and Aditi and move towards Tavisca Solutions.
It was raining so we start around 10:30,
First of all, we all introduce ourselves and move a step ahead towards the introduction to Ansible by Anandprakash Tandale
and along side Ompragash Viswanathan and Abhijeet helping him in solving
the query of folks.
After an introduction to Ansible, we move forward and Amit Upadaye start introducing Foreman and show what we can do with Foreman
then Kavita Gaikwad join him and explore more about Foreman.
After getting know how Foreman works we move towards lunch and during lunch we learn how Ansible works and a quick demo of creating a user
in Windows using Ansible playbook.
And after lunch we move forward and Yadnyawalkya Tale introduce ManageIQ and show a demo.
And now it’s time for getting to know about AWX and Saurabh Thakre done a great job in geeting,
know what is AWX and how it works.
And at last Nikhil Kathole give a demo that how we can integrate Ancible and Foreman.
and after that we click some pictures and get our goodies and back to home.
It Turned out to be one of the long(approx 5 hours) meetup!! Still it was fun and I will wait for the next one to join. 
I recently started interacting on #dgplug channel using my matrix ID and I’m also attending the dgplug summer training, in-turn learning a lot of new stuff. As all of us(dgplug summer trainees) were learning about mailing list etiquette and FOSS, we were suggested by mbuf (Shakthi Kannan) to go ahead and read his book ‘i want 2 do project. tell me wat 2 do.’ to get better insights for FOSS, mailing etiquette, how FOSS works etc.
The book then showed up at my door after a couple of days. This book presents valuable insights on open-source software and the equally important communication side related to it, which a newbie wouldn’t pay much attention to in the beginning.
The book starts with Mailing list etiquette and explains it in detail – it explains the importance of trimmed, ‘interleaved, bottom-posting’, not writing HTML mails, no overquoting , really well. It also made me realize how important adding additional details are. When I delved in further, I learnt about the tools that can be used for effective communication(mailing lists, IRC, SMS, Voice Calls) and when to use the right tool, with right people at the right time.
Next up, I learnt about the details for starting in open-source software development, how to effectively read README.md/important docs to proceed with the code-base. Then, in chapter-5, the whole process of creating a patch and e-mailing it is explained. A few days back I too had to merge a mailed patch to my repository so I could very well relate to the process of generating a patch via Version Control System(VCS) Tool and submit the patch via mail.
As I read further, I came across one of the most important take away from the book – Bug Triaging. It’s nothing but, reproducing the same bug from the mail/description and work upon it. It thus, also means that the mail/description should contain as much detail as possible for the debugging to be smooth.
The last three chapters focus on reading /writing, presentation and sustenance and have nice pointers to follow. The chapter-9 on presentation made me look back at the mistakes that I made while delivering talks at past meetups. I took a note of all the points that I missed so that I can deliver my next talk as perfectly as I can, 🙂
That’s about it. Thank you Shakthi Kannan , for this amazing book! Here's my photo with the book:

Come to the #dgplug channel on freenode, and ask for an account. If you are regular member of dgplug, any of the admins will provide you an account.
Happy blogging!

I was 12 when I had a fight with a boy in my 'gully', who I used to play cricket with. When he was running away after our little 'disagreement', he called me 'chhakke' and ran as fast as he could.
I just stood there, puzzled, with my cricket bat in my hand, thinking why would someone call me a score and expect me to feel insulted. (In India, hitting a six in cricket is often called 'chhakka', plural 'chhakke').
Read more… (2 min remaining to read)
Fedora 30 Meetup and release party
It was a pleasing day, I wake up in the morning and got to know that i can join Fedora Pune meetup and release party for Fedora 30,
so I was very excited about it and i reach there with Pooja Yadav and Prveen Kumar,
Pravin Satpute starts the meetup with his talk on new features of Fedora 30.
-> GNOME 3.32
GNOME 3.32 that really gives a new 3D view to the icones and all the taskbars and other GUI stuff.
-> Improved performance for DNF
The performance of DNF (default package manager for Fedora) is improved
-> Two New Desktop Environment
Fedora 30 extends the offering with elementary OS‘ Pantheon desktop environment and Deepin Linux’ DeepinDE.
-> Linux Kernel 5
Fedora 30 has Linux Kernel 5.1.5 version that has improved support for hardware and some performance improvements.
-> Emojis
Fedora 30 comes with emojis you can just enable screen keyboard ( settings – universal access – screen keyboard)
and there on the right of space button you will see an emoji button or you can use the shortcut [ctrl+shift+e].
And after that Parag Nemade give a talk about the modularity and packaging and then a question-answer session goes  .
.
After that we discuss how we can start contributing to Fedora CoreOS, Praveen Kumar give a talk about Fedora coreOS
it’s basically an OS that is specially designed for the Containers and dockers kind of things (I am not that much familiar with those), It will be available soon for everyone it’s under heavy development.
And after that a surprise talk by Kushal Das on Qubes OS it’s really awsome
that how it creates different VM’s for each and every task
For Examle: If you want to open a pdf file that you may get from internet or somewhere else it will create a different VM that prevent your system if that file contain any malware.
Finally it’s cake time  Praveen Kumar cut the cake and after eating that Kushal Das give some stickers of Tor to cover the cameras of our mobile phones.
Everything was so knowledgeable and fun.

Captcha is a small image containing a code(above) that is used to identify humans from machines. The code visible in the captcha image is supposed to makes sense only to humans.
Since these images can only make sense to humans, captchas are often placed at login screens in order to stop bots or machines from automatically logging in or sending bulk requests in one go (which may sometimes lead to denial of service and server crashes).
Here's a screenshot of Employee's Provident Fund Organization, India's login portal to access passbooks. A portal that employees all over India use to check on their provident fund:
Read more… (4 min remaining to read)
The common way for most people to chat is using an app on their phone which typically one of Whatsapp, Messenger or Telegram. In the same vein we have apps like Threema and Signal which are more popular in certain circles. But the one consistent feature for all these services, is the centralization of accounts and forcing users to be trapped inside a silo. It is true whether the services or clients themselves are open source or not. In the case of Signal, the author doesn’t want to federate with people who want to run their own servers1. Given that the Freedom of the Press Foundation recommends Signal as a secure communications tool2, I have nothing against the security of the service and the client. It has audited by cryptographers and the underlying protocol for end-to-end encryption is used by other messaging services. Given this, you would still want to have control over the service and client for various reasons including not wanting to be dependent on centralized services.
XMPP is an open standard for messaging. Notably GTalk and earlier iterations of Messenger supported XMPP and used to federate with other servers. So, it has a proven track record of actually working at scale but being closed off to grow their own proprietary services and lock users into such platforms. XMPP is generally extended by XEPs, XMPP Extension Protocols, that include features such as end-to-end encryption, file uploads, avatars etc. Even the definition of the process XEPs is XEP-0001 :)
To use XMPP, one can sign up for an account at one of the free services which need to be verified or you can run your own server.
Prosody is an XMPP server that implements a lot of XEPs3 and further has community modules which can be used just as easily4. I will be using Debian 9 on the server and the project provides repositories for installing the latest stable release to make installation simple.
To install start by adding their repository to Debian’s sources list,
# /etc/apt/sources.list.d/prosody.list
deb https://packages.prosody.im/debian stretch main
add their key
wget https://prosody.im/files/prosody-debian-packages.key -O- | sudo apt-key add -
and finally install the package using apt,
sudo apt update && sudo apt install prosody
The configuration of Prosody is a single Lua file located in /etc/prosody/prosody.cfg.lua.
If you are already configuring this on server, the first course of action is to change the domain under which you want to run the server.
VirtualHost "myxmppserver.im"
Next is to specify the certificate used for SSL,
https_certificate = "/etc/prosody/certs/myxmppserver.im.crt"
I use Lets Encrypt to obtain certificates for free and if you already use for the server, it can be linked to the current location.
sudo prosodyctl --root cert import /etc/letsencrypt/live
At this point you can start the server using systemctl,
sudo systemctl start prosody
By default it will log under /var/logs/prosody/, so be sure to check there in case there are issues.
To test the installation, you need to add an account.
By default, the configuration prevents creating accounts by using clients as a safety feature but if you are planning to run a public server this can changed later.
sudo prosodyctl adduser test@myxmppserver.im
Test the account using a Jabber client. There are many programs but I find the android app Conversations, to be fully featured and a pleasure to use. If all is well, we can move on to enabling some nice to have features in Prosody.
In the modules_enabled table, uncomment mam and csi_simple.
mam allows one to access the archive and this allows Conversations to pull down the history when you were offline.
For using some community modules, it was recommended by linkmauve to have a clone of the modules repository and link the required modules into modules library under prosody.
hg clone https://hg.prosody.im/prosody-modules/ prosody-modules
sudo ln -s ~/prosody-modules/mod_smacks/mod_smacks.lua /usr/lib/prosody/modules
You can link these modules as required.
To enable them, add the module to the modules_enabled table and restart the server.
You can check for compliance of your server on https://compliance.conversations.im/ which can be useful to see if you want to enable other modules according to your requirements.
Please remember to create a separate account to run these tests by using prosodyctl since you will have to provide passwords to the compliance site.
In conclusion, one can run their own XMPP server or use a trusted server, for example, https://jabberfr.org/ and chat with anyone on XMPP whether on your server or on their own islands. You can meet me at xmpp:jagan@j605.tk, See ya :)
by Jagannathan Tiruvallur Eachambadi (jagannathante@gmail.com) at May 26, 2019 09:09 AM
Should governments or judiciaries of any country be allowed to pass judgments on what applications their citizens can and cannot keep in their phones?

Read more… (3 min remaining to read)
I usually encounter this when saving notes about list of items that are not numbered but are generally better off being itemized. Since this is such a common scenario I did find a couple of posts1 2 that explained the method but they had edge cases which were not handled properly.
Say you want to note down a shopping list and then decide to number it later,
Soy milk
Carrots
Tomatoes
Pasta
Start off by numbering the first line and then move the cursor to the second line. Then, the steps are
a, by using qa.k to go one line up.yW to copy one big word, in this case “1. ”.j to come one line down and | to go to the start of the line.[p to paste before and | to go the beginning.Ctrl+A and then j and | to set it up for subsequent runs.To run the macro, go to the next line and execute @a.
For repeating it 3 times, you can use 3@a.
by Jagannathan Tiruvallur Eachambadi (jagannathante@gmail.com) at February 17, 2019 12:05 PM
We had an introductory session on Ansible in #dgplug and these are some notes from the class. 1. Learned about hosts file to create an inventory, https://docs.ansible.com/ansible/latest/user_guide/intro_inventory.html#hosts-and-groups
Different connections (ssh and local for now). I had also tested it against a server running CentOS.
We then went on to create an ansible.cfg file in the demo directory which takes precedence over the global configuration.
Learned to write a basic playbook which is a YAML file.
/bin/echo using shell module
ping using the ping module
by Jagannathan Tiruvallur Eachambadi (jagannathante@gmail.com) at February 06, 2019 07:15 PM
Original post at https://mjbraganza.com/atomic-habits/
Schedule and structure make or break the plan. Goals only show the direction of the task. Personally I would say this has brought all change I need.
Answer in the affirmative. You don’t try quitting smoking, you don’t smoke period. Personally I don’t identify as someone who can’t eat butter or meat but as someone who won’t. This confirms my resolve in what I believe to be done.
Environments are inherently associated with specific habits. I go to the department to work to make it possible to just concentrate on the task at hand instead of procrastinating. This has worked really well and it can be further improved but it is much better than being at home.
Jason mentions a more important point that I had realize earlier but failed to follow through. It is to always repeat and practice something even if one is not good at it. We can always improve on the parts of the task that are lacking rather than ditching the whole task.
I have made running more enjoyable by running with an acquittance and making them a friend. It is more interesting to interact with someone you don’t see everyday.
I will just leave the quote here, “Never miss twice. Missing once is an accident. Missing twice is the start of a new habit.”
I think most of it boils down to building an identity and keep improving it to best serve our needs. For me, it is a matter of compounding the effort put in building up a schedule this month to make it smoother in the coming days. As a nice side effect I am getting 6km of biking done everyday for free :)
by Jagannathan Tiruvallur Eachambadi (jagannathante@gmail.com) at January 20, 2019 07:31 AM
I was using kio-gdrive to access my Google drive account using Dolphin (file manager).
Since these are mounted as a virtual filesystem, I was not able to save files in them directly from libreoffice or any external program.
So I thought creating a new document from dolphin and then editing an empty document would be easier to use.
But information was scant regarding how to put together.
I knew we needed a template which is just an empty file but I didn’t know how to put all this together to make it show up in Dolphin’s “Create New” context menu.
The example assumes creation of an empty document (ODT file).
First create a template file by saving an empty document in ~/Templates. This is just a suggested directory but any place would be fine.
As of kf5, the path for user templates is ~/.local/share/templates which can be got from kf5-config --path templates.
So in ~/.local/share/templates, create an application file like so
# ~/.local/share/templates/writer.desktop
[Desktop Entry]
Version=1.0
Name=Writer Document
Terminal=false
Icon=libreoffice-writer
Type=Link
URL=$HOME/Templates/Untitled 1.odt
After this Dolphin should pick this up and show this entry in the “Create new” menu.
 One has to take care to give proper extension to the files when naming them though since Google Docs won’t like files without extension although they can opened from Drive into Docs.
by Jagannathan Tiruvallur Eachambadi (jagannathante@gmail.com) at October 22, 2018 10:46 PM
STRUCTURE:
You are aware that a variable stores a single value of a data type. Arrays can store many values of
similar data type. Data in the array is of the same composition in nature as far as type is concerned.
In real life we need to have different data type for example to maintain employees information we should
have information such as name,age,qualification,salary etc.
Here,to maintain the information of employees
dissimilar data types are required. Name and qualification of the employee are char data type, age is
integer,and salary is float. All these data types can not be expressed in a single array. One may think
to declare different arrays for each data type. But there will be huge increase in source codes of the
program. Hence, arrays can not be useful here. For tackling such mixed data types, a special feature is
provided by C.it is known as structure.
A structure is a collection of one or more variables of different data types, grouped together under a
single name. By using structures we can make a group of variables,arrays,pointers etc.
1. To copy elements of one array to another array of same data type elements are copied one by one.
it is not possible to copy all the elements at a time. Whereas in structure it is possible to copy the
contents of all structure elements of different data types to another structure variable of its type using
assignment (=) operator. It is possible because the structure elements are stored in successive memory
locations.
2. Nesting of structures is possible i.e. one can create structure within structure. Using this feature
one can handle complex data types.
3. It is also possible to pass structure elements to a function. This is similar to passing an
ordinary variable to a function. One can pass individual structure elements or entire structure by
value or address.
4. It is also possible to create structure pointers. We can create a pointer pointing to structure elements.
For this it requires operator.
   syn:   struct Name_of_structure
          {
             member1;
             member2;
             member3;

          };
   e.g.
       struct student                          struct employee                        struct test
          {  int roll;                              { int empno;                          {  int a,b,c;
             char name[100],fname[100];               char name[100],address[100];           float x,y,z;
             char address[100],inst[100];             char dept[100],post[100];              char p[9];
             char sub[100];                           float basic;                         };
             float fee;                             };
           };
      struct student                                    struct
    {                                                 {
      int roll;                                           int roll;
      char name[100];                                     char name[100];
      char sub[100];                                      char sub[100];
      float fee;                                          float fee;
    }A,B,C;                                           }A,B,C;
#define z 50
struct employee
{
    int ID;
    char name[z];
    char dept[z];
    float sailry;
};
int main()
{
    struct employee A;
    char Escape_NULL;

    printf("Enter Employee ID : ");
    scanf("%d",&A.ID);
    scanf("%c",&Escape_NULL);

    printf("Enter Employee name : ");
    gets(A.name);

    printf("Enter sailry : ");
    scanf("%f",&A.sailry);
    scanf("%c",&Escape_NULL);

    printf("Enter Department of Employee : ");
    gets(A.dept);

    printf("Name : %s. \n",A.name);
    printf("ID : %d.\n",A.ID);
    printf("Department : %s.\n",A.dept);
    printf("Sailry : %.3f.",A.sailry);

    return 0;
}
Output:-
Enter Employee ID : 10001
Enter Employee name : Vipin
Enter sailry : 18000.69;
Enter Department of Employee : IT
Name : Vipin.
ID : 10001.
Department : IT.
Sailry : 18000.690.
This operator is referred as structure variable structure member operator it is used to access a,
structure member from a structure variable.
syn: structure_name new_name;
e.g.
1.                                          2.                                    3.
                                                                                  Nameless structure
                                                                                  Using typedef
  typedef struct student                    typedef struct employee               typedef struct
    {   int roll;                              { int empno;                          {  int a,b,c;
        char name[100],fname[100];               char name[100],address[100];           float x,y,z;             char address[100],inst[100];             char dept[100],post[100];              char p[9];
        char sub[100];                           float basic;                         }test;
        float fee;                             }emp;
    };
    typedef struct student std;
We can create array of our structure , Here in our this example we will take employee detail,
and print them.
#define z 50
struct employee
{
    int ID;
    char name[z];
    char dept[z];
    float sailry;
};
typedef struct employee emp;
int main()
{
    struct employee A[5];
    char Escape_NULL;
    int i;
    for ( i = 0 ; i < 5 ; i++ )
    {
        printf("Enter Employee ID : ");
        scanf("%d",&A[i].ID);
        scanf("%c",&Escape_NULL);

        printf("Enter Employee name : ");
        scanf("%s",A[i].name);

        printf("Enter sailry : ");
        scanf("%f",&A[i].sailry);
        scanf("%c",&Escape_NULL);

        printf("Enter Department of Employee : ");
        scanf("%s",&A[i].dept);

    }

    for ( i = 0 ; i < 5 ; i++ )
    {
        printf("Name : %s.\nID : %d.\nSailry : %f.\nDepartment : %s.",A[i].name,A[i].ID,A[i].sailry,A[i].dept);
        printf("\n\n");
    }
    return 0;
}
Output:-
Enter Employee ID : 1001
Enter Employee name : Vipin
Enter sailry : 18200.69
Enter Department of Employee : IT
Enter Employee ID : 1002
Enter Employee name : Yatender
Enter sailry : 18000
Enter Department of Employee : Sales
Enter Employee ID : 1003
Enter Employee name : Harchand
Enter sailry : 17000
Enter Department of Employee : Markcketing
Enter Employee ID : 1004
Enter Employee name : XYZ
Enter sailry : 0000
Enter Department of Employee : abc
Enter Employee ID : 1005
Enter Employee name : ABC
Enter sailry : 0000
Enter Department of Employee : XYZ

Name : Vipin.
ID : 1001.
Sailry : 18200.689453.
Department : IT.

Name : Yatender.
ID : 1002.
Sailry : 18000.000000.
Department : Sales.

Name : Harchand.
ID : 1003.
Sailry : 17000.000000.
Department : Markcketing.

Name : XYZ.
ID : 1004.
Sailry : 0.000000.
Department : abc.

Name : ABC.
ID : 1005.
Sailry : 0.000000.
Department : XYZ.
In our this example we will take marks of student as input and display names of student who got,
above 85% marks.
#define z 50
struct Student
{
    char name[z];
    float Math;
    float Physics;
    float Chemistry;
};
typedef struct Student std;
int main()
{
    std A[5];
    int i;
    float P;
    for ( i = 0 ; i < 5 ; i++ )
    {
        printf("Enter Student Name :");
        scanf("%s",A[i].name);

        printf("Enter marks of Math for %s :",A[i].name);
        scanf("%f",&A[i].Math);

        printf("Enter marks of Physics for %s :",A[i].name);
        scanf("%f",&A[i].Physics);

        printf("Enter marks of Chemistry for %s :",A[i].name);
        scanf("%f",&A[i].Chemistry);

        printf("\n");
    }

    for ( i = 0 ; i  85.00 )
            printf("%s Has %.2f%%.\n",A[i].name,P);
    }
    return 0;
}
Output:-
Enter marks of Math for Vipin :85
Enter marks of Physics for Vipin :86
Enter marks of Chemistry for Vipin :87

Enter Student Name :Nitin
Enter marks of Math for Nitin :88
Enter marks of Physics for Nitin :45
Enter marks of Chemistry for Nitin :67

Enter Student Name :Harchand
Enter marks of Math for Harchand :43
Enter marks of Physics for Harchand :45
Enter marks of Chemistry for Harchand :67

Enter Student Name :Yatender
Enter marks of Math for Yatender :56
Enter marks of Physics for Yatender :43
Enter marks of Chemistry for Yatender :88

Enter Student Name :KVY
Enter marks of Math for KVY :90
Enter marks of Physics for KVY :98
Enter marks of Chemistry for KVY :99

Vipin Has 86.00%.
KVY Has 95.66%.
We know that pointer is a variable that holds the address of another data variable mean of any data type
that is int, float and double. In the same way we can also define pointer to structure .
here starting address of the member variable can be accessed. Thus search pointers structure pointer.
struct Name_of_structure *ptrname;
e.g.
#define z 50
struct Student
{
    char name[z];
    float Math;
    float Physics;
    float Chemistry;
};
typedef struct Student std;
int main()
{
    std A = {"Vipin", 78, 87, 98};
    std *p;

    p = &A;

    printf("%s has %.1f mark in Math %.1f marks in Physics and %.1f marks in Chemistry.",(*p).name,(*p).Physics,(*p).Chemistry);
    // Using of () is coumpulsurry you can use -> (Arrow Operatore) insted of (*)

    return 0;
}
Output:-
Vipin has 87.0 mark in Math 98.0 marks in Physics and 0.0 marks in Chemistry.
This operator is used to access a structure number through a structure pointer variable,
It also known as structure pointer to member operator.
#include<>
#define z 50
struct Student
{
    char name[z];
    int Math;
    int Physics;
    int Chemistry;
};
typedef struct Student std;
int main()
{
    std A = {"Vipin", 78, 87, 98};
    std *p;

    p = &A;

    printf("Name : %s\n",p->name);
    printf("Marks in Math : %d.\n",p->Math);
    printf("Marks in Physics : %d.\n",p->Physics);
    printf("Marks in Chemistry : %d.\n",p->Chemistry);

    return 0;
}
Output:-
Name : Vipin
Marks in Math : 78.
Marks in Physics : 87.
Marks in Chemistry : 98.
Like members of standered data types, structure variables can be passed to the
function by value or address.
The Example is given Below.
#define z 50
struct complex
{
    int real,img;
};
typedef struct complex complex;
int main()
{
    complex A;

    void input( complex * );
    void output( complex );

    input(&A);
    output(A);

    return 0;
}
void input( complex *x )
{
    printf("Enter value of numerator : ");
    scanf("%d",&x->real);

    printf("Enter value of Denominator : ");
    scanf("%d",&x->img);
}

void output( complex x )
{
    printf("%d/%d",x.real,x.img);
}
Output:-
Enter value of numerator : 12
Enter value of Denominator : 45
12/45
In our next blog we will look forward union in C Language.
In this post I am going to discuss the python-requests library. Python-requests is a powerful HTTP library that helps you make HTTP(s) requests very easily by writing minimal amount of code and also allows Basic HTTP Authentication out of the box. But before I write this post I want to describe the motivation behind me writing this post.
When it comes to writing software, libraries are a lifesaver. There is a library that addresses almost every problem you need to solve. That was the case for me as well. Whenever I used to face a specific problem I would look to see, if a library already existed. But I never tried to understand how they were implemented, the hard work that goes into building them, or the folks behind the libraries. Most of the libraries we use these days are open source and their source code is available somewhere. So we could, if we wished to, with a little hard work, understand the implementation.
During a related discussion with mbuf in #dgplug channel, he gave me a assignment to understand one of the libraries I have recently used and understand what data structures/algorithms are used. So I chose to look inside the source code of python-requests . Let’s begin by understanding how two nodes in a network actually communicate.
Socket Programming : The basis of all Networking Applications
Socket Programming is a way of connecting two nodes in a network and letting them communicate with each other. Usually, one node acts a server and other as a client. The server node listens to a port for an IP, while the client reaches out to make a connection. The combination of port and an IP is called a socket. The listener socket in the server listens to request from the client.
This is the basis of all Web Browsing that happens on the Internet. Let us see how a basic client-server socket program looks like
As you can see a server binds to a port where it listens to any incoming request. In our case it is listening to all network interfaces 0.0.0.0 (which is represented by an empty string) at a random port 12345. For a HTTP Server the default port is 80. The server accepts any incoming request from a client and then sends a response and closes the connection.
When a client wants to connect to a server it connects to the port the server is listening on, and sends in the request. In this case we send the request to 127.0.0.1 which is the IP of the local computer known as localhost.
This is how any client-server communication would look like. But there is obviously lot more to it. There will be more than one request coming to a server so we will need multi-threaded server to handle it. In this case I sent simple text. But there could be different types of data like images, files etc.
Most of the communication that happens over the web uses HTTP which is a protocol to handle exchange and transfer of hypertext i.e. the output of the web pages we visit. Then there is HTTPS which is the secure version of HTTP which encrypts the communication happening over the network using protocols like TLS.
Making HTTP Requests in Python
Handling HTTP/HTTPS requests in an application can be complex and so we have libraries in every programming language that make our life easier. In Python there are quite a few libraries that can be used for working with HTTP. The most basic is the http.client which is a cpython library. The http.client uses socket programs that is used to make the request. Here’s how we make a HTTP request using http.client
For making Requests that involve Authentication we have to use Authorization headers in the request header. We have used the base64 library here for generating a Base64 encoded Authorization String.
Using python-requests for making HTTP requests
The http.client library is a very basic library for making HTTP requests and its not used directly for making complex HTTP requests. Requests is a library that wraps around http.client and gives us a really friendly interface to handle all kinds of http(s) requests, simple or complex and takes care of lots of other nitty gritty, e.g., TLS security for HTTPS requests.
Requests heavily depends on urllib3 library which in turn uses the http.client library. This sample shows how requests is used for making HTTP requests
You can see making requests is much simpler using requests module. Also it gracefully handles which protocol to use by parsing the URL of the request
Let us now go over the implementation
Inspecting requests
The requests api contains method names similar to the type of request. So there is get, post, put, patch, delete, head methods.
Given below is a rough UML class diagram of the most important classes of the requests library

When we make a request using the request api the following things happen
1. Call to Session.request() method
Whenever we make a request using the requests api it calls a requests.request() method which in turn Calls the Session.request() method by creating a new session object. The request() method then creates a Request object and then prepares to make a request.
2. Create a PreparedRequest object
The request() method creates a PreparedRequest object using the Request object and prepares it for request
3. Prepare for the Request
The PreparedRequest object then makes a call to the prepare() method to prepare for the request. The prepare method makes a call to prepare_method(), prepare_url(), prepare_headers(), prepare_cookies(), prepare_body(), prepare_auth(), and prepare_hooks() methods. These methods does some pre-processing on the various request parameters
4. Send the Request
The Session object then calls the send() method to send the request. The send() method then gets the HTTPAdapter object which makes the request
5. Get the Response
The HTTPAdapter makes a call to its send() method which gets a connection object using get_connection() which then sends the request. It then gets the Response object using the request object and the httplib response from httplib library (httplib is the python2 version of http.client)
And now onwards, How does a request actually get sent and how do we get a httplib response ?
Enter the urllib3 module
The urllib3 module is used internally by requests to send the HTTP request. When the control comes to the HTTPAdapter.send() method the following things happen
1. Get the Connection object
The HTTPAdapter gets the connection object using the get_connection() method. It returns a urllib3.ConnectionPool object. The ConnectionPool object actually makes the request.
2. Check if the request is chunked and make the request
The request is checked to see if it’s chunked or not. If it is not chunked a call to urlopen() method of ConnectionPool object is made. The urlopen() method makes the lowest level call to make the request using the httplib(http.client in python3) library. So it takes in a lot of arguments from the PreparedRequest object.
If the request is chunked a new connection object is created, this time, the HTTPConnection object of httplib. The connection object will be used to send the request body in chunks using the HTTPConnection.send() method which uses socket program to send the request.
3. Get the httplib response
The httplib response is generated using the urlopen() method if the request is not chunked and if the request is chunked it is generated using the getresponse() method of httplib. Httplib then uses socket program to get the response.
And there you have it! The most important parts of the requests workflow. There is a lot more that you can know by reading the code further.
Libraries make the life of a developer simpler by solving a specific problem and making the code shareable and widespread. There’s also a lot of hard work involved in maintaining the library. So in case you are a regular user of a library do consider reading the source code if its available and contributing to it if possible.
Thanks to kennethreitz and the requests community for making our life easier with requests!
References
Also many Thanks to #dgplug friends for helping me improving this post.
A 1-D array is a collection of several elements that contain only one row of elements.
The 2-D array is a collection of rows and columns where each row contains smiler number of columns.
The requirement of 2-D array is removing the need of several 1-d array and it may be helpful to create
mathematical data structure named as matrix.
1.
2.
int main()
{
    int a[3][2];
    int i,j;

    for( i = 0 ; i < 3 ; i++ )
    {
        for( j = 0 ; j < 2 ; j++ )
        {
            printf("Enter [%d][%d] element of array : ",i,j);
            scanf("%d",&a[i][j]);
        }
    }
}
Output:-
Enter [0][0] element of array : 1
Enter [0][1] element of array : 2
Enter [1][0] element of array : 3
Enter [1][1] element of array : 4
Enter [2][0] element of array : 5
Enter [2][1] element of array : 6
int main()
{
    int a[3][2];
    int i,j;

    for( i = 0 ; i < 3 ; i++ )
    {
        for( j = 0 ; j < 2 ; j++ )
        {
            printf("Enter [%d][%d] element of array : ",i,j);
            scanf("%d",&a[i][j]);
        }
    }

    for( i = 0 ; i < 3 ; i++ )
    {
        for( j = 0 ; j < 2 ; j++ )
        {
            printf("%4d",a[i][j]);
        }
        printf("\n");
    }
}
Output :-
Enter [0][0] element of array : 1
Enter [0][1] element of array : 2
Enter [1][0] element of array : 3
Enter [1][1] element of array : 4
Enter [2][0] element of array : 5
Enter [2][1] element of array : 6
   1   2
   3   4
   5   6
int main()
{
    int a[3][3];
    int b[3][3];
    int c[3][3];

    void input( int [][3] );

    void output( int [][3] );

    void sum( int [][3] , int [][3] , int [][3] );

    void subtraction( int [][3] , int [][3] ,int [][3] );

    void multiply( int [][3] , int [][3], int [][3] );

    printf("Taking input in first Array : \n");
    input(a);

    printf("Value in a : \n");
    output(a);

    printf("Taking input in first Array : \n");
    input(b);

    printf("\nValue in b : \n");
    output(b);

    printf("Adding a and b :\n");
    printf("\nvalue of sum of a and b:\n");
    sum(a,b,c);
    output(c);

    printf("Subtracting a and b :\n");
    printf("\nvalue of subtraction of a and b:\n");
    subtraction(a,b,c);
    output(c);

    printf("multiplying a and b :\n");
    printf("value of multiplication of a and b :\n");
    multiply(a,b,c);
    output(c);
}

void input( int a[][3] )
{
    int i ,j;

    for( i = 0 ; i < 3 ; i++ )
    {
        for( j = 0 ; j < 3 ; j++ )
        {
            printf("Enter [%d][%d] element of array : ",i,j);
            scanf("%d",&a[i][j]);
        }
    }
}

void output( int a[][3] )
{
    int i,j;
    for( i = 0 ; i < 3 ; i++ )
    {
        for( j = 0 ; j < 3 ; j++ )
        {
            printf("%4d",a[i][j]);
        }
        printf("\n");
    }
}

void sum( int x[][3] , int y[][3], int z[][3] )
{
    int i,j;

    for( i = 0 ; i < 3 ; i++ )
    {
        for( j = 0 ; j < 3 ; j++ )
        {
            z[i][j] =  x[i][j] + y[i][j];
        }
    }
}

void subtraction( int x[][3] , int y[][3], int z[][3] )
{
    int i,j;

    for( i = 0 ; i < 3 ; i++ )
    {
        for( j = 0 ; j < 3 ; j++ )
        {
            z[i][j] =  x[i][j] - y[i][j];
        }
    }
}

void multiply( int x[][3] , int y[][3], int z[][3] )
{
    int i,j,k;

    for( i = 0 ; i < 3 ; i++ )
    {
        for( j = 0 ; j < 3 ; j++ )
        {
            z[i][j] = 0 ;
            for( k = 0 ; k < 3 ; k++ )
                z[i][j] = z[i][j] + ( x[i][k] * y[k][j] );
        }
    }
}
Output:-
Taking input in first Array :
Enter [0][0] element of array : 1
Enter [0][1] element of array : 2
Enter [0][2] element of array : 3
Enter [1][0] element of array : 4
Enter [1][1] element of array : 5
Enter [1][2] element of array : 6
Enter [2][0] element of array : 7
Enter [2][1] element of array : 8
Enter [2][2] element of array : 9
Value in a :
   1   2   3
   4   5   6
   7   8   9
Taking input in first Array :
Enter [0][0] element of array : 1
Enter [0][1] element of array : 2
Enter [0][2] element of array : 3
Enter [1][0] element of array : 4
Enter [1][1] element of array : 5
Enter [1][2] element of array : 6
Enter [2][0] element of array : 7
Enter [2][1] element of array : 8
Enter [2][2] element of array : 9

Value in b :
   1   2   3
   4   5   6
   7   8   9
Adding a and b :

value of sum of a and b:
   2   4   6
   8  10  12
  14  16  18
Subtracting a and b :

value of subtraction of a and b:
   0   0   0
   0   0   0
   0   0   0
multiplying a and b :
value of multiplication of a and b :
  30  36  42
  66  81  96
 102 126 150
As we know , A 1-D string can hold only one string at a time. To store more then one string,
we can create 2-D string.

In this program we will take input in 2-D String.
int main()
{
    char a[5][10];
    int i;

    for( i = 0 ; i < 5 ; i++ )
    {
        printf("Enter a string : ");
        scanf("%s",a[i]);
    }
    return 0;
}
output:
Enter a string : vipin
Enter a string : nitin
Enter a string : bhaskar
Enter a string : yatender
Enter a string : harchand
In this program we will print a 2-D string after taking input.
int main()
{
    char a[5][10];
    int i;

    for( i = 0 ; i < 5 ; i++ )
    {
        printf("Enter a string : ");
        scanf("%s",a[i]);
    }

    for( i = 0 ; i < 5 ; i++ )
    {
        puts(a[i]);
    }
    return 0;
}
Enter a string : Vipin
Enter a string : Nitin
Enter a string : Bhaskar
Enter a string : Yatender
Enter a string : Harchand
Vipin
Nitin
Bhaskar
Yatender
Harchand
v or V,int main()
{
char a[10][10];
int i;
for( i = 0 ; i < 10 ; i++ )
{
printf("Enter a string : ");
scanf("%s",a[i]);
}
for( i = 0 ; i < 10 ; i++ )
{
if ( a[i][0] == 'v' || a[i][0] == 'V')
puts(a[i]);
}
return 0;
}
Output:-
Enter a string : vipin
Enter a string : nitin
Enter a string : bhaskar
Enter a string : harchand
Enter a string : yatender
Enter a string : vijay
Enter a string : ajay
Enter a string : ram
Enter a string : Vinod
Enter a string : prateek
vipin
vijay
Vinod
// Use string.h library
int main()
{
    char a[10][10];
    char b[10];
    int i;

    for( i = 0 ; i < 10 ; i++ )
    {
        printf("Enter a string : ");
        scanf("%s",a[i]);
    }

    printf("Enter a string you want to search : ");
    scanf("%s",b);

    for( i = 0 ; i < 10 ; i++ )
    {
        if ( strcmp( a[i] , b ) == 0)
            printf("String is at a[%d]",i);
    }
    return 0;
}
Output:-
Enter a string : Vipin
Enter a string : nitin
Enter a string : yatender
Enter a string : bhaskar
Enter a string : ajay
Enter a string : vijay
Enter a string : harchand
Enter a string : ned
Enter a string : caption
Enter a string : rajat
Enter a string you want to search : vijay
String is at a[5]
We can have more multi dimensional array but we use them according to our needs.
In our next blog-post we will read structures
1. pointer is a user define data type.
2. A pointer variable stores address of another variable or NULL because pointer stores address,
of another variable so that with the help of pointer variable we can process the variable.
3. Run time memory allocation scheme can be applied only with pointers in c.
4. As we know in c language we ca no access variable of a function into another function but this can
be possible with help of pointers.
5. To create a pointer we can use * ( Re-direction operator )
syntax ::
e.g.
   int           *p;
   char          *q;
   float         *r;
The Data type of pointer specify that a pointer can store address of a particular data type variable.
using pointer with different datatype :
int A = 12;        char B = 'X';       float C = 3.14;       double D = 21.22;
int *P;            char *Q;            float *R;             double *S;
P = &A;            Q = &B;             R = &C;               S = &D;
—> & operator is known as “address of” operator.
size of pointer :
pointer memory size is size of integer. because a pointer stores memory address, and memory address,
is always integer.
int A;             char B;      float C;       double D ;
2 byte             1 byte       4 byte         8 byte

int *P;            char *Q;     float *R;      double *S;
2 byte             2 byte       2 byte         2 byte
1.

2.

3.

Hope you will got pointers.
:-Now we will learn how to use pointer with simple asthmatics, strings, array and functions.
int main()
{
    int A;
    int B;
    int C;
    int *p;
    int *q;
    int *r;

    A = 10;
    B = 20;

    p = &A;
    q = &B;
    r = &C;

    *r  = *p * *q ;

    printf("Multiply of A and B is %d.",*r);

    return 0;
}
Multiply of A and B is 200.
int main()
{
float P ;
float R ;
float T ;
float S;
float *p;
float *q;
float *r;
float *SI;
p = &P;
q = &R;
r = &T;
SI = &S;
printf("Enter Principle : ");
scanf("%f",p); // Because <code>p</code> has address of <code>P</code>, // So we can write <code>p</code> instead of <code>&P</code>. printf("Enter Rate : "); scanf("%f",q); printf("Enter Time : "); scanf("%f",r); *SI = (*p * *q * *r)/100; // or *SI = (*p**q**r)/100; printf("Simple Interest is %.2f%%.",*SI); return 0; }
Enter Principle : 10000
Enter Rate : 2.4
Enter Time : 1.5
Simple Interest is 360.00%.
Now we will use pointer with functions.
int main()
{
    int x = 90;
    int y = 67;
    int sum;

    void sum_of_2_number( int * , int * , int * );
    // In above statement we are telling that we give Address of variable as argument,
    // And receive them in pointers.

    sum_of_2_number( &x, &y, &sum );
    // Giving Address of variables.

    printf("Sum of x and y is %d.",sum);

    return 0;
}

void sum_of_2_number( int *a , int *b , int *c )
// Here we are reserving addresses in a, b and c.
{
    *c = *a + *b;
}
Sum of x and y is 157.
int main()
{
    int x = 90;
    int y = 67;

    void swap( int * , int * );

    printf("Values of x and y before calling function : \nx = %d y = %d \n",x,y);

    swap( &x, &y );

    printf("Values of x and y after calling function : \nx = %d y = %d \n",x,y);

    return 0;
}

void swap( int *a , int *b )
{
    int temp;

    temp = *a;
    *a = *b;
    *b = temp;
}
Values of x and y before calling function :
x = 90 y = 67
Values of x and y after calling function :
x = 67 y = 90
int main()
{
    float r;
    float area;

    void Area_of_circle( float * , float * );

    printf("Enter Radius of Circle : ");
    scanf("%f",&r);

    Area_of_circle( &r, &area );

    printf("Area of circle is %.3f.",area);

    return 0;
}

void Area_of_circle( float *a , float *b )
{
    *b = 3.14* *a * *a;
}
Enter Radius of Circle : 9
Area of circle is 254.340.
int main()
{
    int n, count = 0;

    void Count_digit( int * , int * );

    printf("Enter a integer : ");
    scanf("%d",&n);

    Count_digit( &n , &count );

    printf("Number of digit in a integer are %d.",count);

    return 0;
}

void Count_digit( int *a , int *b )
{
    for( ; *a != 0 ; *a = *a/10 )
        *b = *b + 1;
}
Enter a integer : 999999
Number of digit in a Integer are 6.

We can add only an integer to a pointer which return an address.

We can subtract only an integer to a pointer which return an address.

MULTIPLICATION, DIVISION AND REMAINDER OPERATION ARE NOT ALLOWED WITH POINTERS.
We can not add 2 pointer with each other but we can subtract 2 pointers which return,no of element between addresses.


int main()
{
    int a[5] = {23,54,56,67,78};

    int *p , i;

    p = a; // or p = &a[0];

    for ( i = 0 ; i < 5 ; i++ )
        printf("%d\n",*(p+i));

    return 0;
}

//or

int main()
{
    int a[5] = {23,54,56,67,78};

    int i;

    for ( i = 0 ; i < 5 ; i++ )
        printf("%d\n",*(a+i));

    return 0;
}
// or

int main()
{
    int a[5] = {23,54,56,67,78};

    int *p;

    for ( p = a ; p < a+5 ; p++ )
        printf("%d\n",*p);

    return 0;
}
Output:-
23
54
56
67
78
int main()
{
    int a[5] = {23,54,56,67,78};

    int *p;

    for ( p = a+4 ; p >= a ; p-- )
        printf("%d\n",*p);

    return 0;
}
//or
int main()
{
    int a[5] = {23,54,56,67,78};

    int *p , i;

    for ( i = 4, p = a ; i >= 0 ; i-- )
        printf("%d\n",*(p+i));

    return 0;
}
// or

int main()
{
    int a[5] = {23,54,56,67,78};

    int i;

    for ( i = 4 ; i >= 0 ; i-- )
        printf("%d\n",*(a+i));

    return 0;
}
78
67
56
54
23
int main()
{
    char a[] = "My name is vipin.";
    char *p;

    for ( p = a ; *p != 0 ; p++ )
        printf("%c",*p);

    return 0;
}
Output:-
My name is vipin.
We have a studied about inbuilt function of strings now we will create our own functions or,
we will learn function with strings.
copy( A, B )
Our this function will copy A into B it work as strcpy() but It is coded by you :).
e.g.
#include<stdio.h>
int main()
{
    char A[] = "Vipin is my name";
    char B[20] = "Empty :)";

    void copy( char [] , char [] );
    printf("Values before changes : \n\n");
    puts(A);
    puts(B);

    copy(A,B);

    printf("\nValues after changes : \n\n");
    puts(A);
    puts(B);

    return 0;
}
void copy( char x[] , char y[])
{
    int i;

    for( i = 0 ; x[i] != 0 ; i++ )
    // Here 0 condition represent NULL
    {
        y[i] = x[i];
    }
    y[i] = 0;
}
Output:-
Values before changes :

Vipin is my name
Empty :)

Values after changes :

Vipin is my name
Vipin is my name
length( A )
Our this function will accept a String and find it’s length and return it.
e.g.
#include<stdio.h>
int main()
{
    char A[] = "Vipin is my name";
    int length_of_String;

    int length( char [] );

    length_of_String = length( A );

    printf("Length of A is : %d.\n",length_of_String);

    return 0;
}
int length( char x[] )
{
    int i;

    for( i = 0 ; x[i] != 0 ; i++ );
    // This ';' will show that we are not writting anything in for loop
    return --i;
}
Output:-
Length of A is : 15.
count_vowels( A )
Our this function will count vowels in a string.
e.g.
#include<stdio.h>
int main()
{
    char A[] = "Vipin is my name";
    int number_or_vowels;

    int count_vowel( char [] );

    number_or_vowels = count_vowel( A );

    printf("Numbers of vowels in A is : %d.\n",number_or_vowels);

    return 0;
}
int count_vowel( char x[] )
{
    int i;
    int count;

    for( i = 0, count = 0 ; x[i] != 0 ; i++ )
    // Here 0 condition repentant NULL
    {
        if ( x[i] == 'a' || x[i] == 'e' || x[i] == 'i' || x[i] == 'o' || x[i] == 'u' )
            count++;
    }

    return count;
}
Output:-
Numbers of vowels in A is : 5.
concatenate_strings( A , B )
Our this function will concatenate A and B mean It append B with A,
It is same as strcat() but here we code this function.
e.g.
#include<stdio.h>
int main()
{
    char A[50] = "my name is ";
    char B[]   = " Kumar Vipin Yadav";

    void concatenate_strings( char [] , char[] );

    printf("Value of A before calling our function : \n\n");
    puts( A );

    concatenate_strings( A , B );

    printf("Value of A after calling our function : \n\n");
    puts( A );

    return 0;
}
void concatenate_strings( char x[] ,char y[] )
{
    int i;
    int len;

    for( i = 0 ; x[i] != 0 ; i++ );

    len = --i;

    for ( i = 0 ; y[i] != 0 ; i++ )
        x[len+i] = y[i];

    x[len+i] = 0;
    // here we add NULL in last of array A
}
Output:-
Value of A before calling our function :

my name is
Value of A after calling our function :

my name is Kumar Vipin Yadav
counting_words( A , B )
Our this function will take a string and count that how many words It has.
e.g.
#include<stdio.h>
int main()
{
    char A[50] = "my name is Vipin";
    int words;

    int counting_words( char[] );

    words = counting_words( A );

    printf("Number of word in our String is %d.\n",words );

    return 0;
}
int counting_words( char y[] )
{
    int i;
    int count;

    for ( i = 0, count = 0 ; y[i] != 0 ; i++ )
    {
        if ( y[i] == ' ' )
            count++;
    }
    return ++count;
}
Output:-
Number of word in our String is 4.
print_alphabets_spaces_digits_symbols( A )
Our this function will take a string and count that how many alphabets It has,
how many digits it has, how many symbols it has and how many spaces it has
and then print all information.
WE CAN EVEN RETURN ABOVE INFORMATION USING A ARRAY, IT’S YOUR HOME TASK HAVE A FUN
e.g.
#include<stdio.h>
int main()
{
    char A[50] = "my name is Vipin";

    void print_alphabets_spaces_digits_symbols( char [] );

    print_alphabets_spaces_digits_symbols( A );

    return 0;
}
void print_alphabets_spaces_digits_symbols( char y[] )
{
    int i;
    int space,alphabets,digit,symbols;

    space = 0 , alphabets = 0 , digit = 0 , symbols = 0 ;

    for ( i = 0 ; y[i] != 0 ; i++ )
    {
        if ( y[i] == ' ' )
            space++;
        else if ( y[i] >= 'a' && y[i] <= 'z' || y[i] >= 'A' && y[i] <= 'Z' )             alphabets++;         else if ( y[i] >= '0' && y[i] <= '9' )
            digit++;

        else
            symbols++;

    }
    printf("Alphabets = %d, Digit = %d, Space = %d and Symbols = %d.",alphabets,digit,space,symbols);
}
Output:-
Alphabets = 13, Digit = 0, Space = 3 and Symbols = 0.
lower( A )
Our this function will take a string and convert it into lower case.
e.g.
#include<stdio.h>
int main()
{
    char A[50] = "My Name Is VIPIN";

    void lower( char [] );

    lower( A );

    puts( A );

    return 0;
}
void lower( char y[] )
{
    int i;

    for ( i = 0 ; y[i] != 0 ; i++ )
    {
        if ( y[i] >= 'a' && y[i] <= 'z' || y[i] == ' ')
            continue;
        else
            y[i] = y[i] + 32 ;
            // because ASCII value of upper case alphabets are 32 less then uppercase.
    }
}
Output:-
my name is vipin
upper( A )
Our this function will take a string and convert it into upper case.
e.g.
#include<stdio.h>
int main()
{
    char A[50] = "My Name Is VIPIN";

    void upper( char [] );

    upper( A );

    puts( A );

    return 0;
}
void upper( char y[] )
{
    int i;

    for ( i = 0 ; y[i] != 0 ; i++ )
    {
        if ( y[i] >= 'A' && y[i] <= 'Z' || y[i] == ' ')
            continue;
        else
            y[i] = y[i] - 32 ;
            // because ASCII value of lower case alphabets are 32 greater then uppercase.
    }
}
Output:-
MY NAME IS VIPIN
compare( A, B )
Our this function will take 2 string and compare each other.
and return +ve value if A is greater, -ve value if B is greater and 0 if both are equal.
e.g.
#include<stdio.h>
int main()
{
    char A[] = "My Name Is VIPIN";
    char B[] = "My Name Is VIPIN";
    int res;
    int compare( char [] , char [] );

    res = compare( A , B );

    if ( res == 0 )
        printf("Both strings are equal.");
    else if ( res > 0 )
        printf("Strings A is greater.");
    else
        printf("Strings B is greater.");

    return 0;
}
int compare( char x[] , char y[])
{
    int i;

    for ( i = 0 ; x[i] != 0 || y[i] != 0 ; i++ )
    {
        if ( x[i] != y[i] )
            return x[i]-y[i];
    }
    return 0;
}
Output:-
Both strings are equal.
revers_in_another( A, B )
Our this function will take 2 string and revers A in B.
e.g.
#include<stdio.h>
int main()
{
    char A[] = "My Name Is VIPIN";
    char B[50];

    void revers_in_another( char [] , char [] );

    revers_in_another( A , B );

    puts(A);

    puts(B);

    return 0;
}
void revers_in_another( char x[] , char y[])
{
    int i,j;

    for ( i = 0 ; x[i] != 0 ; i++ );

    i -= 1; // because we are not taking NULL which was in last

    for ( j = 0 ; j <= i ; j++ )
        y[j] = x[i-j];

    y[j] = 0;

}
Output:-
My Name Is VIPIN
NIPIV sI emaN yM
revers_in_itself( A )
Our this function will take a string and revers it within it.
e.g.
#include<stdio.h>
int main()
{
    char A[] = "My Name Is VIPIN";
    char B[50];

    void revers_in_itself( char [] );

    printf("A before calling function. \n\n");
    puts(A);

    revers_in_itself( A );

    printf("A after calling function. \n\n");
    puts(A);

    return 0;
}
void revers_in_itself( char x[])
{
    int i,j,temp;

    for ( i = 0 ; x[i] != 0 ; i++ );

    i -= 1;

    for( j = 0 ; j <= i ; j++, i-- )
    {
        temp = x[j];
        x[j] = x[i];
        x[i] = temp;
    }

}
Output:-
A before calling function.

My Name Is VIPIN
A after calling function.

NIPIV sI emaN yM
palindrome( A )
Our this function will take a string and return 1 if they are palandrom and,
return 0 if they are not palindrome.
e.g.
#include<stdio.h>
int main()
{
    char A[] = "VIPIN";
    int res;

    int palindrome( char [] );

    res = palindrome( A );

    if ( res == 1 )
        printf("Yes String is palindrome.\n");
    else
        printf("No String is not palindrome.\n");

    return 0;
}
int palindrome( char x[])
{
    int i,j;

    for ( i = 0 ; x[i] != 0 ; i++ );

    i -= 1;

    for( j = 0 ; j <= i ; j++, i-- )
    {
        if ( x[i] != x[j] )
            return 0;
    }

    return 1;

}
Output:-
No String is not palindrome.
abbreviation( A )
Our this function will take a string and print it’s abbrivation.
e.g.
#include<stdio.h>
int main()
{
    char A[] = "Mohan Das Karam Chand Gandhi";

    void abbreviation( char [] );

    abbreviation( A );

    return 0;
}
void abbreviation( char x[] )
{
    int i,j;

    i = 0 , j = 0 ;
    do
    {
        if ( x[i] == ' ' )
        {
            printf("%c. ", x[j]);

            j = i+1;
        }

        i++;

    }while( x[i] != 0 );
    for ( ; x[j] != 0 ; j++ )
        printf("%c",x[j]);
}
Output :-
M. D. K. C. Gandhi
remove_vowels( A )
Our this function will take a string and remove all vowels from it.
e.g.
#include<stdio.h>
int main()
{
    char A[] = "My Name Is Vipin";

    void remove_vowels( char [] );

    printf("A before calling function\n");
    puts(A);

    remove_vowels( A );

    printf("\nA after calling function\n");
    puts(A);

    return 0;
}
void remove_vowels( char x[] )
{
    int i,j;

    for ( i = 0 ; x[i] != 0 ; i++ )
    {
        if( x[i] == 'a' || x[i] == 'e' || x[i] == 'i' || x[i] == 'o' || x[i] == 'u' )
        {
            for ( j = i ; x[j] != 0 ; j++ )
                x[j] = x[j+1];

            i--;
        }
    }
}
Output:-
A before calling function
My Name Is Vipin

A after calling function
My Nm Is Vpn
In our next blog we will read about pointers .
NOTE : All Inbuilt Function of String need string.h library.
This function will take 2 string as argument one is Target_String and another is Source_String,
this function will copy Source_String into Target_String.
e.g.
#include<stdio.h>
#include<string.h>
int main()
{
	char A[15] = "Vipin Yadav";
	char B[15] = "- - - - -";

	printf("Value of A and B before calling function. \n\n");
	puts(A);
	puts(B);

	strcpy(B,A);
  // It will copy A in B as you can see in Output.

	printf("\nValue of A and B after calling function. \n\n");
	puts(A);
	puts(B);

  return 0;
}
Output:-
Value of A and B before calling function.

Vipin Yadav
- - - - -

Value of A and B after calling function.

Vipin Yadav
Vipin Yadav
This function will take 2 string as argument one is Target_String and another is Source_String,
just like strcpy() this function will copy n letters from Source_String into Target_String,
and it do not affect reaming part of string.
e.g.
#include<stdio.h>
#include<string.h>
int main()
{
	char A[15] = "Vipin Yadav";
	char B[15] = "- - - - -";

	printf("Value of A and B before calling function. \n\n");
	puts(A);
	puts(B);

	strncpy(B,A,5);
  // It will copy A in B but upto n characters and don't disturb other values of B.

	printf("\nValue of A and B after calling function. \n\n");
	puts(A);
	puts(B);

  return 0;
}
Output:-
Value of A and B before calling function.

Vipin Yadav
- - - - -

Value of A and B after calling function.

Vipin Yadav
Vipin - -
This function is used to concatenate Source_String just after Target_String or we can say to append Source_String with Target_String.
e.g.
#include<stdio.h>
#include<string.h>
int main()
{
	char A[20] = " Vipin Yadav";
	char B[20] = "-->";

	printf("Value of A and B before calling function. \n\n");
	puts(A);
	puts(B);

	strcat(B,A);
	// It will append B with A

	printf("\nValue of A and B after calling function. \n\n");
	puts(A);
	puts(B);

  return 0;
}
Output:-
Value of A and B before calling function.

 Vipin Yadav
-->

Value of A and B after calling function.

 Vipin Yadav
--> Vipin Yadav
This function is used to concatenate Source_String just after Target_String or we can say to append Source_String, with Target_String but here we can limit that how much letters you want to append.
e.g.
#include<stdio.h>
#include<string.h>
int main()
{
	char A[20] = " Vipin Yadav";
	char B[20] = "-->";

	printf("Value of A and B before calling function. \n\n");
	puts(A);
	puts(B);

	strncat(B,A,5);
	// It will append B with A upto 5 le tters

	printf("\nValue of A and B after calling function. \n\n");
	puts(A);
	puts(B);

  return 0;
}
Output:-
Value of A and B before calling function.

 Vipin Yadav
-->

Value of A and B after calling function.

 Vipin Yadav
--> Vipi    ( Don't mess with ' ' before V :;)
This function will take 2 Stings as argument and return a>0 value if First_String is,
greater( not on the basic of length ) and return <0 if Second_String is greater and
return 0 If both are Equal.
NOTE : strcmp() IS CASE SENSITIVE
e.g.
#include<stdio.h>
#include<string.h>
int main()
{
	char A[20] = "aaaa";
	char B[20] = "AAAA";
	int x;

	x = strcmp(A,B);

	if ( x == 0 )
		printf("Both Stings are Equal.");
	else if ( x == 1 )
		printf("First Stings is greater.");
	else // mean strcmp() return -1
		printf("Second Stings is greater.");

  return 0;
}
Output:-
Second Stings is greater.
This function will take 2 Stings as argument and return a>0 value if First_String is,
greater( not on the basic of length ) and return <0 if Second_String is greater and
return 0 If both are Equal.
 NOTE :  stricmp() or strcmpi() IS NOT CASE SENSITIVE

AND THIS FUNCTION IS NOT FROM STANDERD LIBRARY OF C
LANGUAGE SO IT WILL NOT WORK IN SOME
COMPILERS LIKE IN LINUX/UNIX .
e.g.
#include<stdio.h>
#include<string.h>
int main()
{
    char A[20] = "aaaa";
    char B[20] = "AAAA";

    int x;

    x = strcmpi();

    if ( x == 0 )
        printf("Both Stings are Equal.");
    else if ( x == 1 )
        printf("First Stings is greater.");
    else // mean strcmp() return -1
        printf("Second Stings is greater.");

    return 0;
}
Output:-
Both Stings are Equal.
This function will take a String as argument and return it’s length.
e.g.
#include<stdio.h>
#include<string.h>
int main()
{
    char A[20] = "aaaa";

    int x;

    x = strlen(A);

    printf("Length of A is %d.",x);

    return 0;
}
Output:-
Length of A is 4.
This function of C language will convert all alphabets of String in lowercase.
NOTE: THIS FUNCTION IS NOT FROM STANDARD LIBRARY OF C LANGUAGE SO IT WILL NOT WORK IN SOME COMPILERS LIKE IN LINUX/UNIX .
e.g.
#include<stdio.h>
#include<string.h>
int main()
{
    char A[20] = "AAAA";

    strlwr(A);

    puts(A);

    return 0;
}
Output:-
aaaa
This function of C language will convet all alphabets of String in uppercase.
 NOTE: THIS FUNCTION IS NOT FROM STANDARD LIBRARY OF C LANGUAGE SO IT WILL NOT WORK IN SOME

COMPILERS LIKE IN LINUX/UNIX .
e.g.
#include<stdio.h>
#include<string.h>
int main()
{
    char A[20] = "aaaa";

    strupr(A);

    puts(A);

    return 0;
}
Output:-
AAAA
This function will change hole string with a character you give,
means It take 2 argument a string and a character and replace hole string with that character.
e.g.
#include<stdio.h>
#include<string.h>
int main()
{
    char A[20] = "Vipin";
    char C = 'V';

    strset(A,C);

    puts(A);

    return 0;
}
Output:-
VVVVV
This function will change hole string with a character you give but upto a limit,
means It take 3 argument a string and a character and a integer and replace hole string with that character,
till n .
e.g.
#include<stdio.h>
#include<string.h>
int main()
{
    char A[20] = "Vipin";
    char C = 'V';

    strnset(A,C,3);

    puts(A);

    return 0;
}
Output:-
VVVin
This function will take 2 string as argument and return the number of characters
in the initial segment of String1 which consist only of characters from String2.
e.g.
#include<stdio.h>
#include<string.h>
int main()
{
    char A[] = "Vipin is my name";
    char C[] = "Vipin";
    int x;

    x = strspn(A,C);

    printf("String C matches In String A till %d.",x);

    return 0;
}
Output:-
String C matches In String A till 5.
One function is there name strstr()
we will learn it when we learn about pointers.
String is group of alphabets,digits and symobls. In C language, a string represented by char array.
e.g. char S[20];
In this example S is a string of 20 characters but it can hold a string of only 19 characters,
because the last character of a string is always NULL.
NULL :-

It is a character used to repersent end of String.

It has three repersentactions:

1. NULL   (need stdio.h)

2. '\0'

3. 0

printf() function:printf will display the entire String using %s
e.g.

char a[20] = "Vipin Yadav";

printf("The String is %s",a);
// The String is Vipin Yadav

printf("The String is %.4s",a);
// The String is Vipi ( Here .4 will allow us to print only 4 letter of string only)

printf("The String is %10.4s",a);
// The String is ------Vipi
// Here 10.4 mean print 10 letter but use 4 letter from string here it take 4 letter and
// use 6 ' ' but i use '-' instead of ' ' to show you
puts() function:scanf() function:scanf() with %s :-
It can read one word of a string or a one word string.
e.g.
 char a[20];
 printf("Enter a string who contain lases then 20 words : ");
 scanf("%s",a);
 // NOTE : WE DO NOT USE '&' DURING A STRING INPUT.
 puts(a);
scanf() with %[^\n] :-
It can read a multi word string .
 char a[20];
 printf("Enter a string who contain lases then 20 words : ");
 scanf("%s",a);
 // NOTE : WE DO NOT USE '&' DURING A STRING INPUT.
 puts(a);
gets() function :-gets() function can read multiple word once It work under stdio.h heder file
e.g.

 char a[20];
 printf("Enter a string who contain lases then 20 words : ");
 gets(a);
 puts(a);
In next post we will read about Inbuilt function and user-define of strings.
systemd-networkd is a network manager that comes built in with Systemd. It has
features, similar to NetworkManager and
ConnMan which are more commonly used in
distributions like Ubuntu and Fedora.
I had moved away from NetworkManager one year back due to constant issues with connecting
to enterprise Wi-Fi with logs and errors that were difficult to debug or fix. It was also
difficult to see where the failures occurred prompted me to move towards a more modular
system.
The hacked system did not have a manager on top and it was cobbled together with:
wpa_supplicant for wireless.dhcpcd for DHCP (wired and wireless).dnscrypt-proxy for DNS over HTTPS and as a local cache.Last week I started having problems when dhcpcd was not setting the proper network
gateway and I couldn’t figure out what exactly was the issue since there were no
updates to any of the affected programs. I realized that decoupling DHCP caused
issues that can only be solved with a program that can react to network link changes properly.
To be honest, this system did not have any issues for a long time and I could’ve just
continued to use it after figuring out the problem but I thought it was time to try
networkd.
systemd-networkdIt works similarly to how Systemd handles services. networkd uses INI style
“.network” configuration files. Look at the man page for
systemd.network
for more information.
My motivation was to seamlessly handle wired and wireless interfaces without dropping
connection due to state changes. For this purpose I had two files,
/etc/systemd/network/20-wired.network
[Match]
Name=eno1

[Network]
DHCP=yes

[DHCP]
RouteMetric=10
and /etc/systemd/network/25-wireless.network with
[Match]
Name=wlp2s0b1

[Network]
DHCP=yes

[DHCP]
RouteMetric=20
You should start systemd-networkd.service and it should work with your existing
wpa_supplicant@wlp2s0b1.service which should be setup separately. Network interface
names eno1 and wlp2s0b1 are predictable and persistent across reboots, and are
setup by Systemd.
My DHCP issue was solved by networkd knowing about both networks and handling them
properly. The other nice property is I can set route metrics in the configuration
which puts the kernel in charge of using the appropriate route when there are multiple
gateways. Example of ip route with both interfaces connected:
$ ip ro
default via 192.168.1.1 dev eno1 proto dhcp src 192.168.1.125 metric 10
default via 10.46.255.254 dev wlp2s0b1 proto dhcp src 10.46.140.105 metric 20
10.46.128.0/17 dev wlp2s0b1 proto kernel scope link src 10.46.140.105
10.46.255.254 dev wlp2s0b1 proto dhcp scope link src 10.46.140.105 metric 20
192.168.1.0/24 dev eno1 proto kernel scope link src 192.168.1.125
192.168.1.1 dev eno1 proto dhcp scope link src 192.168.1.125 metric 10Systemd also comes with resolved which has a bunch of nice features and also integrates
with options in the network files. However tempting this might be I still wanted to
stick with my working dnscrypt-proxy setup. This is easily done by asking resolved
to use 127.0.0.1 as its DNS server in /etc/systemd/resolved.conf. Now resolv.conf
should have use 127.0.0.53 which is the resolved stub and it delegates the actual
work to dnscrypt-proxy.
While you may feel, this is similar to NetworkManager I would point out that wpa_supplicant
is handled separately and hence affords more ways to test your wireless connection before
getting caught in an endless loop. Although if NetworkManager works for you, there isn’t a compelling reason to
leave it. In the end, this was pretty easy to set up and the system looks more robust now.
by Jagannathan Tiruvallur Eachambadi (jagannathante@gmail.com) at July 26, 2018 11:04 PM
Hope you have haired about sorting , Arrange elements of an array either in ascending or descending,
order is called sorting.
we have a lot’s of sorting algorithm but here we will discuss about
1. Selection Sort
2. Bubble Sort
Selection sort works by finding the smallest unsorted item in the list and swapping it with the item in
the current position.
1. set first position as current position.
2. Find the minimum value in the list.
3. Swap it with the value in current position.
4. Set next position as current position.
5. Respect Steps 2-4 until you reach end of list.

Here we will make a program for arranging elements in ascending order.
#include<stdio.h>
int main()
{
  int A[5] = {5,2,1,4,3};
  int i;

  void Short( int [] );

  Short(A);

  for( i = 0 ; i < 5 ; i++ )
      printf("%d  ",A[i]);

  return 0;
}

void Short( int a[] )
{
  int i,j,pos,min,temp;

  for( j = 0 ; j < 4 ; j++)
  {
		pos = j;

    for( i = j ; i < 5 ; i++ )        {          if ( a[pos] > a[i] )
          pos = i;
      }
      temp = a[j];
      a[j] = a[pos];
      a[pos] = temp;
  }
}
Output :-
1 2 3 4 5
and here is a program for arranging elements of array in descending order using Selection Sort.
selection-sort-in-discending.c
#include<stdio.h>
int main()
{
  int A[5] = {5,2,1,4,3};
  int i;

  void Short( int [] );

  Short(A);

  for( i = 0 ; i < 5 ; i++ )
      printf("%d  ",A[i]);

  return 0;
}

void Short( int a[] )
{
  int i,j,pos,min,temp;

  for( j = 0 ; j < 4 ; j++)
  {
		pos = j;

    for( i = j ; i < 5 ; i++ )
      {
        if ( a[pos] < a[i] )
          pos = i;
      }
	temp = a[j];
      a[j] = a[pos];
      a[pos] = temp;
  }
}
Output:-
5 4 3 2 1
Bubble sort works by comparing two continuous items in the array.
It’s algorithm is very simple just compare adjacent element and Swap them.

Let’s code a program for arranging elements of array in ascending order.
#include<stdio.h>
int main()
{
  int A[5] = {5,2,1,4,3};
  int i;

  void Short( int [] );

  Short(A);

  for( i = 0 ; i < 5 ; i++ )
      printf("%d  ",A[i]);

  return 0;
}

void Short( int a[] )
{
  int i,j,temp;
  for ( j = 0 ; j < 5 ; j++ )
   {
	for ( i = 0 ; i < 4 ; i ++ )
  	{
 		if ( a[i] > a[i+1] )
			{
				temp = a[i];
				a[i] = a[i+1];
				a[i+1] = temp;
			}
	}
   }
}
Output:-
1 2 3 4 5
Let’s code a program for arranging elements of array in descending order.
#include<stdio.h>
int main()
{
  int A[5] = {5,2,1,4,3};
  int i;

  void Short( int [] );

  Short(A);

  for( i = 0 ; i < 5 ; i++ )
      printf("%d  ",A[i]);

  return 0;
}

void Short( int a[] )
{
  int i,j,temp;
	for ( j = 0 ; j < 5 ; j++ )
	{
		for ( i = 0 ; i < 4 ; i ++ )
		{
		 if ( a[i] < a[i+1] )
			{
				temp = a[i];
				a[i] = a[i+1];					a[i+1] = temp;
			}
	        }
       }
}
Output:-
5 4 3 2 1
We will start reading about string in our next blog.
In this post I will explain How DNS Works in my own words.
DNS stands for Domain Name System. It is way for naming the Address of computers or resources in a Network. All of the computers in a network is associated with an IP Address, like IP address of google.com is something like 172.217.163.110. Now its tough for a person to remember such big numbers. So we have a simple and more human friendly way of naming these computers which is done by DNS.
So now how does the DNS work ? When we type in a website name in a browser the IP address of the server mapped to the name needs to be found out to display the web page. So there is a process by which this IP address is searched. Let’s understand what are the steps that are carried out for finding the address.
Whenever we type in a website name in a browser the browser searches its cache to check if the IP address mapped to the website is present.
If the Browser doesn’t have the address it then asks the OS to check if it has the address.
If the OS doesn’t have the address it points to the IP address of the Resolver server that will Resolve the IP address of the website. It is the role of the Resolver to find the IP address of the website and bring it back to the OS. These are usually the Servers provided by the ISPs serving the Internet. If you do a cat /etc/resolv.conf in a Linux Machine you will get an output similar to
# Generated by NetworkManager
nameserver 202.88.174.6
nameserver 202.88.174.8
These are the IP addresses of the Resolvers that are responsible for finding the IP address of website when a request comes to it. So it first checks its cache to see if it has the IP address of the website requested. If it doesn’t find the IP address it then goes to the Root to find the same.
The Root server knows the addresses of the Top Level Domain (TLD) Server for the website. There are total 13 Root Servers spread all over the world. Well that doesn’t mean there are only 13 servers. Basically it means there are 13 unique names for the server. Each one is distributed over multiple servers to handle the load. The Resolver gets the address of the TLD Server from the Root and goes there to find the IP address of the website. Each time the Resolver gets the address it saves it to its memory.
The Top Level Domain is the .com part in google.com . Similar to that there can be various Top Level Domains such as .org, .gov, net, .edu etc. Also there are country specific domains like .in, .us. .jp etc. The Root server knows the addresses of these TLD servers. The TLD then gives the address of Authoritative the Nameservers for the website domain.
The Authoritative Nameservers are the one that contains the actual address of the website. Their names are similar to ns1.google.com, ns2.google.com etc. These are often simply called the DNS Servers as they contain the records of the address corresponding to a specific website name. Whenever you purchase a Domain the Domain Registrar send the name of these DNS Servers to the the TLDs. That way a TLD can say which DNS Server contains the address of a website. The DNS Server gives the Resolver the IP address of the website.
You can find the names of the DNS Servers of a website and the website IP address using the dig command. Here is a sample output of dig command.
[ananyo@localhost ~]$ dig google.com ; <<>> DiG 9.11.4-RedHat-9.11.4-1.fc28 <<>> google.com ;; global options: +cmd ;; Got answer: ;; ->>HEADER<<- opcode: QUERY, status: NOERROR, id: 33490 ;; flags: qr rd ra; QUERY: 1, ANSWER: 1, AUTHORITY: 4, ADDITIONAL: 9 ;; OPT PSEUDOSECTION: ; EDNS: version: 0, flags:; udp: 4096 ; COOKIE: 8114e77595b2cc097e7725a95b59fdf1b2d1c4d480039c49 (good) ;; QUESTION SECTION: ;google.com. IN A ;; ANSWER SECTION: google.com. 40 IN A 172.217.163.78 ;; AUTHORITY SECTION: google.com. 31267 IN NS ns3.google.com. google.com. 31267 IN NS ns2.google.com. google.com. 31267 IN NS ns4.google.com. google.com. 31267 IN NS ns1.google.com. ;; ADDITIONAL SECTION: ns1.google.com. 206437 IN A 216.239.32.10 ns2.google.com. 210049 IN A 216.239.34.10 ns3.google.com. 210049 IN A 216.239.36.10 ns4.google.com. 210049 IN A 216.239.38.10 ns1.google.com. 210874 IN AAAA 2001:4860:4802:32::a ns2.google.com. 341654 IN AAAA 2001:4860:4802:34::a ns3.google.com. 57401 IN AAAA 2001:4860:4802:36::a ns4.google.com. 304702 IN AAAA 2001:4860:4802:38::a ;; Query time: 35 msec ;; SERVER: 202.88.174.6#53(202.88.174.6) ;; WHEN: Thu Jul 26 22:29:29 IST 2018 ;; MSG SIZE rcvd: 331
The Resolver finally gives back the IP address of the website to the OS which then caches it for future requests. The OS then gives it back to the Browser which sends the request to the IP address and serves the Page. So if you enter the IP address of the google.com in the browser that we got from dig command (172.217.163.78) it will point to the same page.
The Best part of this is the entire things just takes few seconds to complete!
Let’s discuss about function with arrays:-
When we pass an array to the function the target variable is the reference of passed array.
So that any operation on the reference variable will be performed It will directly affect
the original value of the variable.
Let’s discuss with help of some example.
1. Let’s take two array and print there sum using a function.
sum-of-2-array-in-3rd-using-function.c
int main()
{
int a[] = {1,2,3,4,5};
int b[] = {1,2,3,4,5};
int c[5],i;
// Declaring function sum and telling it that we give 2 arrays as arguments
void sum ( int [] , int [] , int []);
// Calling sum function
sum(a,b);
for( i = 0 ; i < 5 ; i++ )
printf("%d ",c[i] );
return 0;
}
// Here we have defining our function
void sum( int x[] , int y[] , int z[] )
{
int i;
for( i = 0 ; i < 5 ; i++ )
z[i] = x[i]+y[i];
}
Output:-
2 4 6 8 10
In above program x , y and z are reference of a and b
and c
respectively. so as we change value of z in sum function same changes will take place
in c also.
2. Let’s copy an array into other using function.
int main()
{
int a[] = {1,2,3,4,5};
int b[5],i;
// Declaring function copy and telling it that we give 2 arrays as arguments
void copy ( int [] , int []);
// Calling copy function
copy(a,b);
for( i = 0 ; i < 5 ; i++ )
printf("%d ",b[i] );
return 0;
}
// Here we have defining our function
void copy( int x[] , int y[] )
{
int i;
for( i = 0 ; i <span data-mce-type="bookmark" id="mce_SELREST_start" data-mce-style="overflow:hidden;line-height:0" style="overflow:hidden;line-height:0;"></span>< 5 ; i++ )
y[i] = x[i];
}
Output:-
1 2 3 4 5
In above program we will take values from x and store them in y and,
as a result value will stored in b .
The following code implements linear search (Searching algorithm) which is used to find whether,
a given number is present in an array and if it is present then at what location it occurs.
If you give duplicate value then it will return first occurrence of element.
#include
int main()
{
int a[5], i, c , b = -1;
int search (int [],int);
printf("Enter your array :\n");
for (i = 0; i < 5; i++)
{
printf("Enter a number :");
scanf("%d",&a[i]);
}
printf("Enter a number u want to search :");
scanf("%d",&c);
b = search (a,c);
if( b == -1 )
printf("Element is not present in array.\n");
else
printf("Element is present in array at %d.\n",b);
return 0;
}
int search (int a[] , int b )
{
int i;
for (i = 0; i < 5; i++)
{
if( b == a[i] )
return i;
}
}
Output:-
Enter your array : Enter a number :23 Enter a number :45 Enter a number :56 Enter a number :34 Enter a number :23 Enter a number u want to search :34 Element is present in array at 3.
In our this Linear search program we have taken an array as input and find a number in that.
we check each element and if any element match our entered value then we return it’s index value,
and print it, else we return nothing It means there is not such kind of value exist.
This code implements binary search in C language.
It can only be used for sorted arrays, but it’s fast as compared to linear search.
If you wish to use binary search on an array which isn’t sorted, then you must sort it using some sorting technique say merge sort and then use the binary search algorithm to find the desired. Element in the list. If the element to be searched is found then its position is printed.
#include
int main()
{
int a[5],i,b,c = -1;
int search (int [],int,int);
printf("Enter your array : \n");
for (i = 0; i < 5; i++)
{
printf("Enter a number :");
scanf("%d",&a[i]);
}
printf("Enter a number you want to search :");
scanf("%d",&b);
i=i-1;
c = search (a,b,i);
if( c != -1 )
printf("Element is present in array. \n");
else
printf("Element is not present in array. \n");
}
int search(int a[],int b,int h)
{
int i,m,l;
l=0;
while ( l <= h ) { m = (l+h)/2; if( m == b ) return 1; else if( b > m )
l = m+1;
else if( b < m )
h = m-1;
}
return 0;
}
Output:-
Enter your array : Enter a number :1 Enter a number :2 Enter a number :3 Enter a number :4 Enter a number :5 Enter a number you want to search :5 Element is present in array.
In binary search we divide our array from middle and search is the element in mid of array if yes,
then we return 0 and loop will stop and if element is not on mid position of array then we check,
is our element less or greater then the mid then we find value between mid and the last position,
of array or in between first and mid position of array respectively.
and if mid position cross the last position and we can’t find our element then we
return 0,
and stop loop.
NOTE : Data must be sorted If we use binary search for searching an item in a array.
We will read about sorting algorithms in next blog post.
Mozilla, the organization behind Firefox actually does more than just build software. In its advocacy efforts, they roped in Veronica Belmont to make IRL: Online Life Is Real Life, a podcast that explores various aspects of privacy in everyday life explained in a way that can be understood by everyone. It is into the third season and the current episode takes a look at the dilemma of sharing data with companies for free services and privacy.
I was privacy conscious before but documentaries like “Nothing to Hide” has opened my eyes towards the historical significance of privacy as well. People who are generally in the opinion that since I am a normal person, I don’t have to fear surveillance should watch the documentary to gain more insight as to why everyone has something to hide or at least would not be comfortable with it being public.
Coming back to the topic of the IRL’s recent episode, we have become quite accustomed to accepting long terms of service agreements for online services. This extends to application permissions that can be overreaching. We move past those in the hopes of getting something out of those applications and in some cases we do. The episode takes a dive into whether this is worth it and how it can have an impact on someone’s life.
Old methods and practices are always resurfaced as we find newfangled business models are insufficient to handle privacy concerns. The question is if we pay for services, will that buy us more privacy.
It should be quite evident that paying for these services removes incentives for companies to spy on users and concentrate on the product instead. To be honest, I am not sure that everyone would be able to pay for every service we use for free today. A lot of us use multiple news sources but paying for each of them can be difficult.
There is a real concern that the section of the internet users which is not able to pay their way out of this will be disproportionately affected. Till now these issues have not been looked at seriously because of online advertisement. But due to increase in the use ad blockers we have had banners asking to disable the plugin and allow tracking to view the content.
A straightforward solution will be to allow people to share subscriptions and make them cheaper; family plans comes to mind. We should also realise nothing comes for free and accept some loss of functionality by limiting our use to essential services. More importantly by paying for those essential services we get more privacy!
Motivated individuals can maintain their own services on a personal server for a small group of people. For example, personal mail servers was the norm in the 90s but it has died out considerably due to amount of administrative burden and inherent complexity of these services.
To this extent, I have seen a couple of groups popping up offering free services powered through donations and free software that can help people move from ad-driven services. Disroot and Asymtote are examples that I found online. I believe forming groups among like-minded people and creating such small services is the way forward. Importantly the author behind Asymtote is keeping the infrastructure open so people can create clones and stand up their own versions. Sharing of infrastructure can help with reducing costs and burden with regards administration and bus factor.
This post has been braindump of sorts but hopefully the links here and the podcast can help people to think about these issues before signing up for more services and think about self hosting as a cheaper alternative. If you have money, please pay someone rather than using an ad-driven service for your own privacy and safety.
by Jagannathan Tiruvallur Eachambadi (jagannathante@gmail.com) at July 14, 2018 12:30 PM
When I first installed this system, I was oblivious to disk encryption and didn’t
factor it in. This resulted in a non-LVM
system with some haphazard partitions from subsequent resizing and nuking of Windows
in the past few years. One good decision I took when installing was to separate
/ and /home so this turned out to be easier than I thought.
I was apprehensive of ending up with a dead system before today’s DGPLUG session,
so I managed to get weechat up and running inside tmux in a virtual console.
Next I had the wiki article
opened on elinks, a TUI browser. I don’t want to repeat any commands that are
already available in the wiki. I would like to make a more cogent story mentioning some caveats
in the process. First the resize2fs command to shrink /home took some time.
This was done to make space for LUKS header which would be written during encryption. I
wish there was warning in the wiki about how long this would take. At least I could’ve
enabled the progress option for resize2fs 😀
After resize2fs completes we can start encrypting the partition. It is interesting
to note that cryptsetup-reencrypt is quite recent and I found another project that
was developed in parallel; luiksipc,
which as the name suggests does luks in-place. But since this functionality is
available upstream I didn’t explore the alternative.
cryptsetup-reencrypt doesn’t emit any warnings like the wiki alludes to and this gives me hope
that the functionality was stabilized recently. For the passphrase I took Kushal’s
suggestion to use XKCD style passwords. gopass includes an option to do it quite
easily and it generated a strong yet easy to remember password.

This step took more than 4 hours, but I was attending the class and doing something productive in the meantime. The next steps were to grow the filesystem again and then test it out.
Since swap holds the data when hibernating the system we have to secure this as well.
A swapfile is the easiest approach in my case. Follow the wiki article
to create swap but do it under /home since that is what we have encrypted.
I would like to skip all the mistakes and go straight to the wonderful solution. The mistakes in this case would only confuse the reader. Thanks to Khorne from #archlinux-newbie I was able to recover quickly after a few reboots.
I assume you are using a systemd based initramfs, if not switch to it for the
fancy systemd-analyze output.
HOOKS=(systemd autodetect keyboard sd-vconsole modconf block sd-encrypt sd-lvm2 resume filesystems fsck)Things to lookout for:
keyboard for early userspace functionality to enter the password.sd-vconsole for different keymaps and fonts which is the systemd equivalent
for the keymap hook.sd-encrpyt and sd-lvm2 are the respective equivalents for encrpyt and lvm2.
The former is what prompts for password when booting early on.syslinux.cfgThis should be boot loader agnostic but I just like syslinux better after being
scarred by grub-mkconfig. If you use grub, I highly suggest using your own grub.cfg
like so which was taken from #archlinux. Append the following
to kernel parameters,
rd.luks.name=UIID=home resume=/dev/mapper/home resume_offset=OFFSETresume_offset is obtained from
$ sudo filefrag -v /home/swapfile | awk '{if($1=="0:"){print $4}}'taken from the wiki article on swap encryption.
The previous section will add the device /dev/mapper/home which we will use in
/etc/fstab.
# mounting home
/dev/mapper/home /home ext4 rw,relatime,lazytime,data=ordered,nodev,nosuid 0 2
# swapfile
/home/swapfile none swap defaults 0 0
Most of these settings are opinionated, so I would suggest looking at fstab(5)
and ext4(5) for explanations. This completes the loop to mount the encrypted device
opened by sd-encrypt hook. Like most other things systemd takes care of dependencies and
generates appropriate .mount and .device files.
Generate initramfs, reboot and rejoice!
In Arch Linux,
$ sudo mkinitcpio -Pto get initramfs and initrd.
At the end I would say my understanding of all the different systems made it difficult to get it running quickly. Systemd probably made some of this bearable by integrating disparate systems and providing much-needed dependency tracking.
by Jagannathan Tiruvallur Eachambadi (jagannathante@gmail.com) at July 05, 2018 06:55 PM
For quite some time I was thinking of learning Bash scripting. Thanks to dgplug Summer Training I have taken the first step to Learn the Linux Command line. We are using the LYM (Linux Command line for You and Me) book in the classes to learn the basic Linux commands and understand the GNU/Linux system.
There has been already few classes in dgplug Summer Training where we were asked to read few chapters from the book and ask doubts regarding it. I use Fedora 28 as my Linux distribution where I use the gnome-terminal for running the shell commands.
I have learnt quite many things till now. I am on the seventh chapter of the book now which is “Linux Services“. Slowly I have been sinking all the commands to my mind and I hope to make use use of them to make my life easier with my Linux machine. The book is well written for a beginner who is just starting with Linux command line on the other hand it has also references to some important topics like FHS .
Thanks to the authors for their efforts to write this. I hope I can contribute to it at some point
This year I decided to join the dgplug Summer Training conducted by the Durgapur Linux User’s Group. I didn’t blog for a long time since last year, but last class we had our class on blogging and it really motivated me to start my blog again.
I knew dgplug from my initial days of my college since I studied at Durgapur. I got to know about this Training in 2017 when I first met Kushal in FOSSASIA Summit and searched for dgplug’s website. I have been willing to join it since then, but last year I couldn’t really make time. So after I saw the tweet about this year’s edition I was eagerly waiting to get aboard.
It started on 17th June, 2018 at 7 pm sharp. I had my flight to Hyderabad that day on 10.30 pm and I didn’t want to miss the first class so I left early to reach the Airport before the class starts. The class would take on IRC on #dgplug channel on freenode. I just reached on time at the airport and I had to do my check in as well. So I stood in the queue connecting to IRC from my mobile using Riot app and eagerly waited for it to start People were doing countdown before it started and I was amazed to see the number of IRC handles active during the session. The session started, everyone greeted each other. Then Kushal started with some basic rules for the class.There was an interesting way to ask questions during the class. We had to type a “!” and a bot named “batul” would keep queuing those and we had to wait until our turn came and batul prompted us to ask our question. The teacher could take the questions by typing “next”. I had a slow internet connection and Riot took time to sync the messages. But I managed to follow along. Kushal said to read the FAQs for the training and ask questions in case we have any doubt. Then we were asked to introduce ourselves by raising hands using a “!”. We were then guided with the rules for every class and asked to read How to ask smart questions. I realized this is something which should actually be taught in every community so that we ask meaningful questions. Then they were open for questions. At the end of the session we were asked to read some links that were given as home work. The next session would happen the next day.
This was like the format of each session and mind it it was totally conducted on IRC which enabled really fast communication in low bandwidth. Though the entire communication was text based it really felt as if I was in a real class. There is Roll Call at the beginning and end of class, I had to raise hand for asking question, had to wait for my turn to ask my question and was given homework that was not at all over burdening. It is just the right amount given till now and I could get time to read through the reading materials provided after the class and was also able to manage it between my Office schedule.
The best part of the training so far was that we were made to think and come out of our comfort zone in order to do a task. We had to think and search even before asking a question. I believe that is a good practice for everything we have a question.
Already 2 weeks of the training session is complete and I learnt a lot of things in the way.
There was a class on Free Software Communication guidelines which was taken by Shakthi Kannan (aka mbuf) where we were taught about mailing list etiquette and other communication guidelines. The slide on mailing list etiquette and Communication will really help me in the long run.
Then there was a class on Linux Command line by Jason Braganza which taught us to get started with Basic Linux commands. The LYM (Linux for You and Me) book is a good book for newcomers and I really find it easy to follow. It is being used in all our Linux command line sessions and we are asked to read few chapters at a time and then we have doubt sessions where we can ask questions.
On Friday, 21st June we had our first guest session by Harish Pillay. The session was very informative. He told us about the time of Internet when it had just started and was known as ARPANET. He told us the importance of contributing to Free Software/Open Source and Red Hat’s Open culture for contributing to Open Source projects. Then there were all sorts of questions he answered on Startups, open source contribution, Licenses, distros etc.
In the weekend we were asked to watch 2 documentaries. One was The internet’s Own Boy and Citizenfour. I could complete watching the first one. I got to know a lot more about the History of Internet and Free Software Movement. Also we were asked to read this article where I got to know how the History of Free Software movement is deeply rooted to the Freedom of Speech and Expression. I got to learn more about The “Free as in Freedom” ideology, the origin of the GNU project and the importance of Free Software. I did a bit more research on GNU/Linux Operating systems and understood what a kernel means with respect to an Operating System and that it requires a lot more things than a kernel to make a OS work.
In the next week we had a class on Privacy and Opsec from Kushal. He told us how to do a Threat Modelling of our Risks and Good practices to ensure better security. I already installed Tor Browser and have been trying to use it as my browser now. Giving up on Google is hard but I am trying my best to use DuckDuckgo for searches now. I haven’t really switched to using password managers. It will take me some time before I switch over using a password manager since I have to go over its usage to get familiar with it.
On Wednesday, 27th June we had guest session by Nicholas H.Tollervey. He is a classically trained musician, philosophy graduate, teacher, writer and software developer. It really inspired me to see if a person loves something he can learn anything from whichever field he/she comes from. He is one of the pioneers of the micro:bit project. He answered questions on open source contribution and best practices for writing software.
On Thurday, 28th June we had guest session from Pirate Praveen. He is a political activist who uses Free Software Principles in his work and formed the Indian Pirates organisation. He is an upstream contributor to debian and has packaged software like GitLab and Diaspora so that they can be easily setup just by running one command. The motivation for him to contribute to open source projects was because he wanted to solve a problem. He answered questions about his entry into politics, packaging and the way of solving problems.
Then we had a class of blogging taken by Jason Braganza who explained the nitty-gritty of blogging. Over the weekend I completed watching Citizenfour and Nothing to Hide which we were recommended to watch. It made me know a lot of things about Privacy and Surveillance which I was unaware off. Privacy is a basic right and we should all be aware how to protect it.
The experience has been good so far and I am hoping to learn a lot more things in the upcoming days. Thanks to the awesome team who has been working hard to make this possible
Today’s session of summer training in #dgplug on freenode is a follow up on writing and its importance. I wanted to share an answer to one of my doubts given by Jason.
It is established that one has to write regardless of its quality to kick start the habit. The major roadblock is mostly on topic and specificity since there are times when you are in no man’s land. With this laid out, lets get to the answer.
All these instructions seem obvious but one keeps forgetting them since it is not written down concretely to recall. Since I read a lot, the first suggestion is always possible if I make notes of the things I read and make conscious effort to formulate them properly. More than everything I am planning to post on a weekly basis to keep my creative juices flowing.
by Jagannathan Tiruvallur Eachambadi (jagannathante@gmail.com) at June 29, 2018 08:11 PM
Fractals are never ending patterns found in nature that are impossible to
describe in classical geometry. I was intrigued by this topic after a long time
since I had programmed some koch curves for an exercise in the Think Python
book.
Some pictures,

 and the code can be found on github.
The post on how to generate trees1
made me realise that the topic was very general not just related to the curves
I had done earlier. I looked into whether there were already libraries for such
systems and found out that Luxor.jl2 provided a great turtle programing3
interface. After installing the library using Pkg in Julia and running some
example code, I went on to implement the H-tree shown in the post1.
The formulation for a H-tree is written as $$ L(g)→[rf(2^{g/2})L(g+1)][lf(2^{g/2})L(g+1)] $$
For a more detailed explanation please take a look at the post1 and on Lindenmayer system4. I will briefly explain the terms for the purpose of this post.
The expression can be thought of as a recursive function in programming. So the first generation, $L(g=0)$, is called the axiom. Actions of turning right and left are defined as $r$ and $l$. The turtle going forward is represented as $f(n)$. $[$ and $]$ in the formula refer to pushing and popping from a stack respectively. So the expression is effectively decoded as
A stack is used here for the purpose of branching since state has to saved between to come back and draw on the other side of the branch. The author of post1 also gives examples of how trees are generated in this way. Furthermore, the system is parameterized to produced more realistic models of trees.
This gives you a beautiful picture of an H-tree.

Instead of turning by 90° if you try 60°, a nice fractal is formed.

Julia code for the above drawings is provided below.
using Luxor, Colors
Drawing(1000, 1000, "htree.svg")
origin()
🐢 = Turtle()
function L(g, l=200, angle=90)
if g > 200
return
end
Push(🐢)
Turn(🐢, angle)
Forward(🐢, l/sqrt(2))
L(g+20, l/sqrt(2), angle)
Pop(🐢)
Push(🐢)
Turn(🐢, 360-angle)
Forward(🐢, l/sqrt(2))
L(g+20, l/sqrt(2), angle)
Pop(🐢)
end
L(0.0, 200, 60)
finish()by Jagannathan Tiruvallur Eachambadi (jagannathante@gmail.com) at June 26, 2018 04:03 PM
I did not realize that I had an article and a draft stuck in Medium and I thought how difficult would it be to yank it from there and import it to Hugo. This post documents a short version of how to do it.
First, export all your data from Medium. This contains posts as well as other content that you have contributed to the site: claps, bookmarks, topics etc. Since I wanted to export just one post I went in to posts directory and found an HTML file corresponding to that article.
Next, you would have to convert it to markdown to edit it suitably in Hugo’s format.
This blog
showed me that it was easier to use pandoc for converting to markdown. After
that conversion further edits have to be done to strip unnecessary formatting
text. I then proceeded to add a date to the post and added it to the site.
by Jagannathan Tiruvallur Eachambadi (jagannathante@gmail.com) at June 18, 2018 03:59 PM
After a lot of thinking and trying out various static site generators I have
settled on using hugo. To be honest there was no particular preference other
than it being available in the Arch repository and migration was made easier
since I was able to use a WordPress exporter, exitwp.
The post, https://samaxes.com/2016/02/static-site-from-wordpress-to-hugo/ was
helpful in nudging me to hugo as well. I did not bother with comments and other
complexities mentioned in that post although it can be useful for some. A somewhat
simpler solution can be engineered with git hooks to build and copy the site.
by Jagannathan Tiruvallur Eachambadi (jagannathante@gmail.com) at June 11, 2018 12:45 PM
I am a student in Leuven experiencing new things and enjoying the freedom of living alone, which means I am struggling to manage everything going around me!

by Jagannathan Tiruvallur Eachambadi (jagannathante@gmail.com) at June 11, 2018 12:08 PM
Google Code-in 2016 has already started and its a pleasure that I am a part of it this time working as a mentor with FOSSASIA on behalf on Public Lab which is working as a partner org with FOSSASIA. It is in its 7th consecutive year.
Google Code-in is a contest introducing pre-university students between the ages 13 to 17 to open source development. GCI takes place entirely online and is held during Winter every year during this time. The official dates are from 28 November, 2016 – 16 January, 2017 this time. Follow the timeline for detailed schedule. Winners get exciting goodies and T-Shirt from Google and a chance to visit the Google US office for a one week trip with their parents.
To many of you reading this post the word Open Source might be completely new. So let me start with very basics.
Every software that you use starting from your Operating system (Windows, Linux etc.) to any application, is written with some sort of code. So the beautiful and mind blowing applications that you use in your computers or mobiles is the hardwork of some awesome developers who write this code. So many of you out there might have a curiousness to look behind the code that caused it. But not all software are “Open Source” meaning not all of them provide you access to their code.
Open source Software means software whose code is available to all. You can use it, modify it and distribute it ( subject to the License provided along with it ). And the most awesome part is you can actually contribute to it and help it to improve.
Now the most important question. How to actually contribute to Open Source ? The task may look daunting seeing the millions of lines of code beneath. But believe me it’s actually fun once you get started with it. And what you will love the most about Open Source once you land in it is that you will always find people to help you. So Open Source isn’t just lines of code, it refers to the whole community who preach it and are involved with it. And once you get started with it you will actually fall in love with it.
So if you are completely blank about Open Source ( or already a Open Source contributor ) and want to know more about it and meet the criteria ( between 13 and 17 years of age ) Google Code-in 2016 is just the best place for you to get started. You don’t have know about Coding even to get started. There are many beginner and non-Coding tasks to make you acquainted to Open Source. So why wait ? Just register yourself for Google Code-in 2016 !
These are few basic steps that you should follow
Well there’s nothing much you need to know. There are many non-Coding tasks like writing blog posts, making a video, improving documentations. So you really don’t need to know anything except doing conversations in English which is a must as it is the medium of Conversation since it is an worldwide event. It is specially designed to encourage new comers to Open Source and make them learn. But if you already know Coding in any scripting, programming and markup language it is a plus point and you can approach coding tasks. Even if you don’t know Coding it’s completely OK as you can start learning from here.
Well this is a lot of talk and if you recall I mentioned it is completely online and you work from home. But did you wonder how can you actually work on the same piece of code sitting at remote places when you have so many people working on the same code? Won’t it get all messed up when people try to change things at the same time ( at the same line of code to be specific ). So here comes the concept of Version Control System which actually helps to deal with this and Git is a software that helps in Version Control. You don’t need to get scared as this is nothing but a way to work with different versions of code existing with each user after changes are made. To learn more on it just wait for my next blog Post. And this is something that you need to learn in Open-Source as it is used eveywhere in Open-Source and you will get to learn it at some point in Google Code-in.
As for Github it is the largest git hosting website in the current Date. In simple terms it is the place hosting the largest number of Open Source Projects often called the developers Hub. So if you want to work on a wide variety of Open Source projects Github is the place where you will find them. The smart Octocat logo is the most seen thing that you will become familiar with as you become an Open source developer.
Finally! I successfully passed the Final Evaluation! Just can’t mention how happy I am! As I woke up on the Tuesday morning on August 30th I found this mail from gsoc

And I was just feeling great with a sense of accomplishment and that the hardwork I did for the last 3 months brought results! It was a great experience contributing to open source all this time and now I have considerable amount of contribution.
Though I was quite sure about my evaluation as my mentor Jeff already appreciated my work in a comment in my Final wrap up note prior to the official result declaration and I found he wrote the same thing in my Final evaluation as well
Thanks to my mentors Jeff, Liz, Stevie, Bryan and David and the entire PublicLab team! It was a great experience working with all of them. They were really helpful working with all of the GSoC students and providing regular feedback. I hope I get to work with them more. We will be having a video call with all the gsoc students and mentors soon. They call it Openhour and it is a kind of online seminar that they have in the beginning of each month and the September Openhour is dedicated to the gsoc students. Excited for that!
This is just the starting of something good and I hope I can contribute more to open source and learn new stuffs and share my experiences here!
And as the famous poem by Robert Frost says:
And miles to go before I sleep,And miles to go before I sleep !
After getting an admit I was elated and frankly never thought of the arduous journey ahead. The process can be grouped into these steps:

If you have a degree certificate, then great. Most often, students completing their studies in the same year don’t get it. Don’t wait for the university convocation, instead get a provisional certificate after the results have been announced. Next is the admission letter from the university.
For getting the visa, you need to undergo a medical test from a facility recognised by the embassy. You get the list of centres here. It is a smallish test and depending upon the test centre you might get the results the same day. Take care not to open the medical record, you need to submit it as sealed document to VFS.
To make sure you have no pending criminal cases, the embassy requires a Police Clearance Certificate (PCC). There are two ways of obtaining a PCC: from the Passport Seva Kendra (PSK) and the Police. You have to look for more information elsewhere if you want to try the latter method. The former is trivial, apply in the passport seva website and go to PSK according to your appointment. You will get it in an hour at most.
For proving your financial ability, you can produce a solvency certificate from the university or someone can vouch for you. For further details, this page from the University of Leuven website is very thorough. Recently they have introduced another contribution fee for the visa, for a government funded university, €160 to the embassy. More details at their immigration website. Get a receipt from the bank confirming your wire transfer. You need to attach this to your application.
Degree certificate and PCC needs to have an apostille stamp. Your degree certificate needs to be verified by the state department first. It will take about 10 days. You can find their location here. If the PCC was obtained from the PSK, no state verification is needed, since it is issued by the MEA itself. Now go to the MEA to get it verified. This will take only a day.
The medical certificate needs to be legalised by the embassy. Take it to VFS and get it done before applying for visa.
Fill two visa application forms. You can find the copy here. If you have any serious questions ask the embassy and VFS and the VFS is generally reliable to provide correct information. But be really cautious and ask the embassy to confirm. You need to have two copies of all the documents.
Go to the VFS centre early, possibly at 8 AM when it opens so you have enough time to make changes to your application if needed. You also need to wait for them to confirm with the embassy about visa fees.
I will summarise the costs here,
VFS only accepts cash, so be aware.
Best of Luck!
Exported from Medium on June 18, 2018.
by Jagannathan Tiruvallur Eachambadi (jagannathante@gmail.com) at July 28, 2015 12:00 AM
After hours and hours of getting a simple low pass filter to work, I couldn’t help but share this. With a host of FOSS EDA tools in linux, I really couldn’t resist start using it. I got to credit Ashwith, for the wonderful SPICE tutorials without which my life would have been more miserable.
I wouldn’t like to repeat what Ashwith has already written, but I would like to show the schema and results that you can obtain with ngspice as well as matplotlib which are as good as any commercial software that you would use. This is the schema that I have used. It is pretty simple to construct and following Ashwith’s recommendation to change the config file will prove helpful as it will automatically fill in the refdes values for you. This is the schema I have used, the default model of the opamp works fine.

You can use ngspice to simulate the circuit. Even though ngspice has an inbuilt plotter, matplotlib is more visually appealing. Before running ngspice you have to get the netlist, to get the netlist do gnetlist -v -g spice-sdb -o lpf-active1.net lpf-active1.sch. The verbose option will give you valuable debugging information. Start ngspice with the netlist and run the circuit. After simulation, you can use the inbuilt plotter or export the data for later use. To export do, wrdata file v(1,3). Now you can use this script from ‘return 1;’ to generate visually appealing graphs like the one below.
 Frequency response characteristics of first order low pass filter.
by Jagannathan Tiruvallur Eachambadi (jagannathante@gmail.com) at November 07, 2013 10:35 AM
I am going with git-bash since it doesn’t mess up my Windows installation. Also it is more than enough for standard tasks. Get git from http://git-scm.com/download/win. Install git-bash, its a straight forward process.
We need to generate ssh keys for communicating with either http://github.com or http://bitbucket.org. If you already have keys from a Linux or Mac, you can use that. Just copy your ~/.ssh to your home directory in Windows. To generate new keys, open git-bash and do
ssh-keygenHave a decent pass-phrase, or else it would just defeat the purpose. Lastly copy your public key and publish it to Github or Bitbucket.
PS: If you are going to use Github, they have a native application for Windows that will guide you through the process.
by Jagannathan Tiruvallur Eachambadi (jagannathante@gmail.com) at June 02, 2013 02:25 PM
I had an urge to write this post since setting up a dial-up connection took me quite an effort. First of all you should have bluez and wvdial installed.
sudo pacman -S bluez
sudo pacman -S wvdialFirst scan for bluetooth-enabled devices by
hcitool scanIf there are any devices, its address and name would be displayed. Copy the required address. Now, create rfcomm device to connect to your phone via bluetooth.
sudo mknod --mode=666 /dev/rfcomm0 c 216 0In the file /etc/conf.d/bluetooth, set RFCOMM_ENABLE true. In another terminal run bluez-simple-agent and now to check the connection, type
rfcomm connect 0 address channelYou already have the address, the active channel is obtained from the command
sdptool search dun | grep ChannelWhen you run the command, you will be prompted for a pin in your mobile and that has to be entered in the terminal which is running bluez-simple-agent. You should have successfully connected right now. Now press ^C to exit the connection. For setting up the internet connection you have to edit /etc/wvdial.conf or create one. For guys using a different ISP, get your APN by googling(just change airtelgprs.in by your ISP’s APN).
[Dialer Defaults]
Modem = /dev/rfcomm0
Init3 = AT+cgdcont=1,"IP","airtelgprs.com"
Phone = *99#
Username = user
Password = pass
New PPD = yes
ISDN = no
BAUD = 115200
Stupid Mode = yes
Carrier Check = noThe Username and Password, in the case of airtel are just for namesake. You can fill them up with bogus data. With that done restart the bluetooth daemon.
sudo rc.d restart bluetoothStarting wvdial as root would connect you to the internet.
by Jagannathan Tiruvallur Eachambadi (jagannathante@gmail.com) at March 14, 2012 04:16 PM
GSOC - Google Summer of Code provides the best opportunity for students to get involved in FOSS development. My search for an organisation lead me to different softwares written in different languages. My love lies in python. It was the first language that I learnt. I should give it to my sister who keeps inspiring me to learn new stuff. After some searching, mailman it was that was suggested to me. Being written in python it was quite obvious for me to research about. Installing from source, it is possible to have the latest source-code. Hope to code away this summer.
by Jagannathan Tiruvallur Eachambadi (jagannathante@gmail.com) at January 17, 2012 05:09 PM
Working on the book ‘think python’ has given me lots of opportunities to learn by experimentation. This script is a result of such experimentation of an exercise already given in the book. The script list duplicates accepts two arguments. The first is the extension of the file and the next is the root directory. It uses the function os.path.walk(), which is very versatile. Further improvements of the script will follow.
by Jagannathan Tiruvallur Eachambadi (jagannathante@gmail.com) at December 18, 2011 02:16 PM
This is my first post from vim using vimpress.Because of having a low bandwidth connection, I was forced to think for an alternative and vim being as versatile it can getto throw answers to everything we can think of. Okay, now getting on with the topic at hand what is vimpress and what does it do ?
Vimpress is a plugin for vim which is used to post in your blog.
Here’s how we start, download the script from vim’s site.Put the files blog.vim and blogsyntax.vim in ~/.vim/plugin folder ,if the folder does not exist create one. Open the blog.vim file and fill in your your username and password and site url in their respective places. Open vim and type in CmdLine
:so ~/.vim/plugin/blog.vim
:so ~/.vim/plugin/blogsyntax.vimnow that you have successfully setup vimpress, you can happily blog away.
by Jagannathan Tiruvallur Eachambadi (jagannathante@gmail.com) at October 22, 2011 07:36 AM
“vim-debug” is a python debugger that is integrated into vim. This works like any other debugger but you don’t have to come out of vim to debug.Before we get started ensure that the python-pip package is installed in your distro.For installing open a terminal and type :
sudo apt-get install python-pipThe package pip is an improved python package installer.Next we move onto installing the plugin which are essentially python scripts. To install type:
sudo pip install dbgp
sudo pip install vim-debug
install-vim-debug.pyLike any other vim command you type this command in comdline-mode.Here you start the session by the command Dbg as vim does not seem to accept lower case characters at the beginning of a user defined command.After the session is started basic ways of operating dbg is shown.For further information on how to operate dbg you can see the video by Jared Forsyth who is the maintainer for the project. [youtube=http://www.youtube.com/watch?v=kairdgZCD1U]
i hope Jared Forsyth comes back successfully from his mission.
by Jagannathan Tiruvallur Eachambadi (jagannathante@gmail.com) at October 08, 2011 10:23 AM
Starting this blog right now is a surprise to even me. I am a tech loving person who is a bit reserved. I hope to come out with it with this blog. thats all for now, cheers!!
by Jagannathan Tiruvallur Eachambadi (jagannathante@gmail.com) at October 08, 2011 09:55 AM
Last updated:
September 22, 2019 07:00 PM
All times are UTC.
Powered by:
![]()